 Contact Us


Screen Groups
New to Screen Groups in PIXERA 2.0 is the ability to add Screen objects to multiple screen groups and assign layers visibility based on a new parameter in Setup: Screen Group Presence.
You can add a new screen group by clicking on the plus button in the Screen Groups tab:
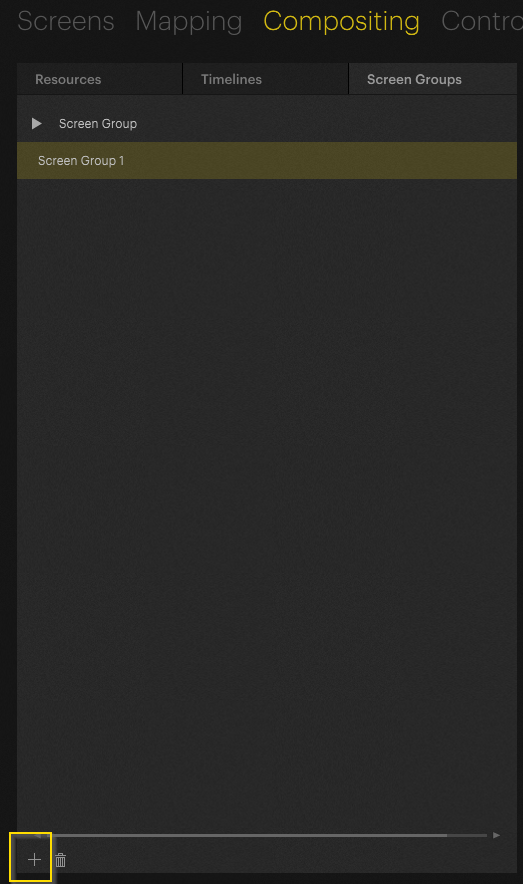
You can rename the Screen Group by selecting it and changing the Name in the Inspector.
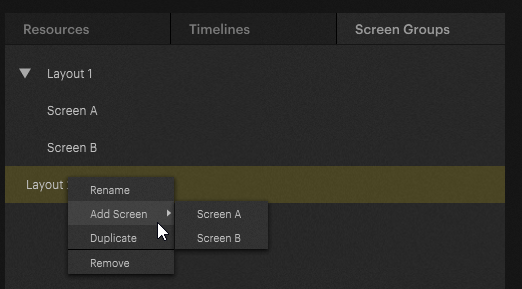
You can then right click on the Screen group and choose which screen objects will be within this screen group.
Alternatively, you could duplicate a Screen Group that already has the screen objects in it that you desire from this same menu.
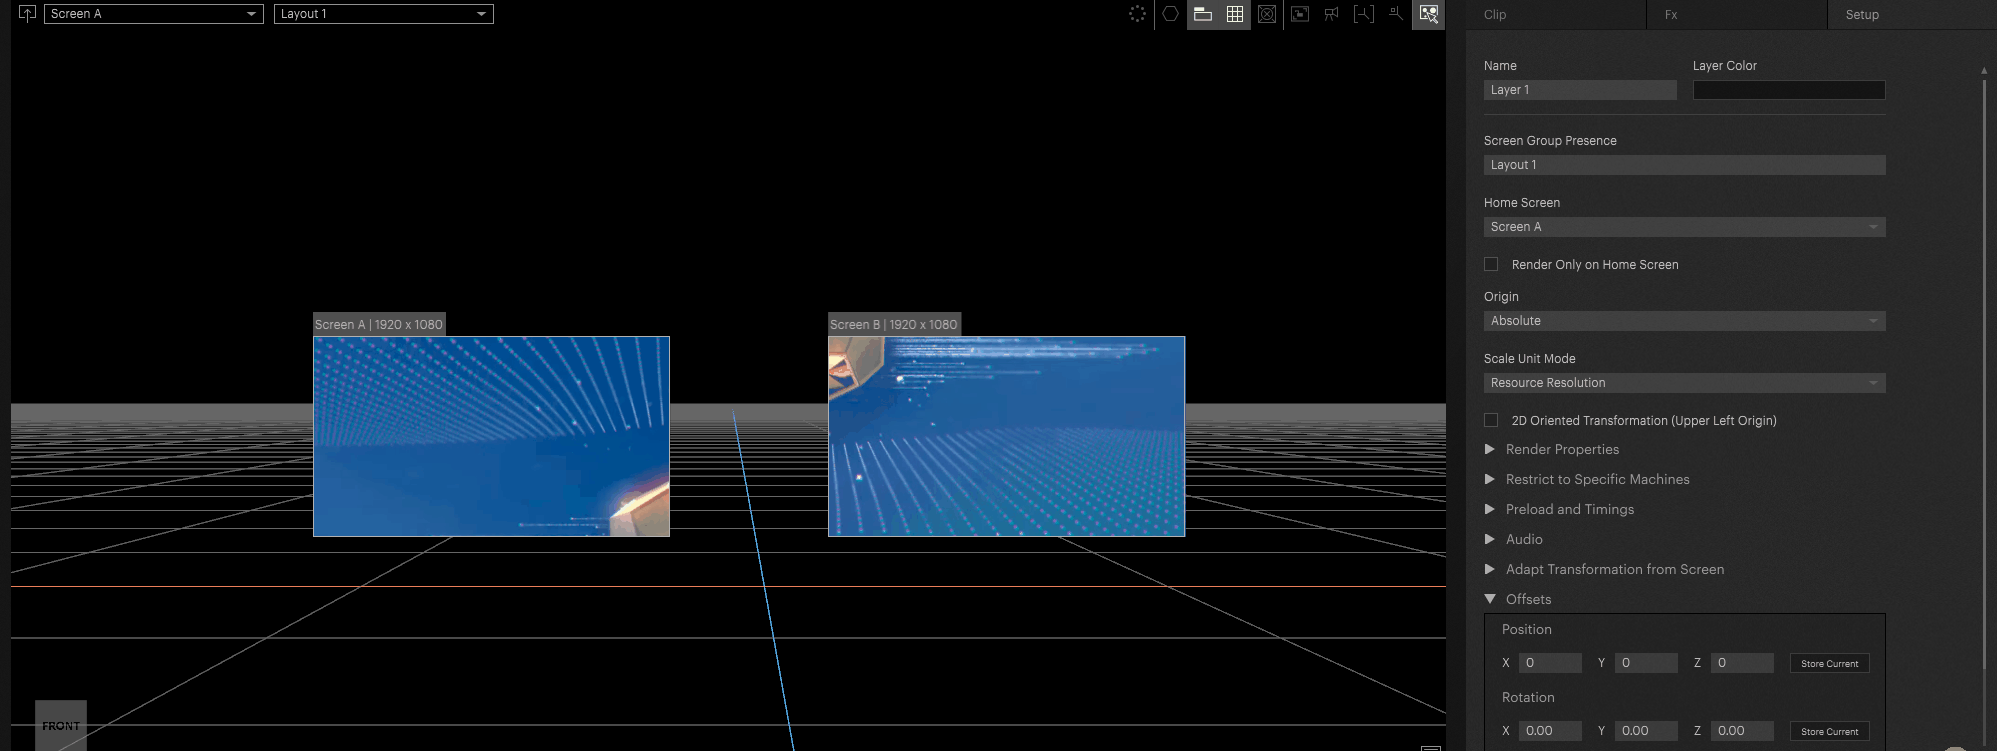
We can select which Screen Groups a layer appears in by selecting a Layer and going to Setup to find a new parameter: Screen Group Presence
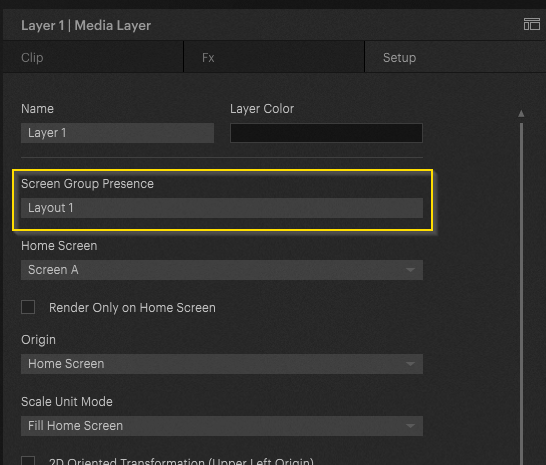
Screen Group Presence has replaced Screen Presence in 2.0
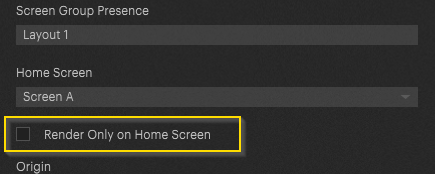
Additionally, there is an added option for each layer: ‘Render Only on Home Screen’ will render the layer only on its Home Screen, no matter what Screen Groups it is in.
Layers can appear in one, or multiple Screen Groups by clicking on the check boxes in the drop-down menu:
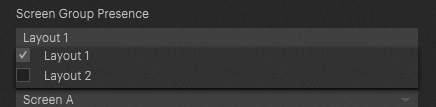
Layers must appear in at least one Screen Group
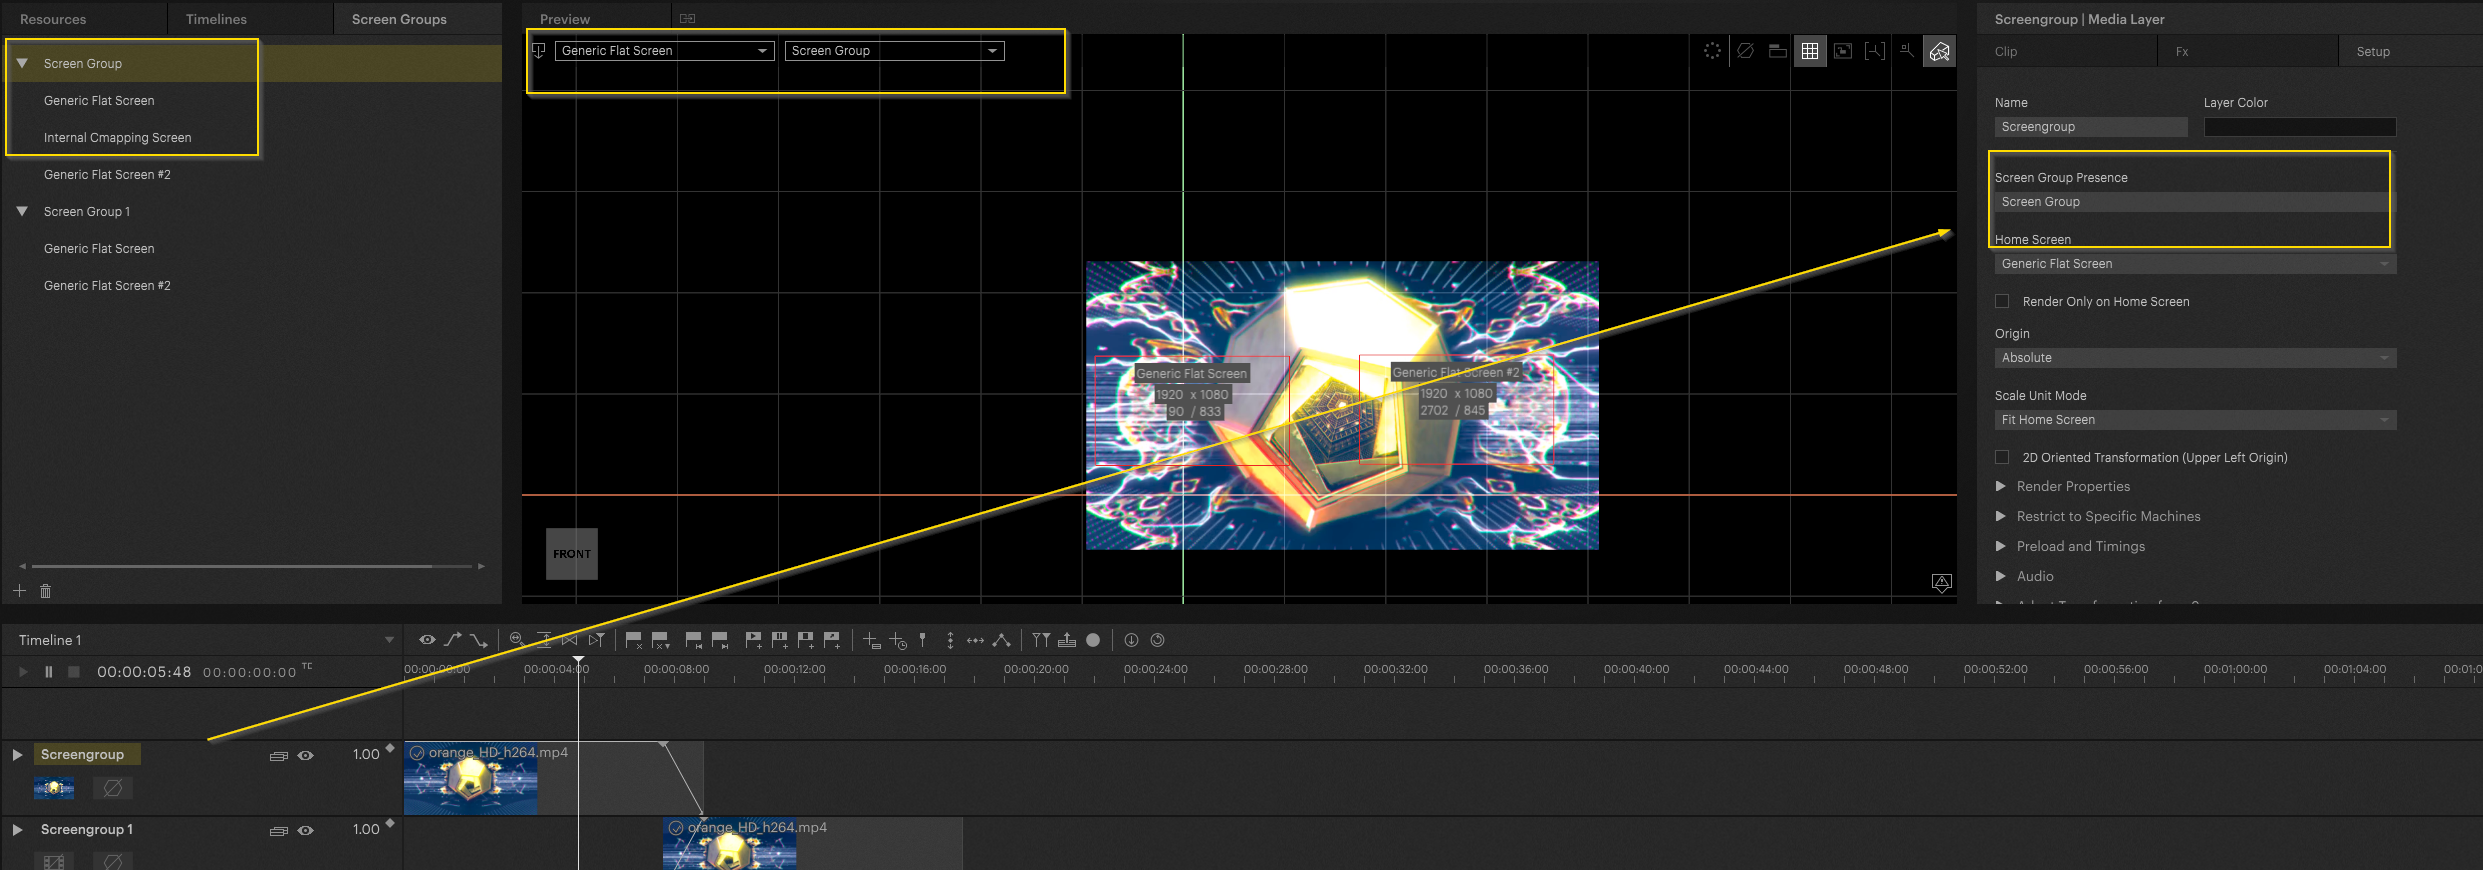
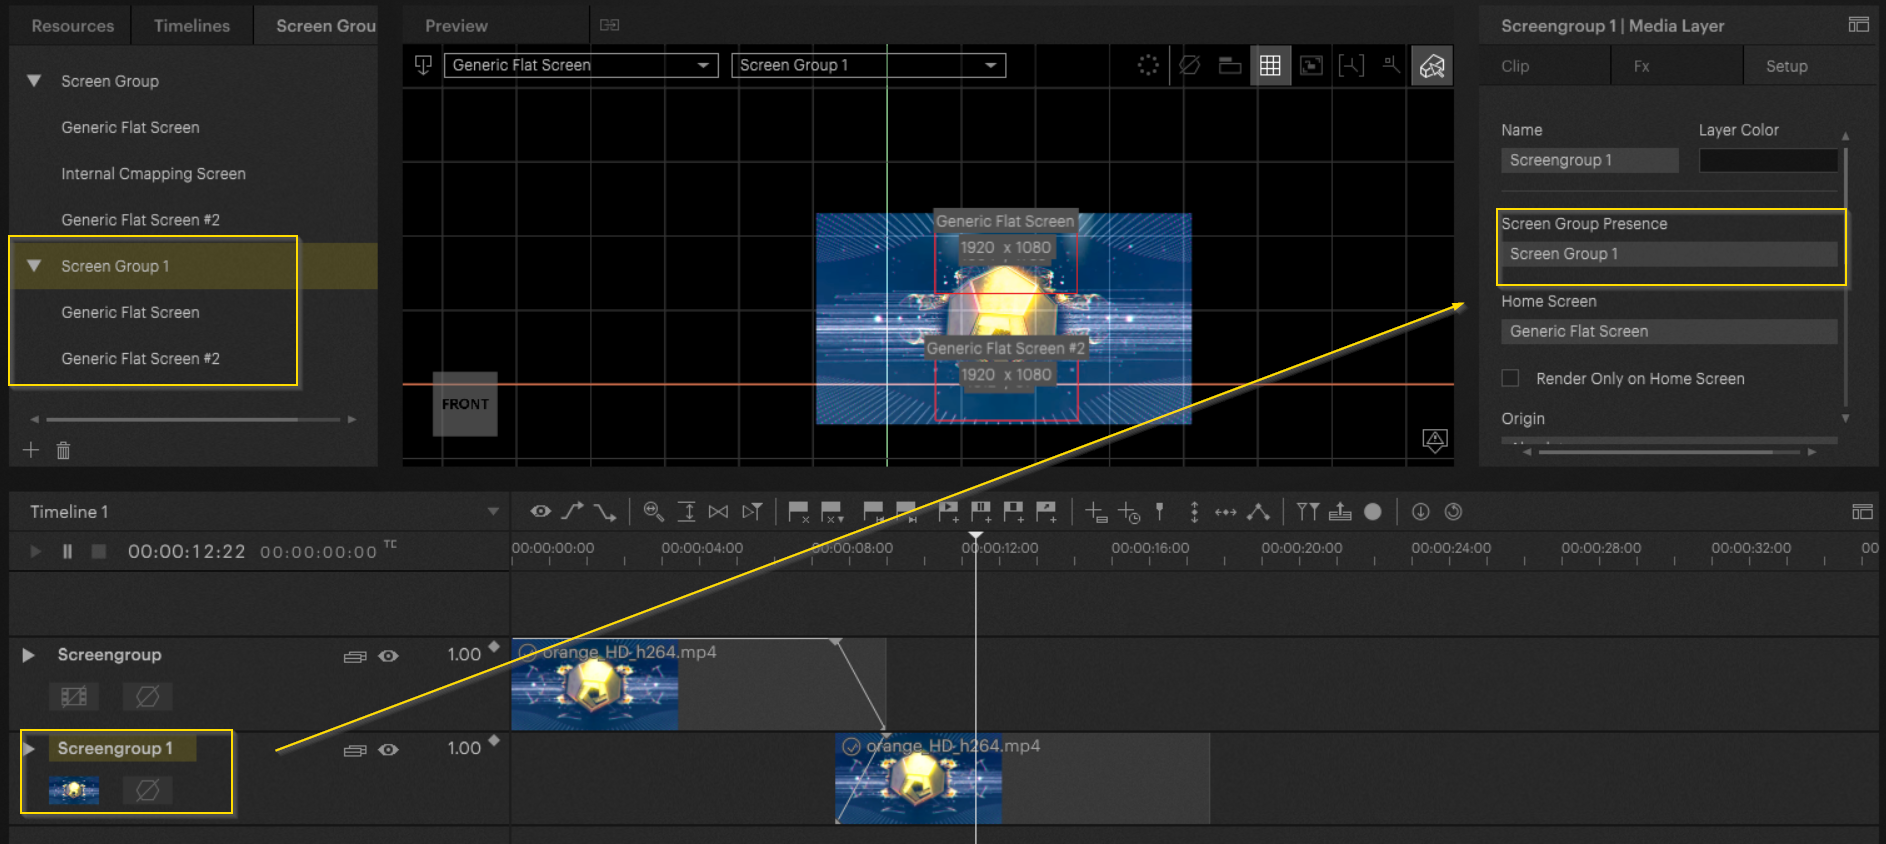
There is now an added drop down selection menu in the workspace in order to change between screen groups when diving in.
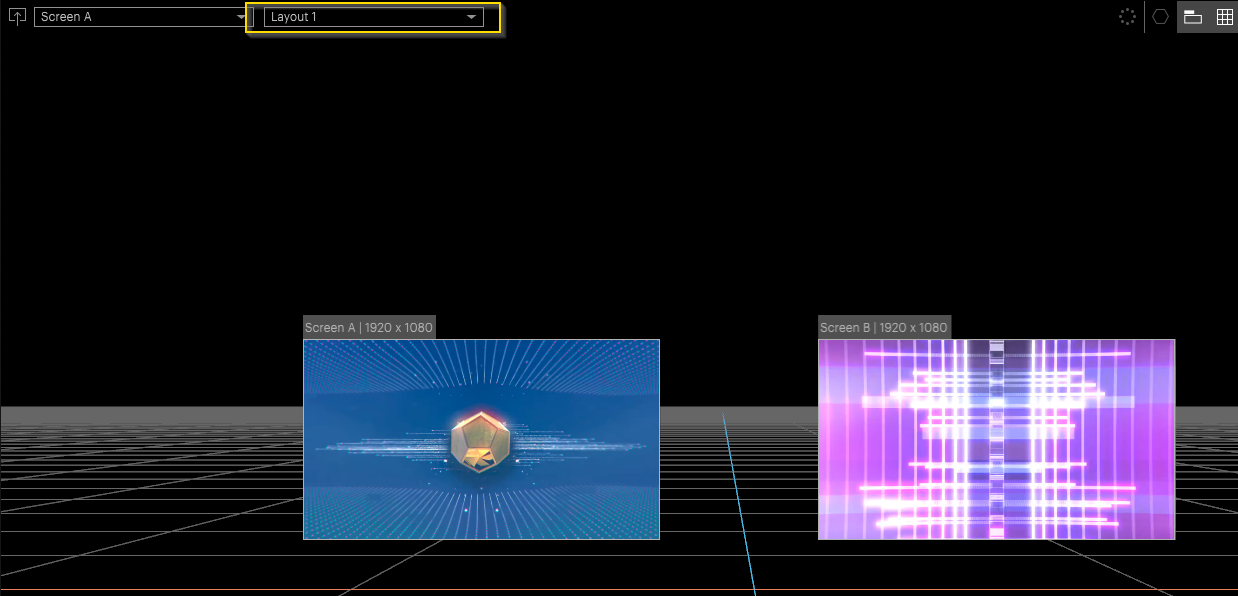
When we dive in, we can re-arrange the screen perspectives for each Screen Group individually by changing which Screen Group we're in.
Here, we've set up Screen A and Screen B of Layout 1 to meet in the middle of some content.
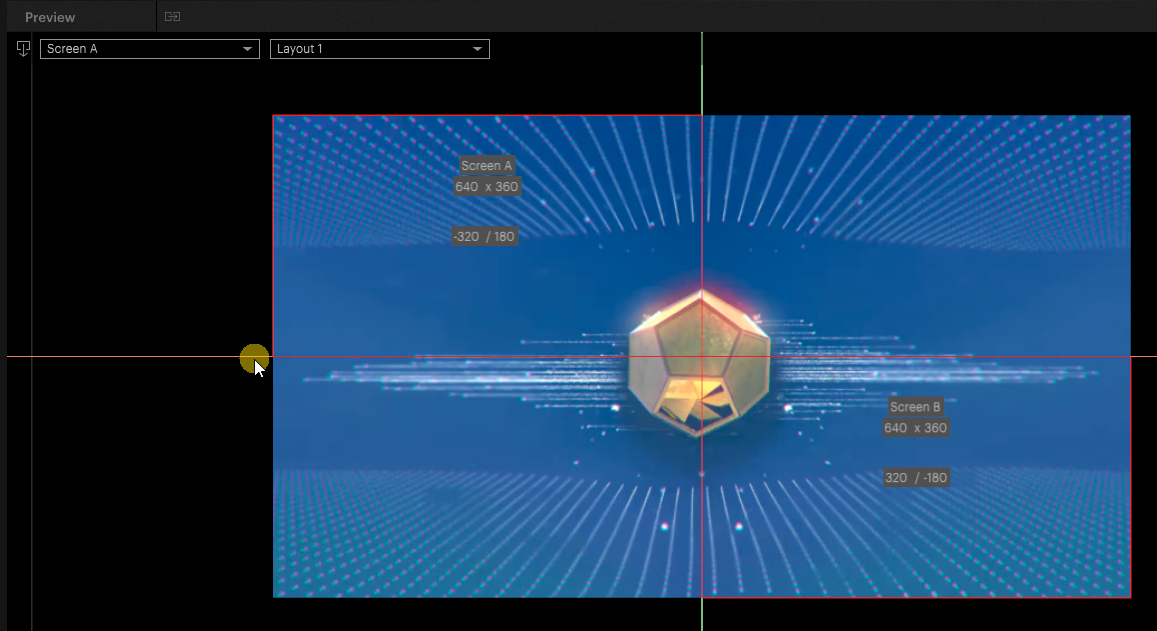
Here's what that looks like when we Dive Out
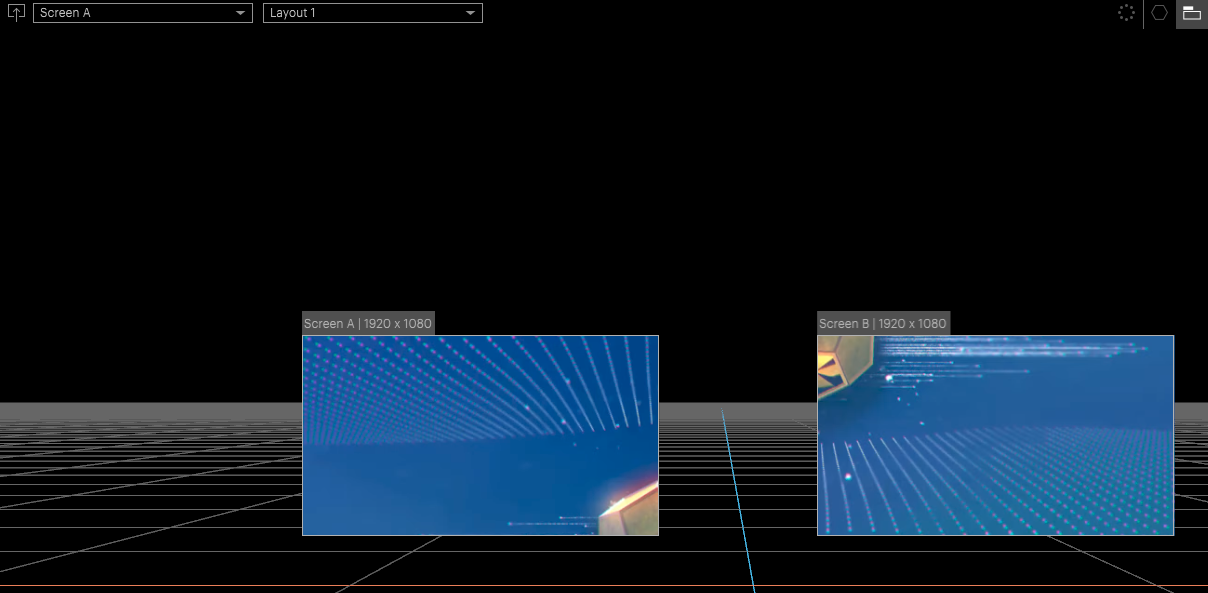
We can change this layer's Screen Group Presence property to only appear with Layout 2. We can then re arrange the Perspectives of Layout 2 so that both perspectives overlap.
We can see two different layouts for the same Screen Objects.
Scaling on Multiple Screens in the same Screen Group
In this example, we have different resolutions on our displays. We can now move content to these if we are in the same screen group.
Since both screens are in the same screen group and the LED wall is used as the reference screen (because it was created first) then the resolution of the second screen in the inner compositing refers to the size of the first.
This is done so that you can move layers over several screens in the same size.
Pixera now generates a size for the second screen that is the same size as in reference to the reference screen. In this case it is 1318x741, which in this case is no longer exactly 16:9, it differs by 0.375 pixels. It is not possible to display it otherwise because the values are not divisible in proportion.
The scaling would always be different, if PIXERA wouldn't do this, when you move content across multiple screens.
The correct workflow for multiple displays, where the content does not need to be moved and therefore has no connection, is to separate the screen groups from one another.
Note
Even if this scaling is set incorrectly, there is still no loss of quality because it is used at a point in the render pipeline where it has no negative impact
You can deactivate this calculation in the screen group: Then you can observe the behavior when they are not scaled.
Workflow example
Sometimes it is necessary to display different mappings on the same outputs. By utilizing the new screen groups there are fresh solutions available.
Create the different screen groups for different layers to show different mappings on the outputs.
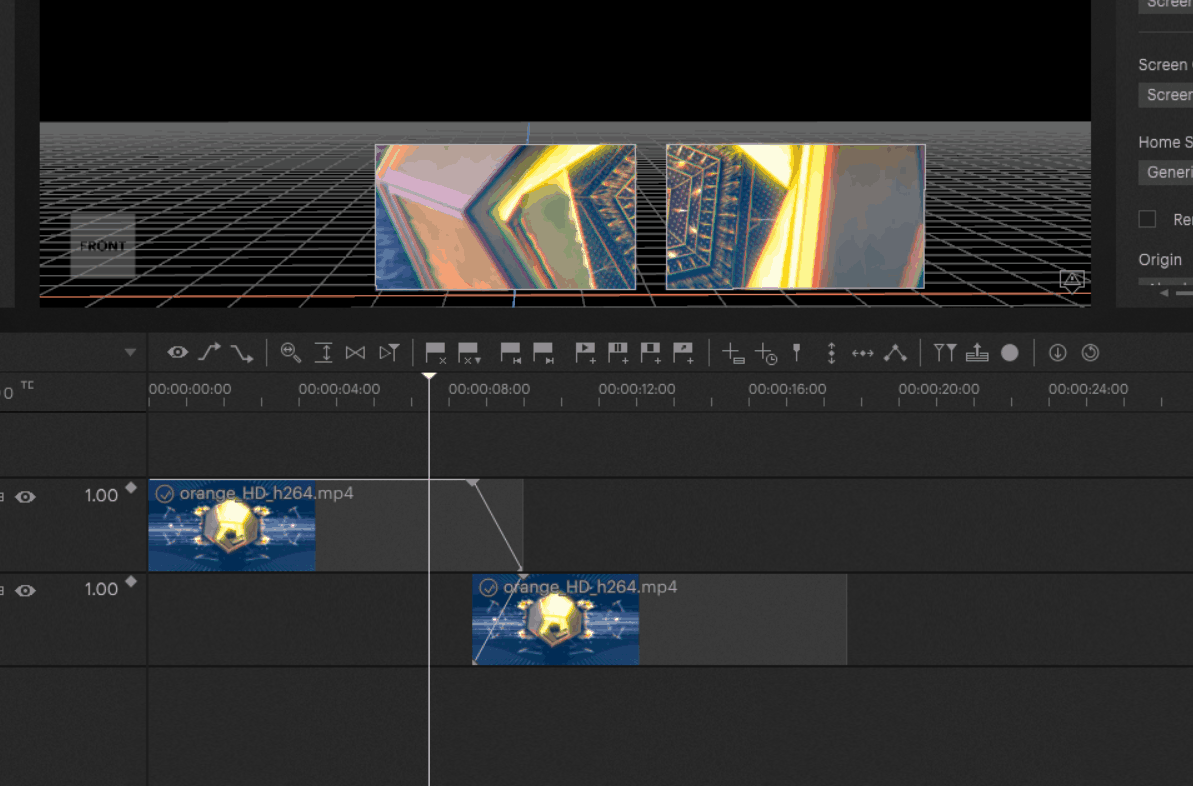
In this example two screen groups were created for the setup. The first screengroup setup is seen on the screenshot. The first layer was assigned to the first screengroup:
Meanwhile the second layer is assigned to the second screen group. As you can see the inner perspective setup differs:
Now the system can fade simple between two different screen group setups (different mappings so to speak):
PIXERA 1.9.144| 28. September 2023 |M.B.