YOUTUBE VIDEO
TECHNICAL SETUP PIXERA
This 2.0 feature allows you to arrange multiple media assets into one new piece of content that you can add to a layer. This comes in handy when dealing with alpha content and overlays and frees up space on your timeline.
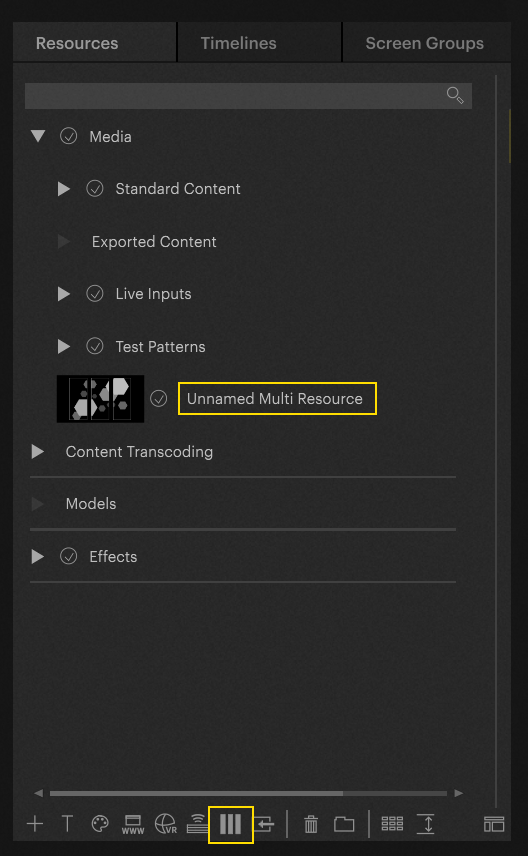
To add a Multi Resource, navigate to the Compositing tab. Under Resources, you will see an icon with three vertical bars. This will add an Unnamed Multi Resource to your selected folder:
To start building your Multi Resource, click on the plus button to add media. It will follow the file structure of your resource browser:
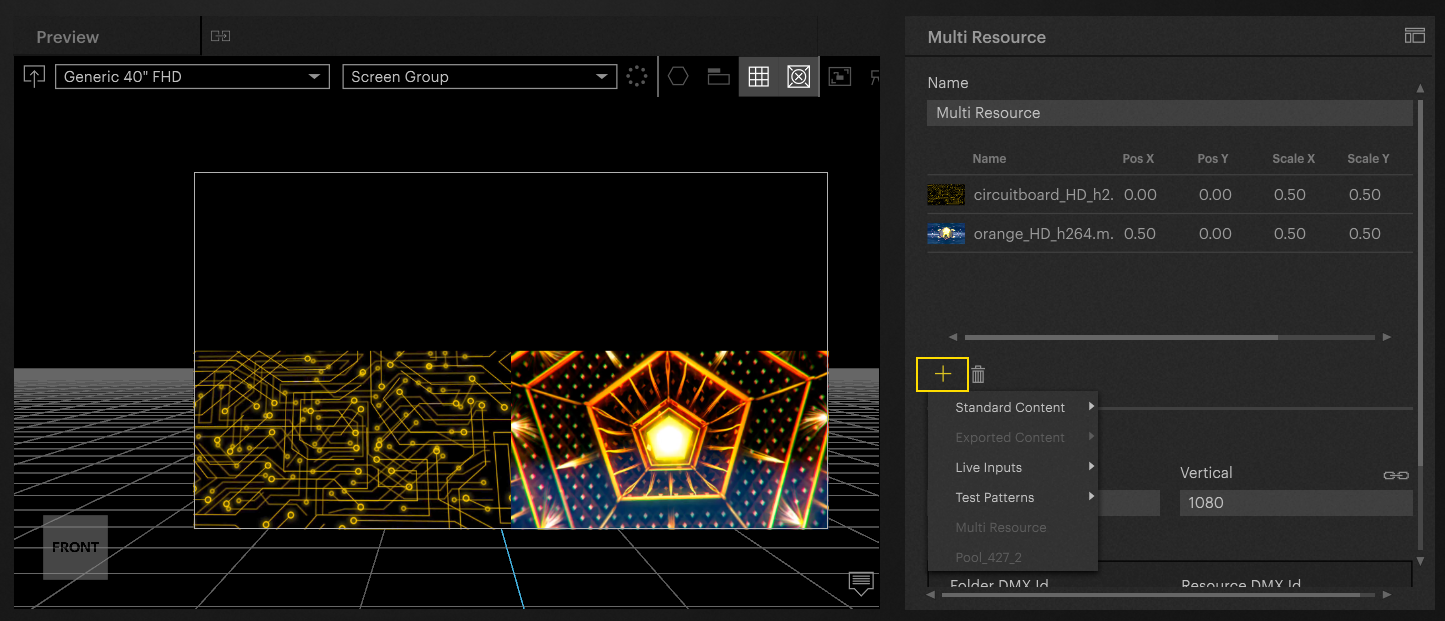
For now, a maximum of eight resources can be added to the “Multi Resource” object.
Adjust your X and Y position and scale factors to arrange your media as desired. These parameters range from 0-1. Note that the layer rendering order is from bottom to top: your most recently added content renders first, so you can build your Multi Resource from the ground up, so to speak.
As of now, you cannot reorder your assets after they are added, you must delete and re-add as necessary.
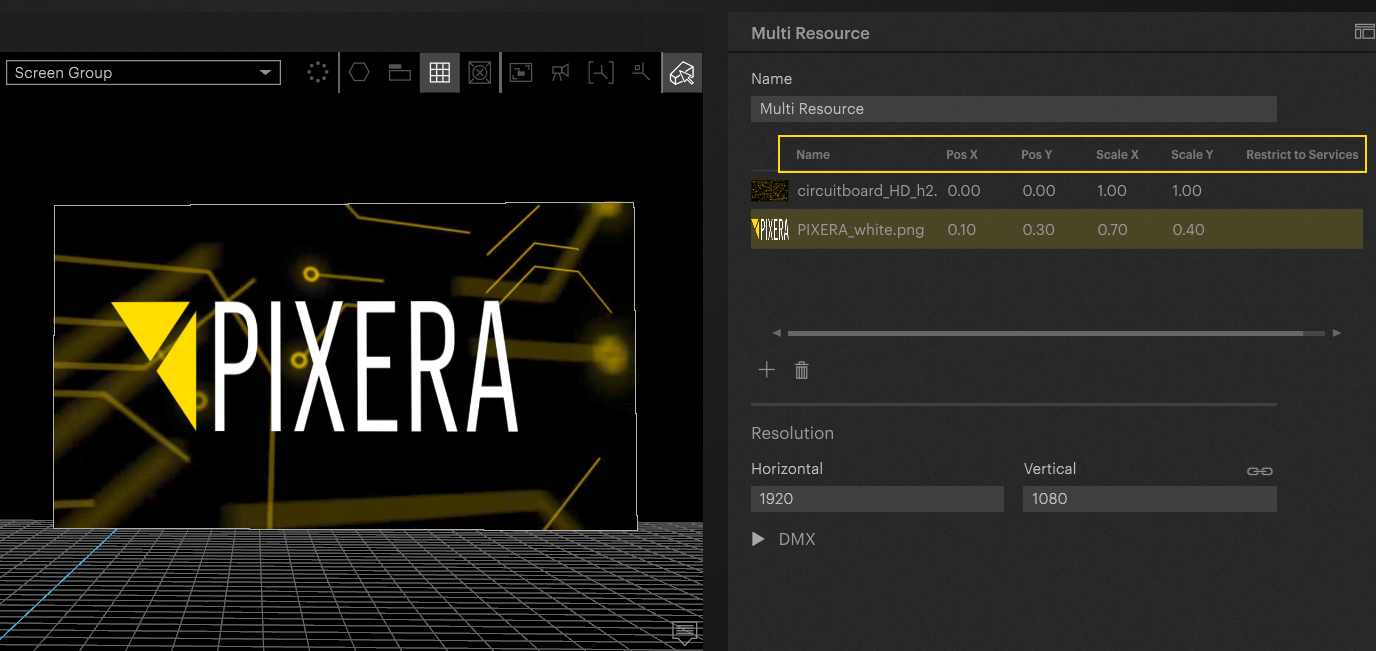
It is possible with “Restrict to Service” to have a different play out on different servers but use the same resource on the same Timeline. In order for this to work, you have to assign the screen to at least two different live systems.
CONTROL VIA DMX
Select the resource, and in the Inspector, you can set your name and desired resolution and assign DMX values. You can now drop the resource onto your timeline.
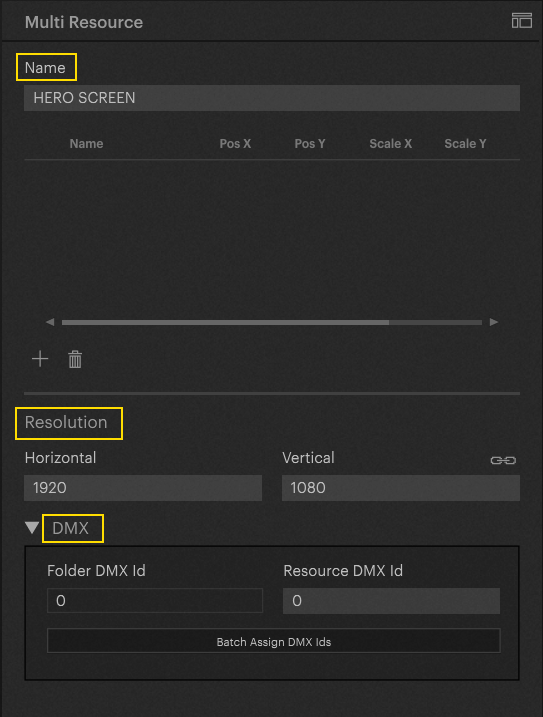
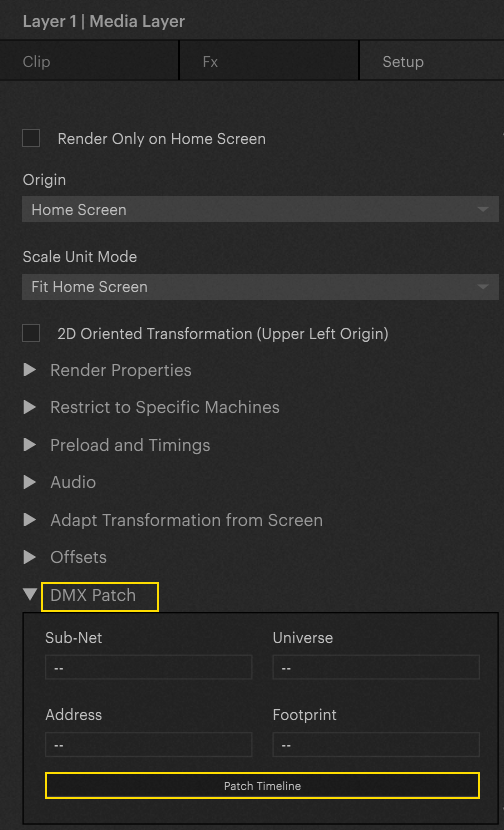
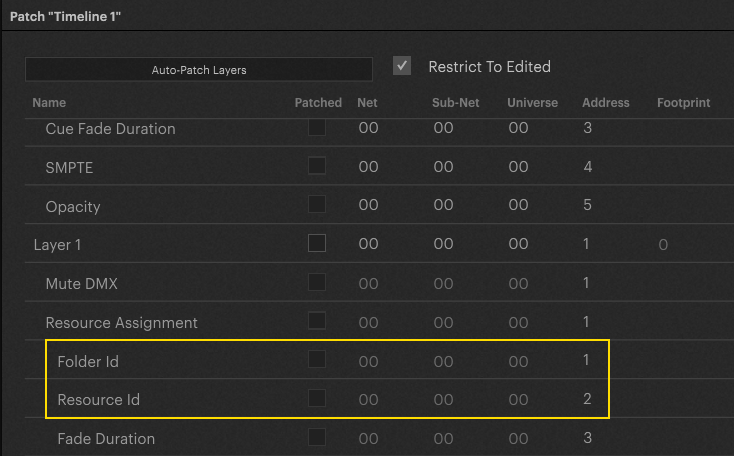
To find your DMX Folder and Resource ID's, select the layer your Multi Resource is on. In the Inspector, under the Setup tab you will see a DMX section and the option to “Patch Timeline.” Click on this and it will open a table of parameters and their DMX values.
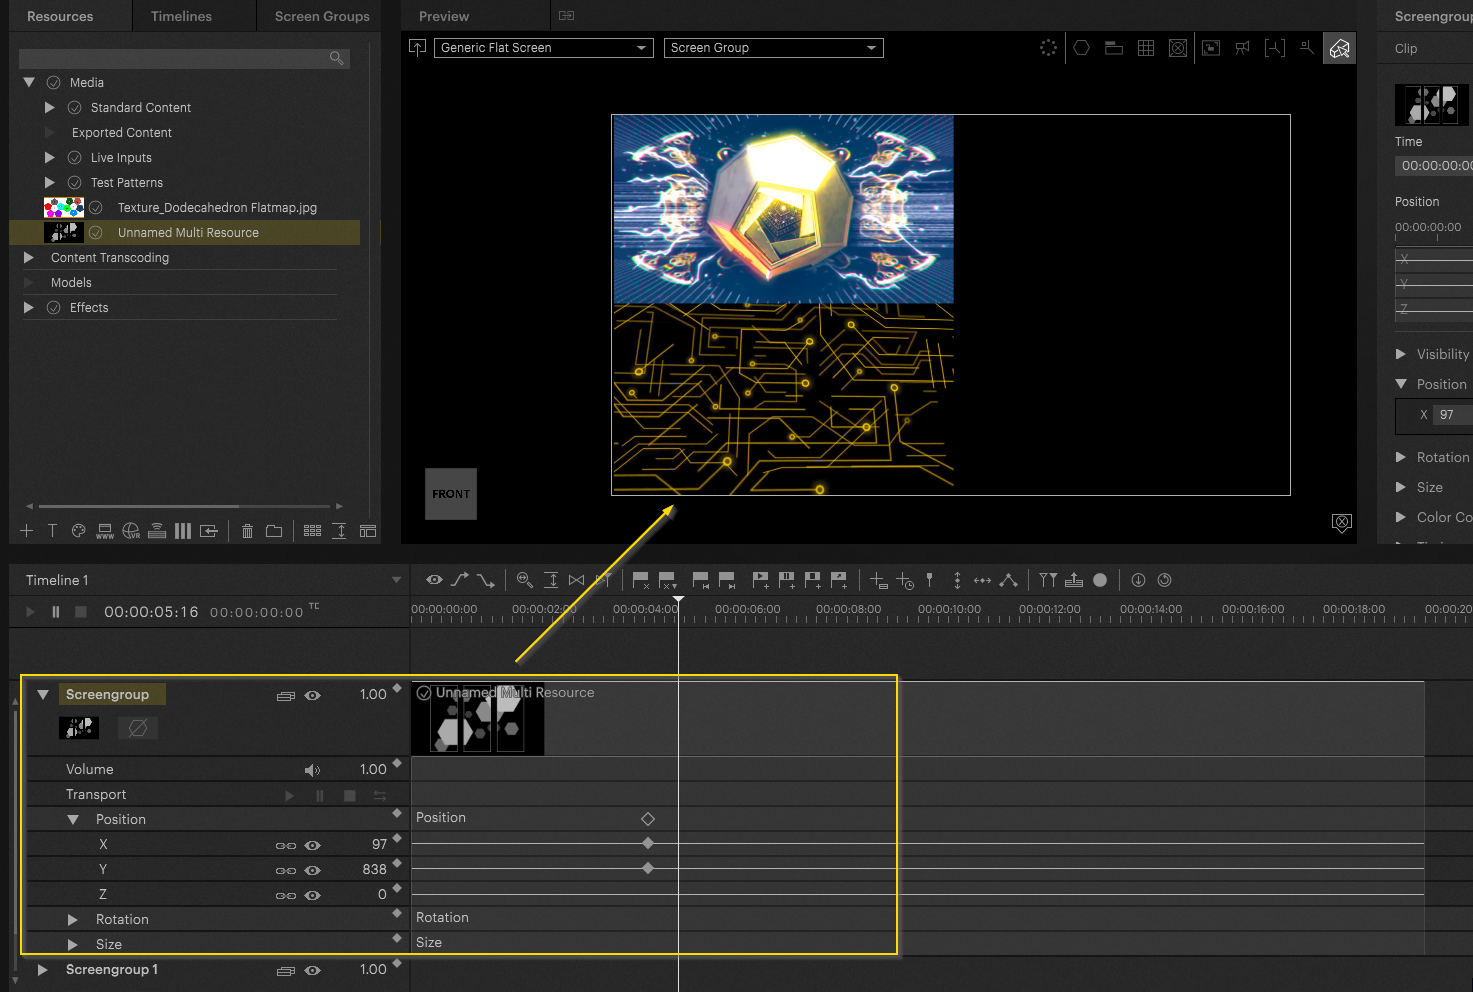
Now that you have built your Multi Resource you can treat it like any other piece of content by adding keyframes and effects. If you do not see the content in your workspace, try rebuffering by dragging the Nowpointer on and off the Resource.
PIXERA 2.0 | 18. September 2023
 Contact Us


