 Contact Us


Disclaimer
Virtual Production is a complex topic. It is mandatory to understand the basic setup to be able to advance to the advanced techniques (for example, set extension and multi-pos warp).
Furthermore, it is mandatory to understand all the basic principles of Pixera.
Here is a list of all the VP related documentation in chronological order:
Unreal 5.2.1 Tips and Tricks (Performance and Testing)
Pixera Connect (Unreal Engine Plugin)
Studio Camera (Virtual Production)
Set Extension (Virtual Production)
Introduction
Starting with Pixera 2.0, Unreal Engine 5.2.1 can be used as a resource in the compositing tab.
Prior to starting the setup, please check the following prerequisites:
-
Unreal Engine (compositing resource) only works with a Server License or official Pixera Servers
-
With Unreal Engine 4.27 is NOT working with Pixera 2.0.
- In case you are currently working with an Unreal 4.27 Setup please follow the official Epic migration guide:
-
Unreal Engine 5 Migration Guide | Unreal Engine 5.0 Documentation
-
Unreal is extremely demanding. We recommend using a dedicated powerful director as well as a playout server (e.g. Pixera 4RS. In case of a homebrew, we recommend using a RTX A6000)
-
Download Unreal from the EPIC Games store from this URL: Epic Games Store DOWNLOAD
-
Install the .NET 4.8 SDK. .NET is a Microsoft platform used to build and run applications. It is open-source, free, secure, reliable, and high-performance. .NET is required when installing and using Unreal.
- Optional for Packaged Projects:
- Install Visual Studio including following Options (only necessary if you want to package a project):
- Add Game development with C++ (under Workloads) and following options:
- C++ profiling tools
- C++ Address Sanitizer
- Add Game development with C++ (under Workloads) and following options:
- Windows 10 SDK (10.0.18362 or newer)
- Install Visual Studio including following Options (only necessary if you want to package a project):
Unreal Engine Installation Guide
Create an account or log in with an existing account. Navigate to the Unreal Tab and install the correct build version, 5.2.1:
Warning
Sometimes the selection bugs, therefore it is necessary to install the wrong version first to access 5.2.1. Simply hit install and abort immediately
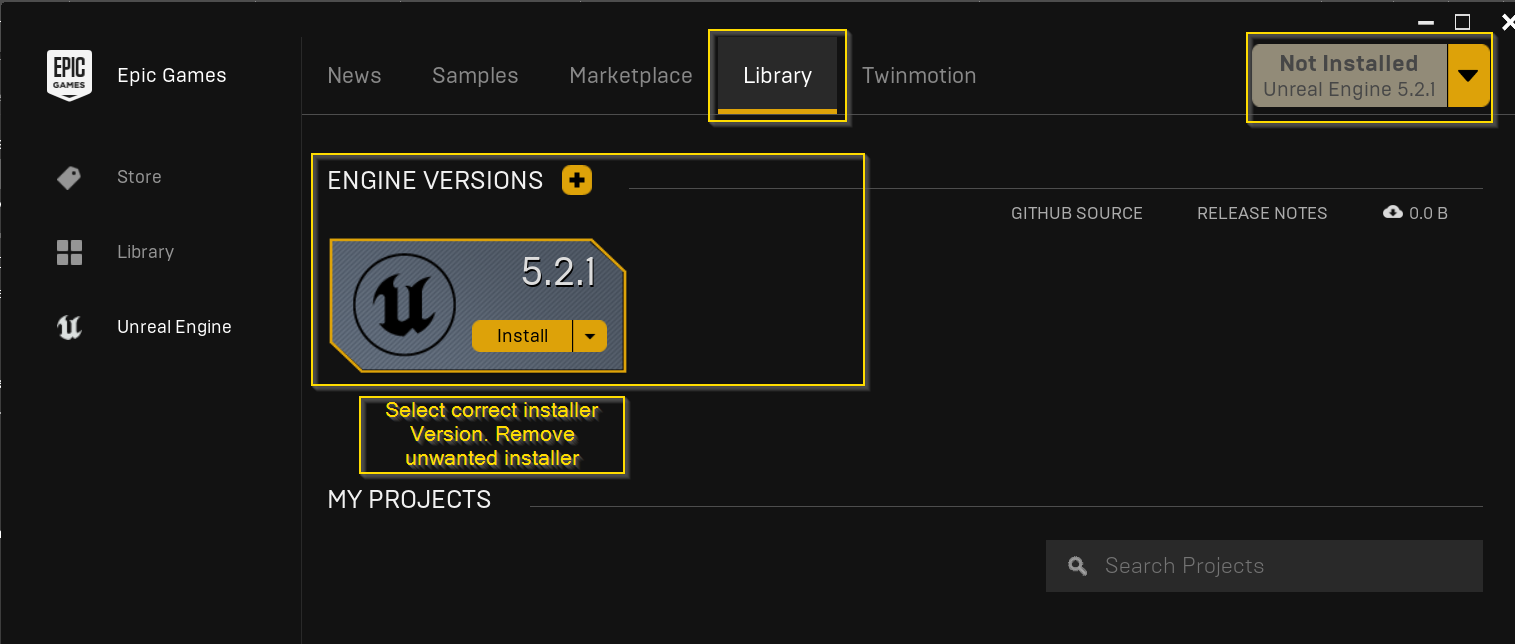
Uninstall unwanted versions by choosing remove.

Warning
Install Epic Games and Unreal Engine on the D - Drive. When installed on the C - Drive Pixera might not be able to access certain files. Furthermore after a reimage of the system the installed files will still be accessible.
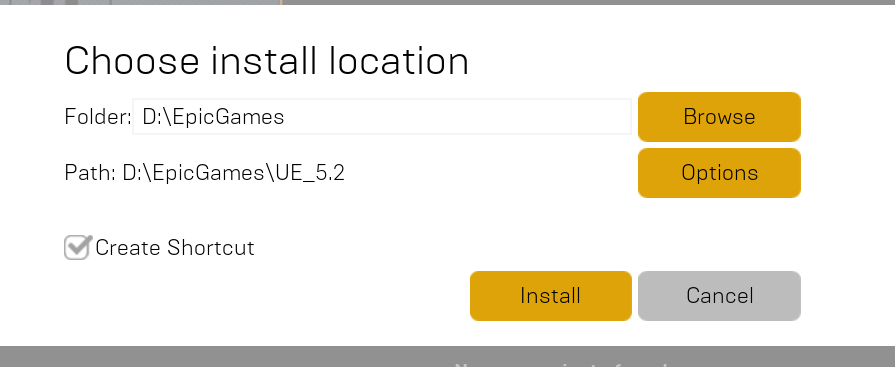
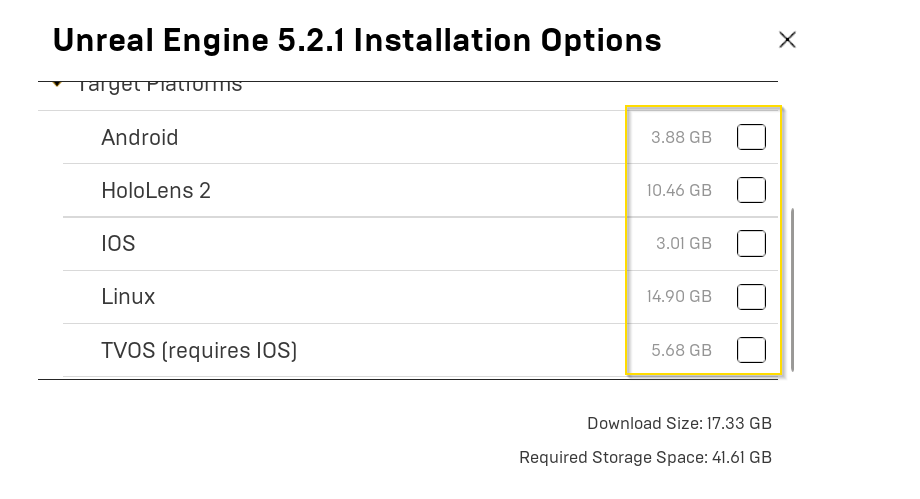
Go to options and change the install options:
Unreal Engine Setup
New Project
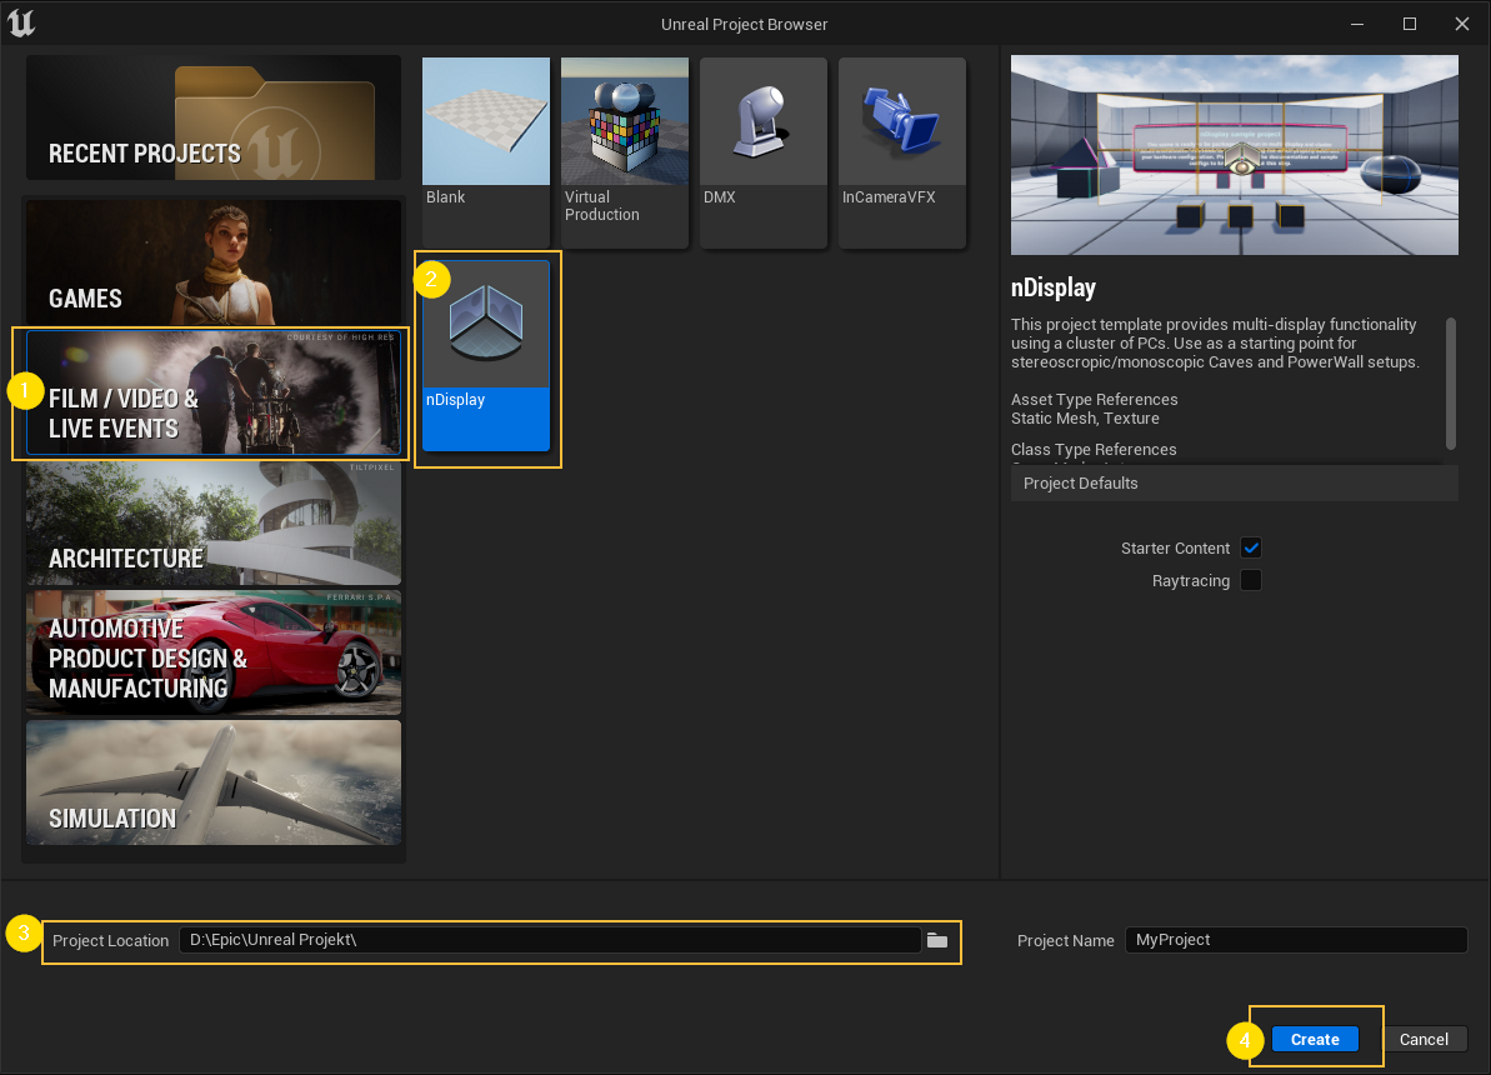
Start Unreal Engine via the Epic Games launcher. In the welcome menu, select Film / Video & Live Events and open the default nDisplay project:
1: Select Film / Video Live Events
2: Select the nDisplay project
3: Warning: define the correct project location. We recommend choosing the same drive as the installation path.
4: Create project
Warning
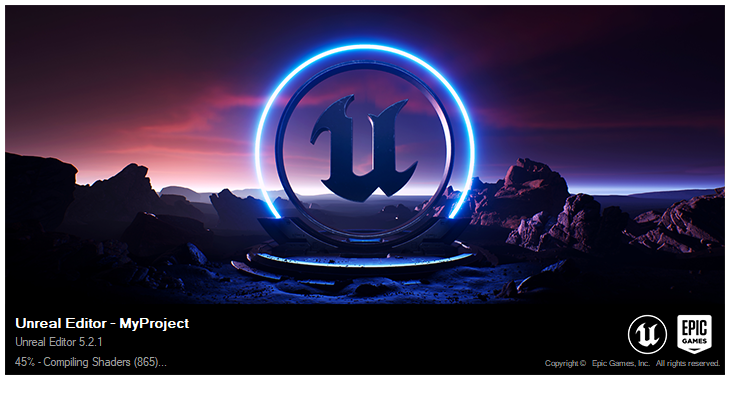
Start once and compile shaders:
Created Project
If you already have a project and want to make it work inside Pixera, you will need to manually set up the following for nDisplay.
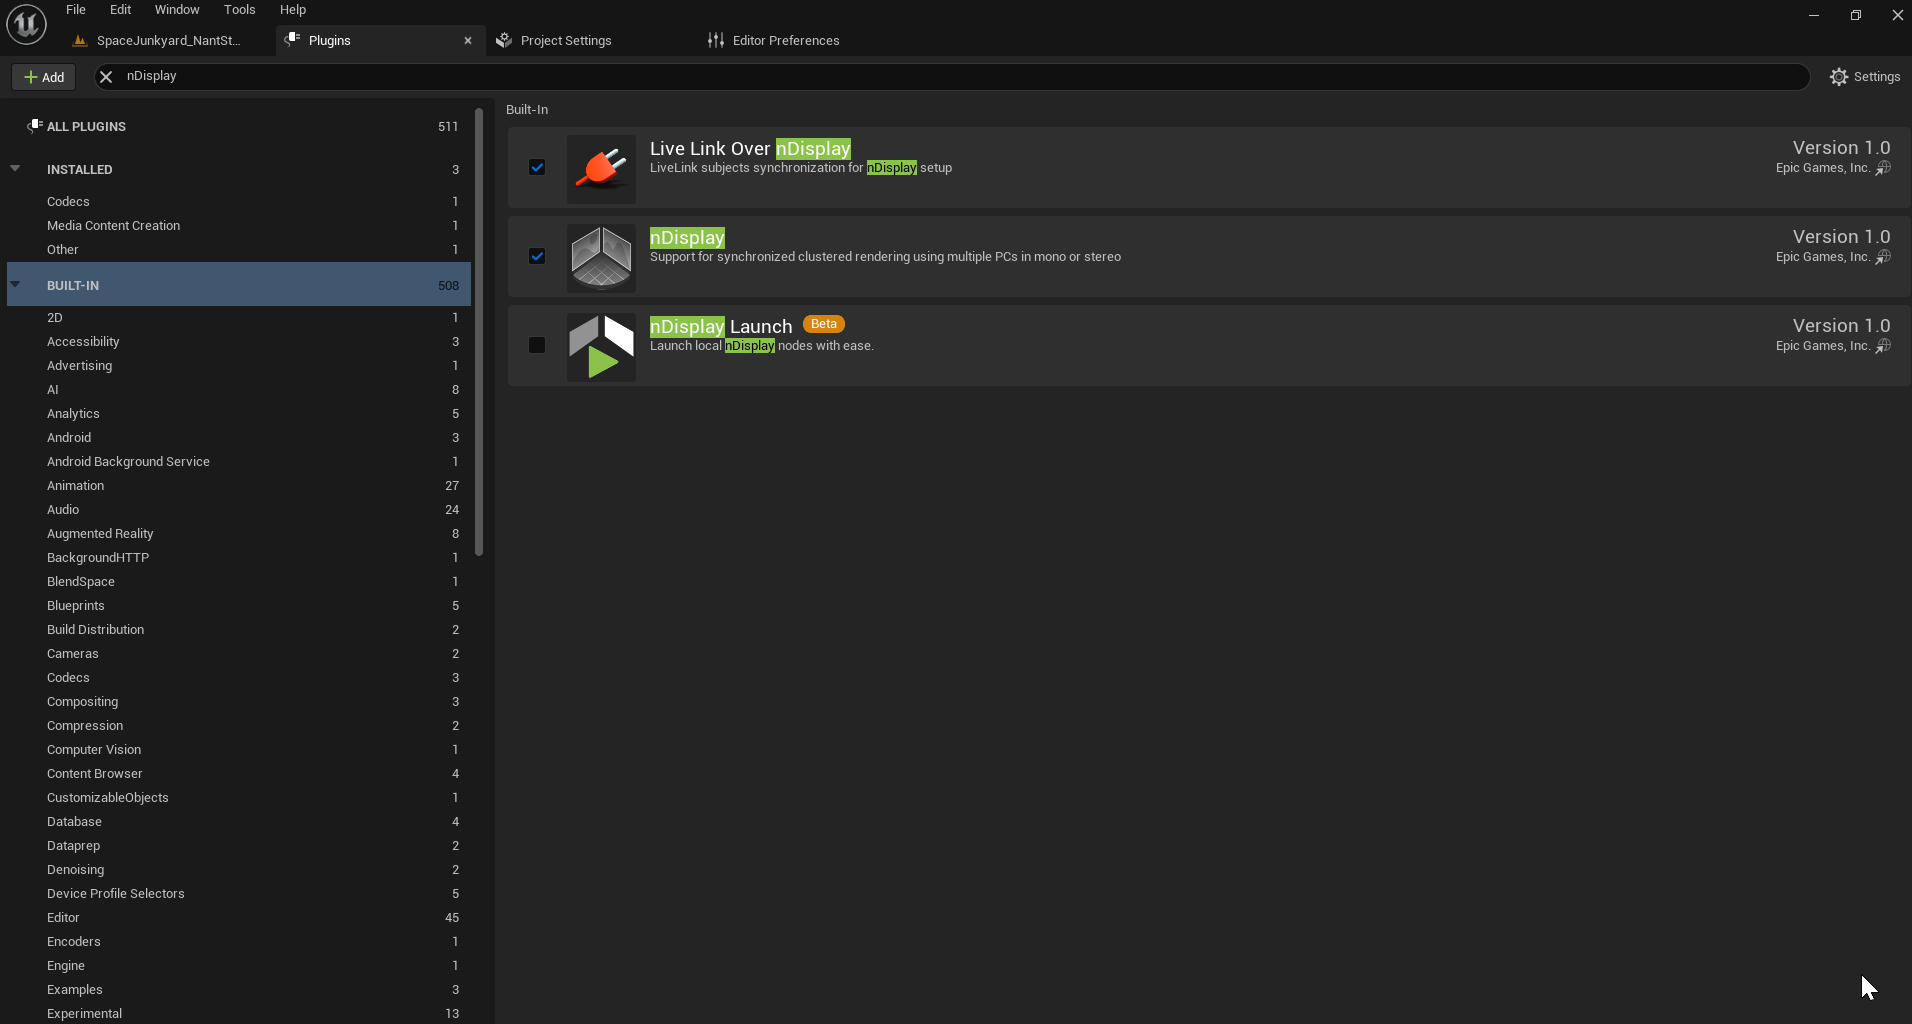
You must first enable the nDisplay plugin by going to “Edit\Plugins” and activating nDisplay in the “Built-in” section.
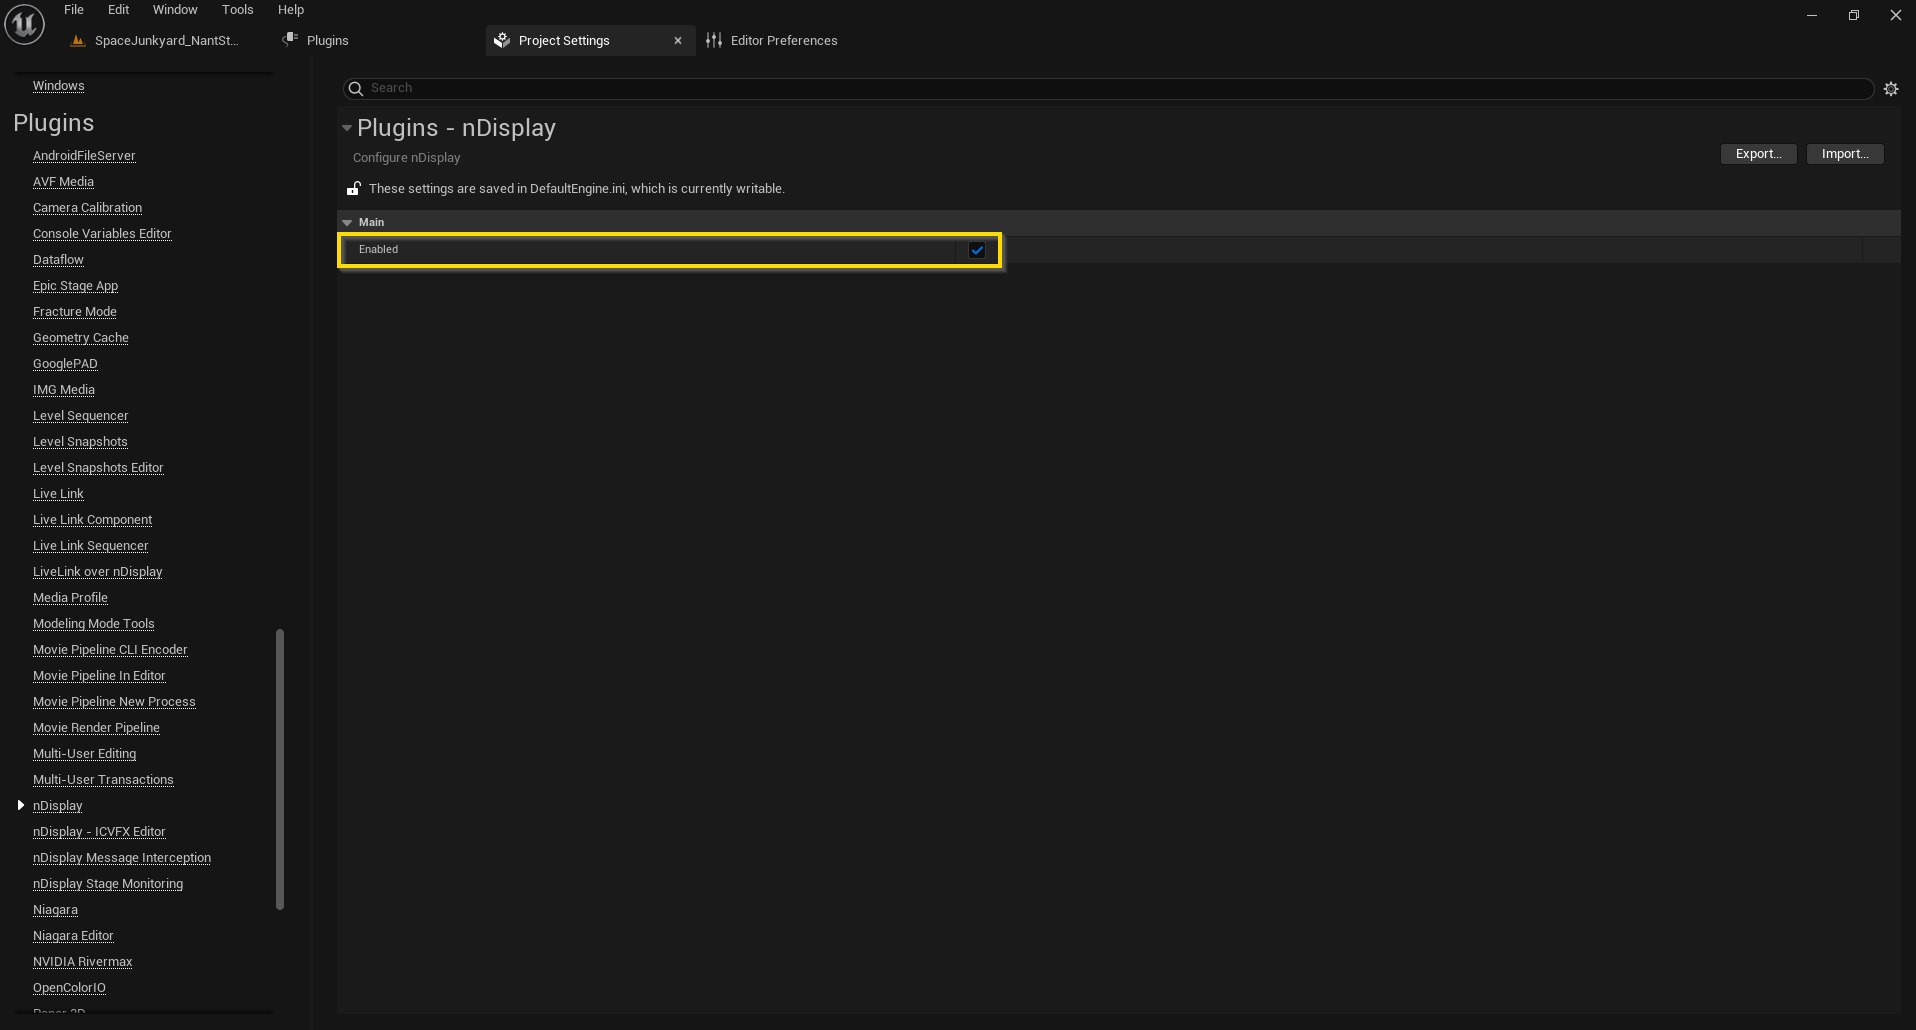
nDisplay must now be turned on in the project itself. This can be done by going to “Edit\Project Settings” in the “Plugins\nDisplay” section and checking the Enabled box on.
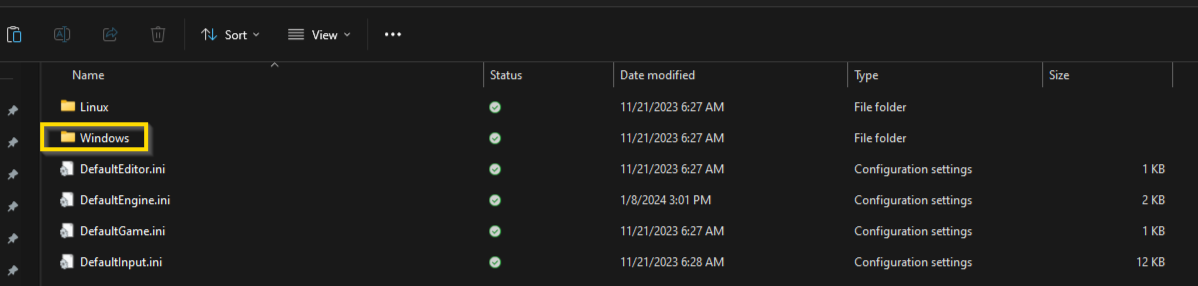
Lastly, some Unreal Projects, such as the ones downloaded from the Marketplace, may not have a “Windows\WindowsEngine.ini” Directory in their Config folder. If this file is not available, then Pixera will be unable to open the project. This folder and file can be copied from an Unreal Project that does contain it, such as the nDisplay template project.

Unreal Executable Setup
The “Unreal_Engine_5-2-1” zip contains the engine and should be extracted to wherever desired, usually in the initial C or D directory.
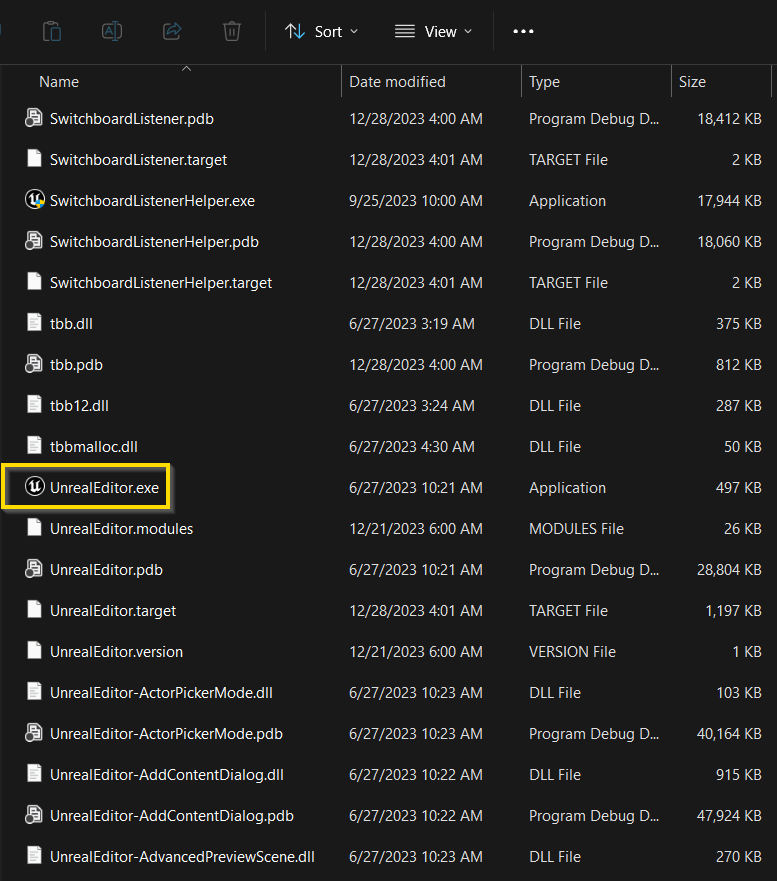
Navigating to “Unreal_Engine_5-2-1\Engine\Windows\Engine\Binaries\Win64” you will find a file which in the same location as other Unreal Engine builds being the “UnrealEditor.exe”. Use this executable to run the engine.
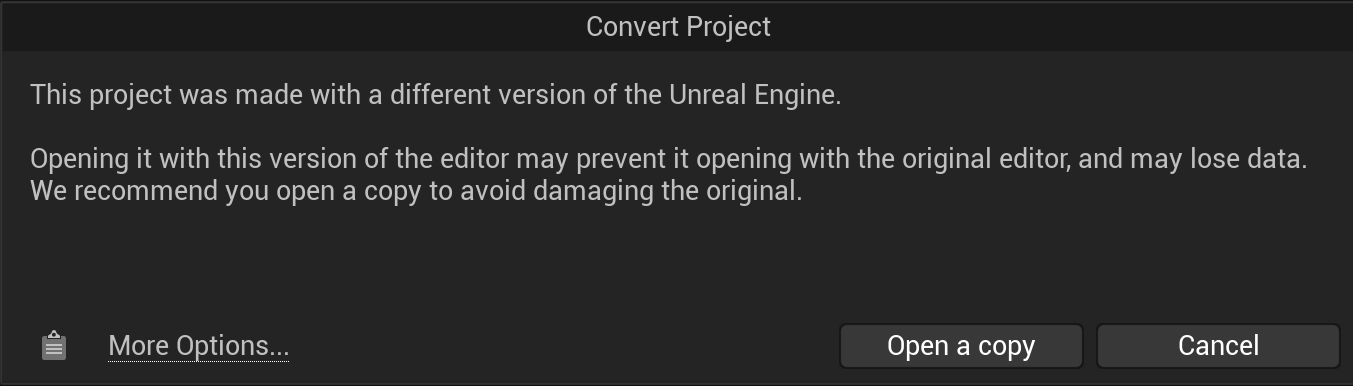
After selecting and opening the project, an Unreal popup will explain that the project should be copied as the Unreal Engine being used is different from what the project was first created it. It is recommended to copy the project and keep this copy available for any rebuilds you may need. Also, this copied project will not open immediately in the vanilla Unreal Engine version, it will instead also ask to copy.
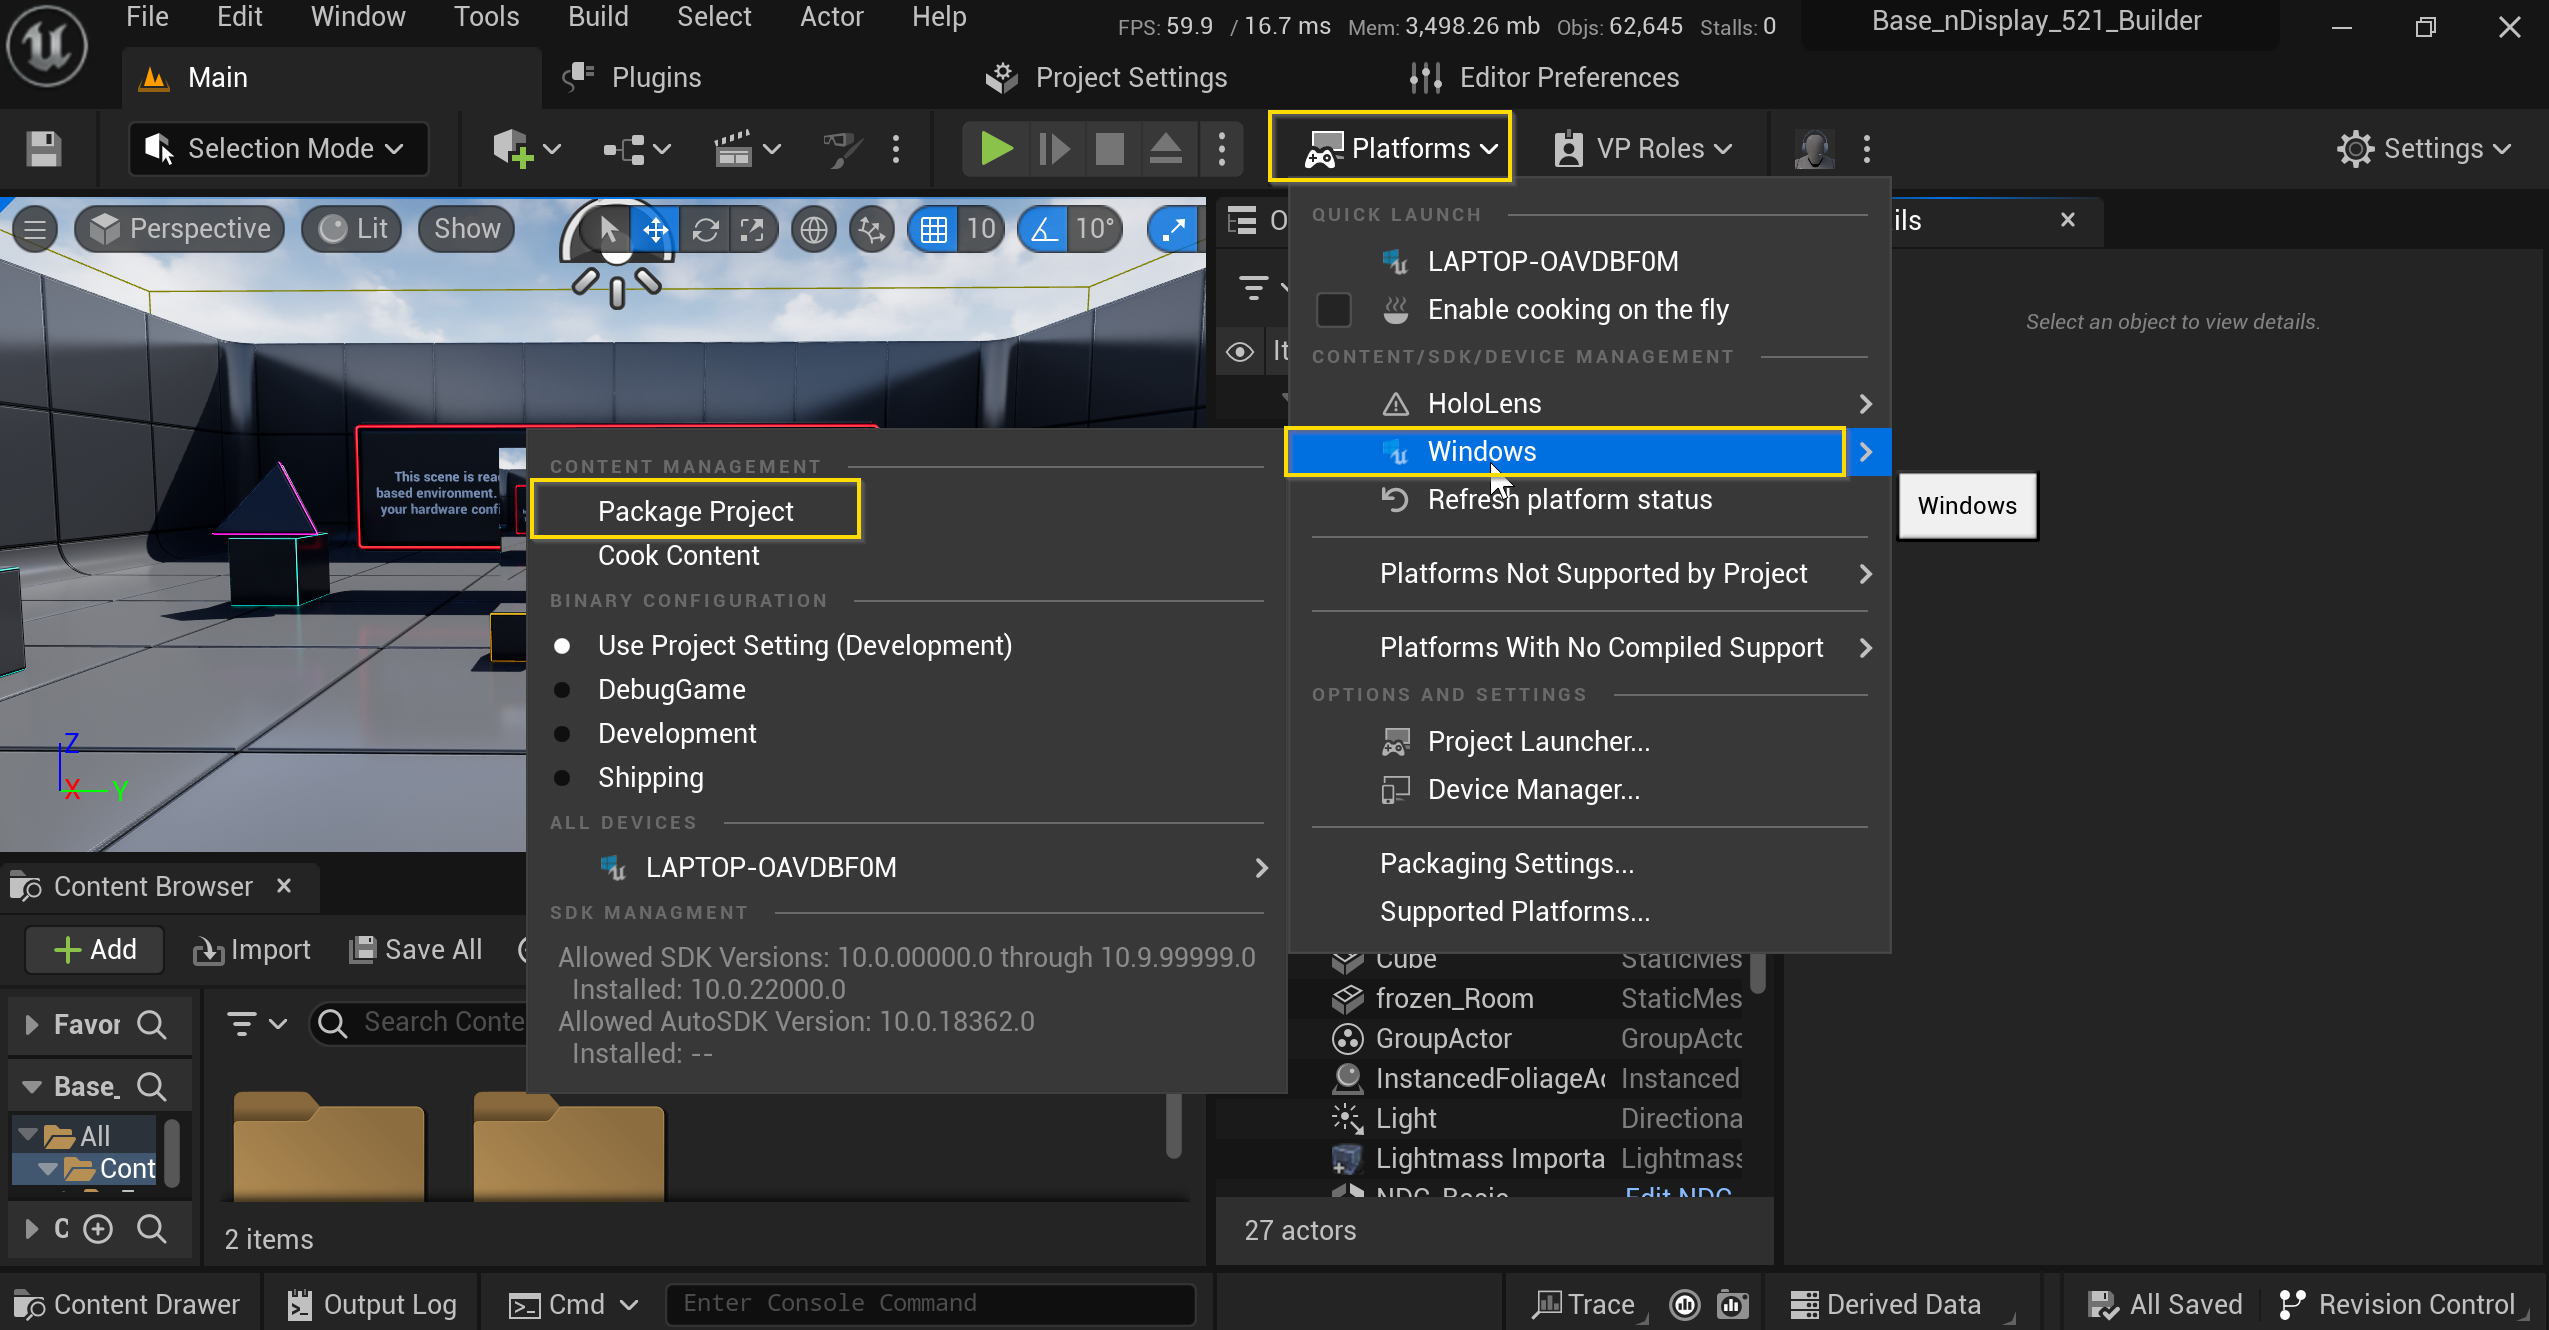
Once the project is open, you can package by going to “Platforms\Windows\Package Project”. The editor will then ask for a location to place the executable. Once selected, the project will begin to be packaged and finish depending on how large the project being packaged is.
Unreal Multi-User Setup
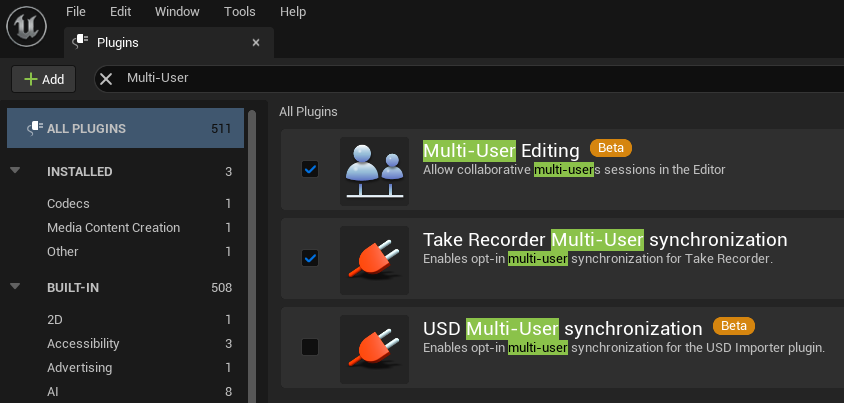
To run Unreal in Multi-User mode, you must first enable the Multi-User plugin.
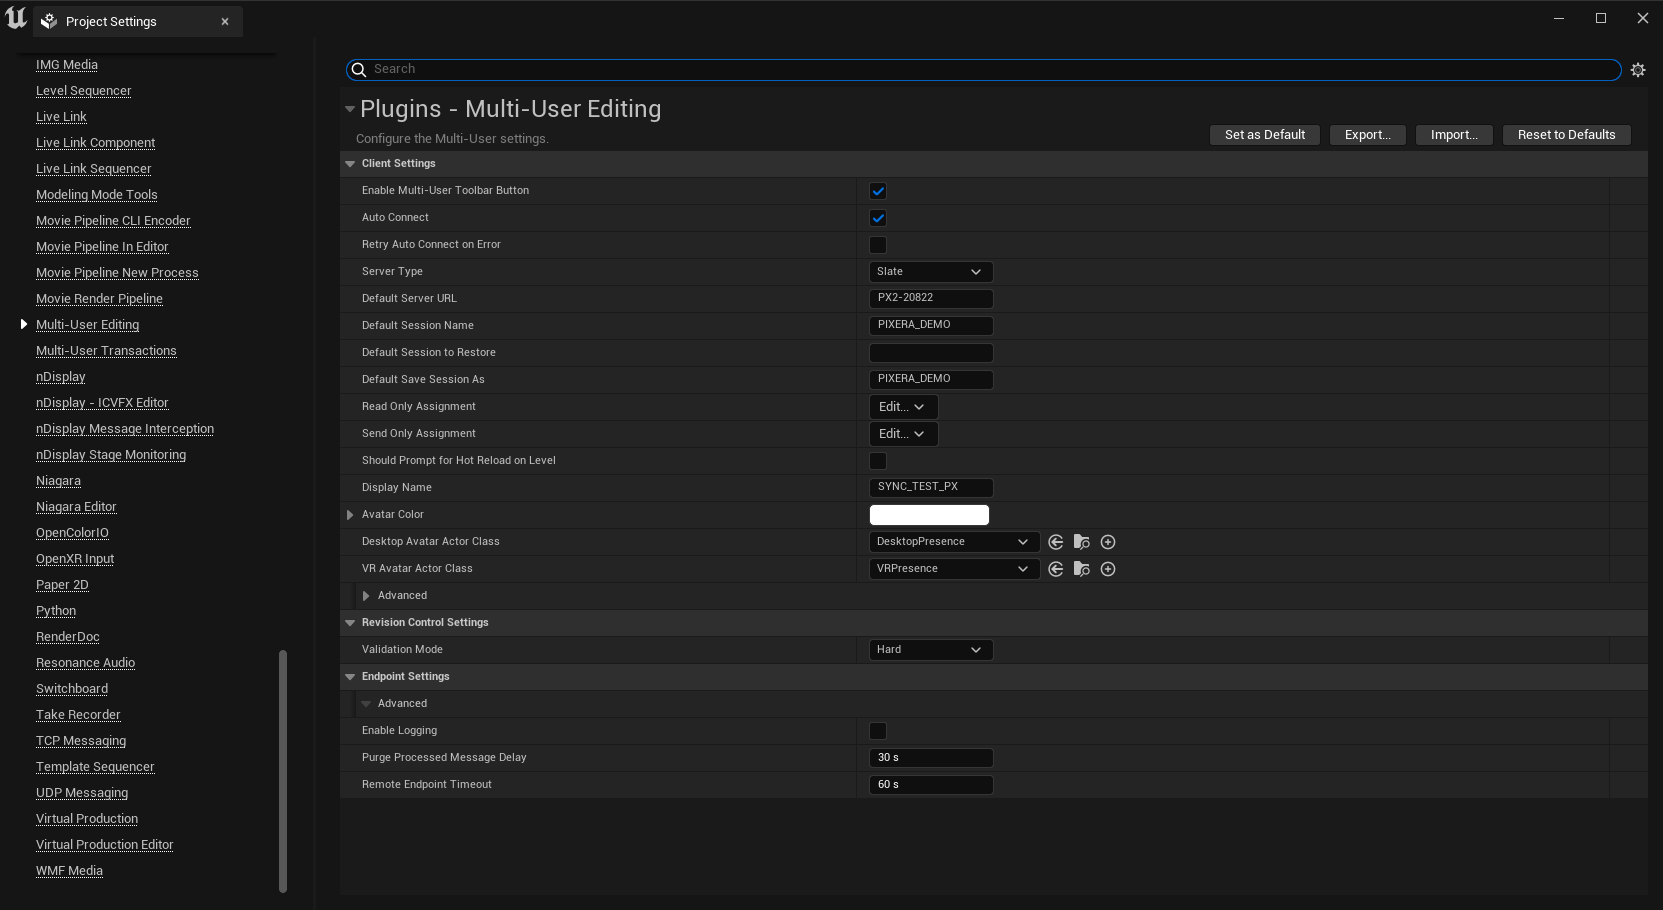
After saving and restarting your Unreal scene, navigate to “Project Settings“ (Edit → Project Settings..), navigate to “Plugins“ → “Multi-User Editing“.
“Enable Multi-User Toolbar Button“ and “Auto Connect“ have to be enabled.
Further, please enter the Windows computer name of your Unreal Server in “Default Server URL“ and assign a name for “Default Session Name“.
Save your project and re-open it.
Click on the arrow next to “Join“ in the toolbar and select Launch a local Multi-User server.
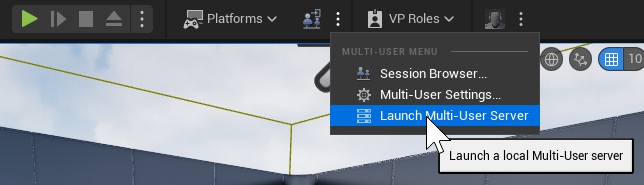
A new window pops up, afterward close Unreal again, and you are all set to bring the project into Pixera!
Pixera Interop Setup
The Interop is an important part of Unreal Integration. Without the correct Interop version, Unreal setups can't be achieved. There are three different Unreal modes in Pixera. Each mode requires the Interop to be in a different root directory:
-
Dash Game:
- Interop must be placed beside the Unreal Editor (as seen in the screenshots below). Whilst installing the Interop the root install directory can be chosen. Please keep in mind that for multiclient setups, the interop can be transferred directly via Pixera. If Unreal was installed on the C drive, Pixera won't be able to copy the Interop because of windows.
-
MultiUser:
- Interop must be placed at the Unreal Editor which will be doing the editing work. Depending on the setup, the Control Instance could be placed on a different server in the network.
-
Packaged:
- Interop must be placed beside the EXE file.
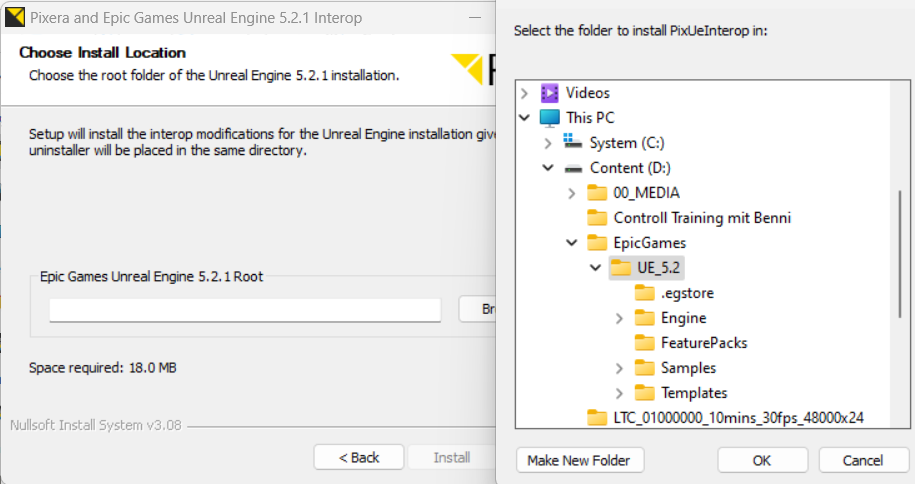
Download the Pixera Interop from here: Downloads (pixera.one)

Select correct root path. This is the same path as the Unreal Engine installation.

As soon as the installation setups have been completed, unreal projects can be imported into Pixera as a compositing resource.
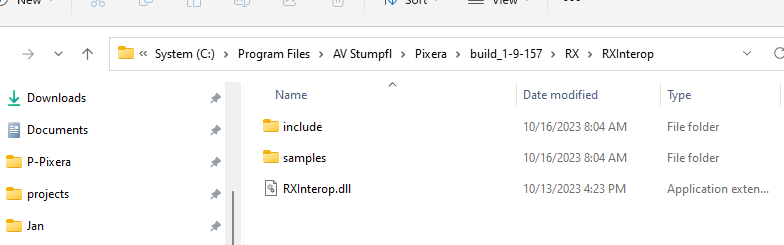
Interop is installed into the Pixera install path:
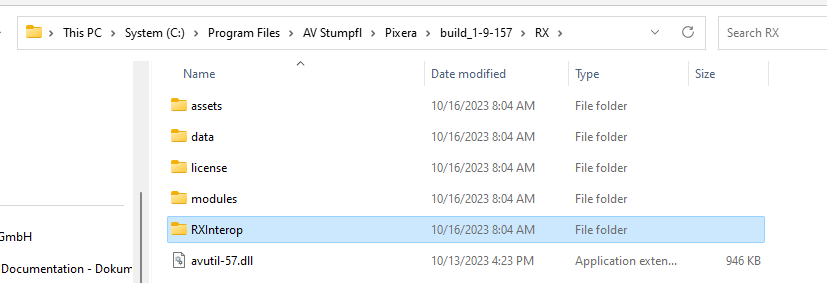
Furthermore, the Interop installer exchanges the available nDisplay DLL´s in the Unreal Engine root install path. The original DLL´s are being placed inside the “PixeraBackup” Folder.
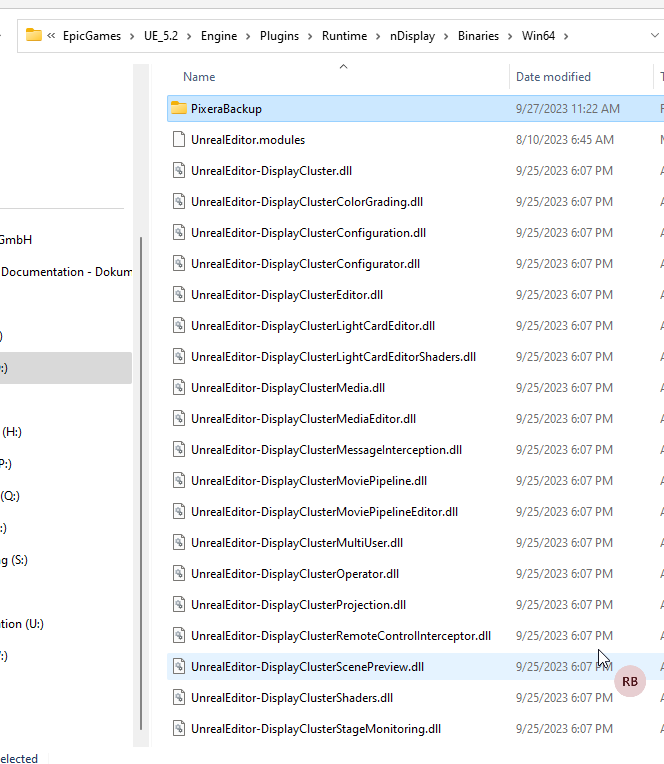
The Interop is then either installed or copied via Pixera to the root folder of the Unreal Engine:
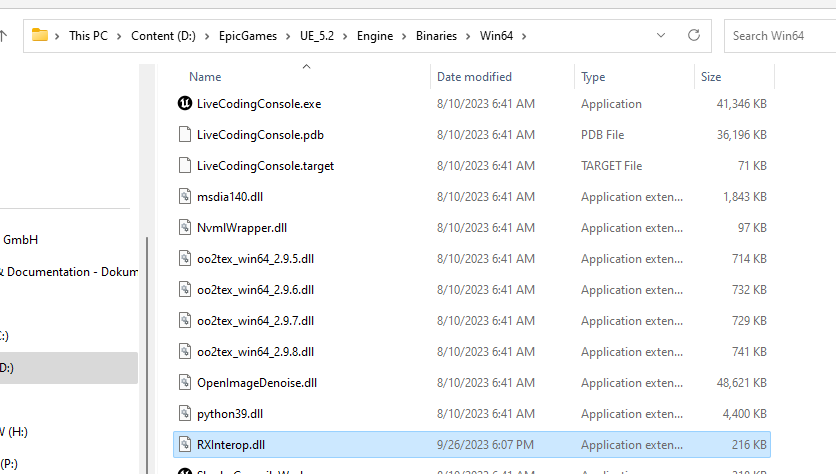
Triggering the “Copy RXInterop.dll To Configured Nodes” button in Pixera will take the interop from the Pixera install path and copy it into the Unreal Engine root path.
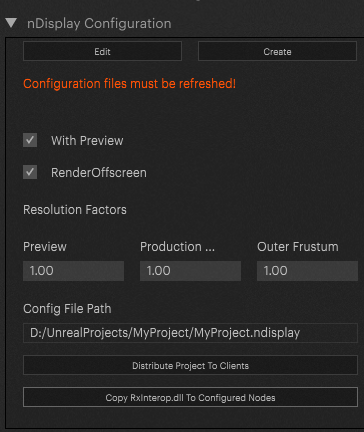
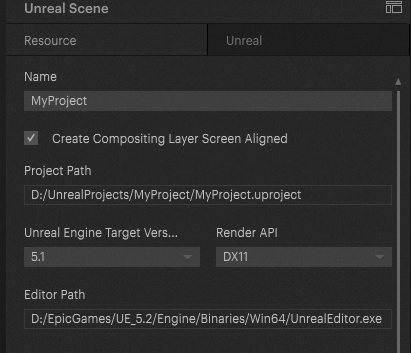
The Unreal Editor path can be found in the Pixera project:
Warning
When Unreal is installed on the C - Drive windows wont allow the copy process (locally as well as on the clients). Therefore we highly recommend to install Unreal on any other drive but C to avoid problems.
Pixera 2.0.6 | 22. February 2024