 Contact Us


Disclaimer
Virtual Production is a complex topic. It is mandatory to understand the basic setup to be able to advance to the advanced techniques (For example, Set Extension and Multi-Pos warp).
Furthermore, it is mandatory to understand all the basic principles of PIXERA.
Here is a list of the essential VP related documentation in chronological order:
Unreal 5.2.1 Tips and Tricks (Performance and Testing)
PIXERA Connect, an Unreal Plugin - General Usage
PIXERA Texture Sharing to Unreal
Studio Camera (Virtual Production)
Set Extension (Virtual Production)
Setup Mapping
Multi-Pos-Warp is a unique feature used in Virtual Production environments, specifically for the set extension.
It allows saving unique warps from the camera's point of view. This is especially important for set extension applications to match the set extension to the rendered image inside the camera.
In the software, multiple positions have to be saved. For each individual position, a 2D warp is done. The software will then blend the warping from one position to another position. This is useful for camera movement that exceeds the physical playback space and where set extensions are used.
Go to the “Mapping Tab” select the Studio Camera and switch to the warp-settings.
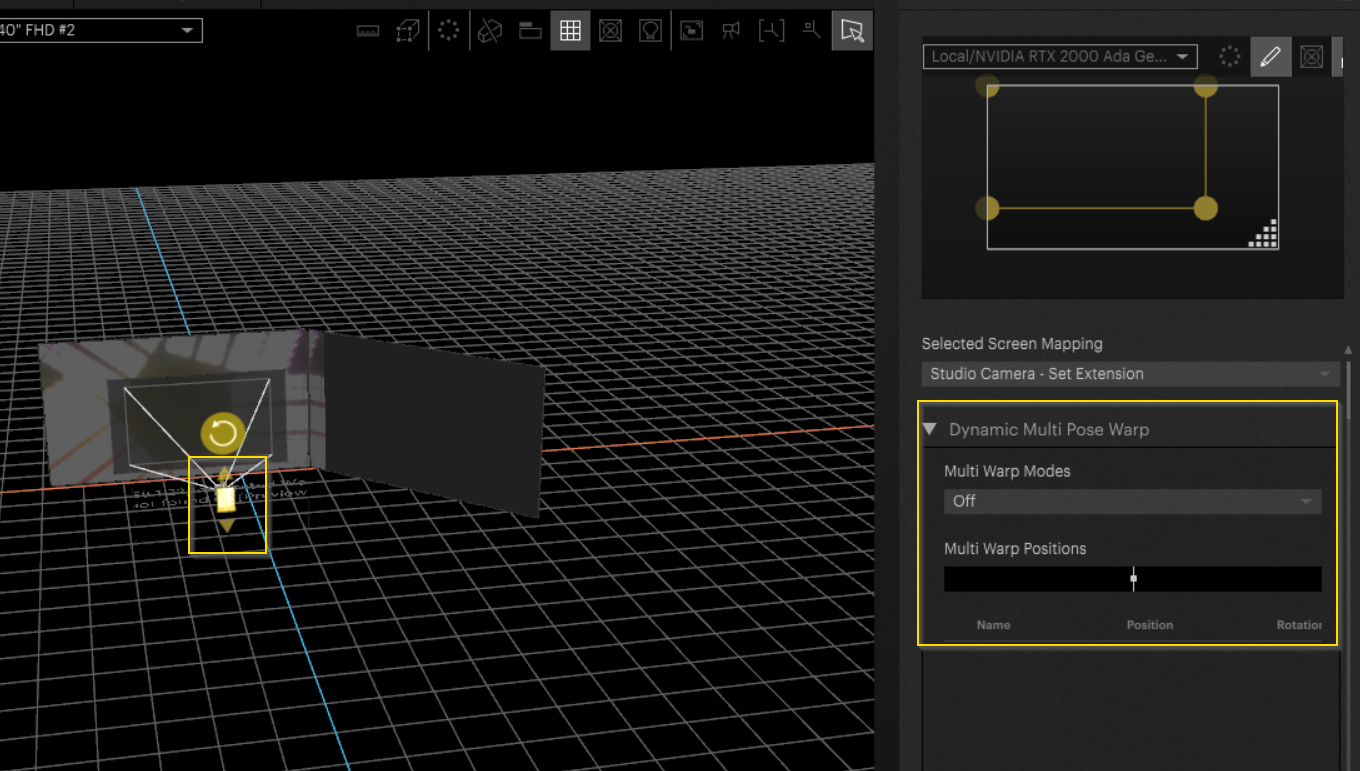
There are different options available:
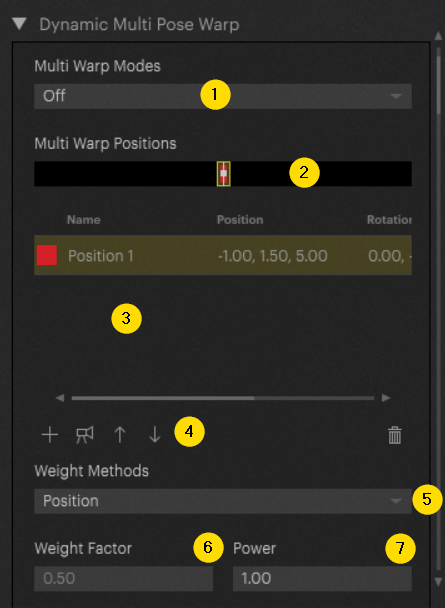
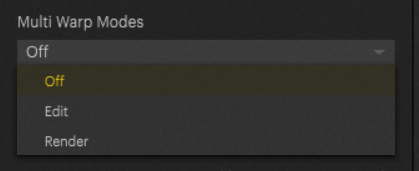
1: Off - no warping
Edit - edit the warp for current position
Render - final warp will be rendered (at least 3 positions have to be set to be able to blend between them)
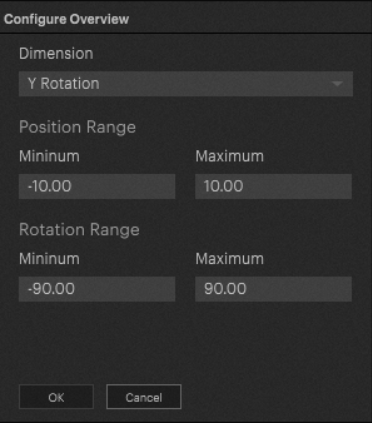
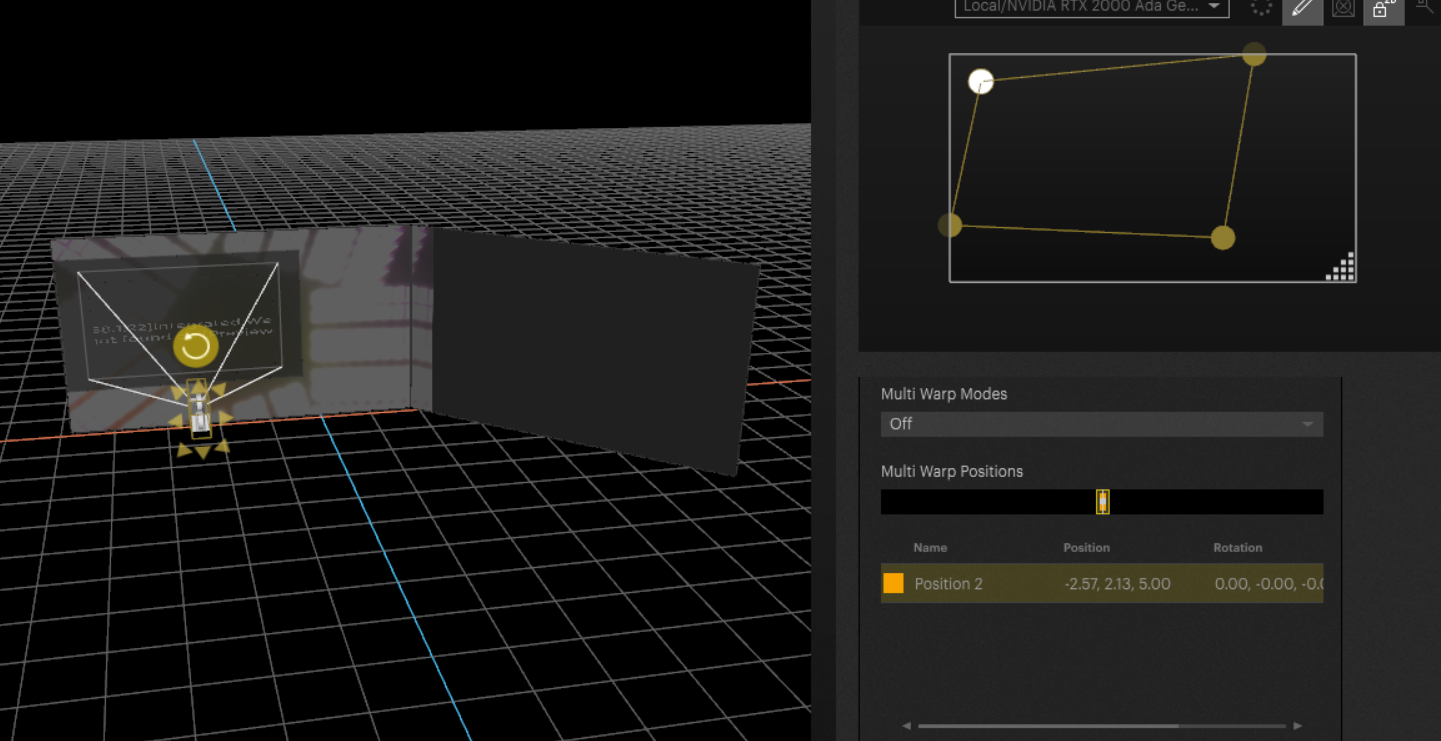
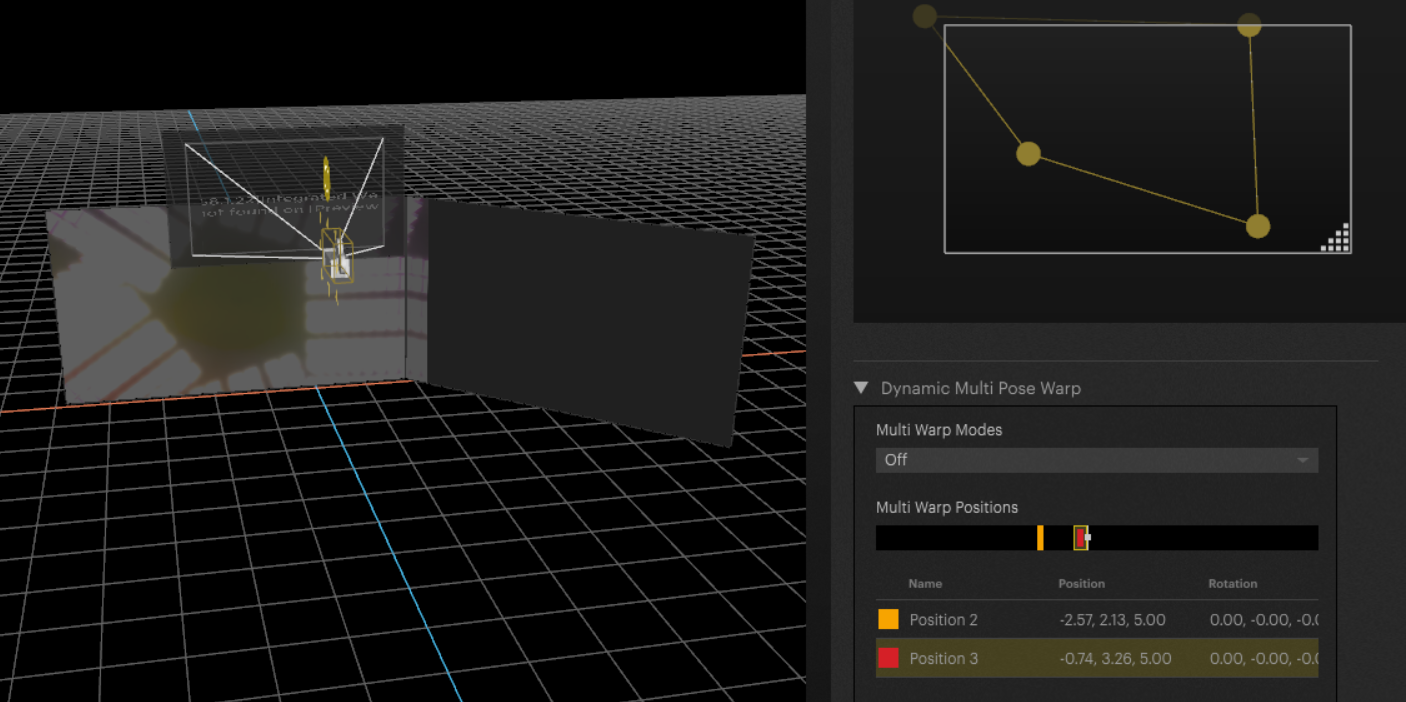
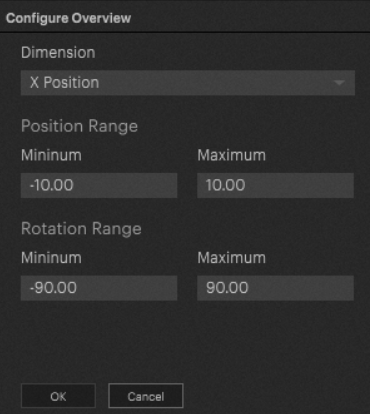
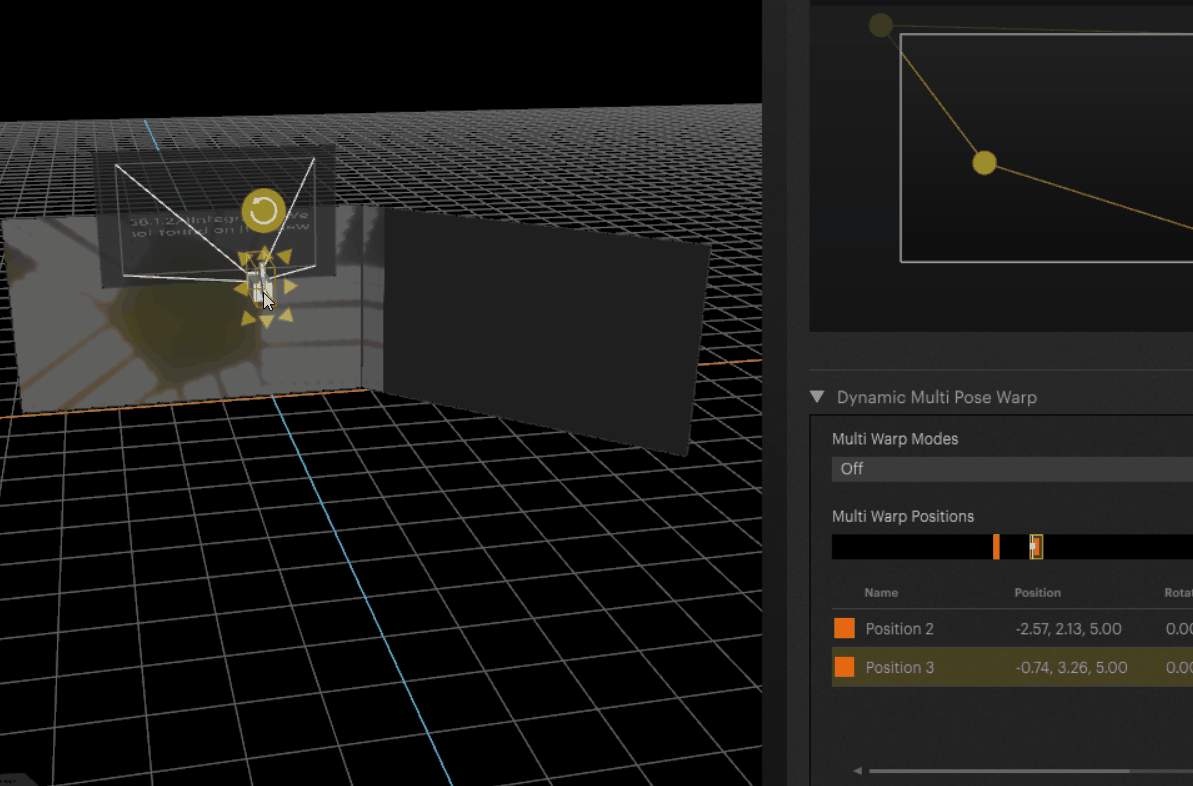
2: Multi Pose Warp positions. Right click in the black bar to access the advanced options. Settings are in meters for position range and degrees for rotation range. The black bars indicate the position of the warp on the selected Axis.
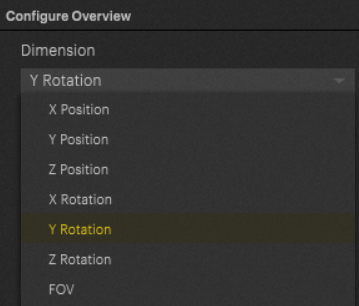
The black bar shows the position/rotation of the studio camera depending on which dimension you have chosen.
3: Saved positions: Move your physical camera that is linked via tracking to your Studio Camera to certain positions and save these with dedicated warps.
4: Add position, Update selected position from camera and change order of saved warps. The order should be done without intersections, so that the blending between the warps is working as expected.
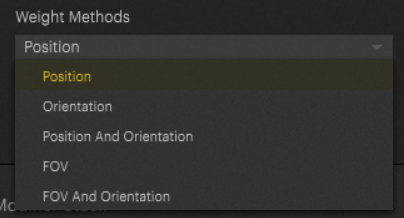
5: In Weight Methods drop-down, you can select which parameter should be used for blending between the warps. For a fixed PTZ, it would be FOV And Orientation. And for a prime lens movable Camera it would be Position and Orientation.
6: Weight Factor is a fixed value and can't be changed.
7: Power for the weight can be changed if a weight method with two parameters is chosen. With the factor, you can decide which of the two parameters should have more weight.
Adding Positional Warpings
To add positional warps, move the camera, ideally through the tracking system, and save the desired warping at the position by pressing +.
To add further positions, move the camera again and change the warp at the new position:
Tip
Remember to set up the correct dimension in the configuration, otherwise the positions won't be displayed in the black progress bar:
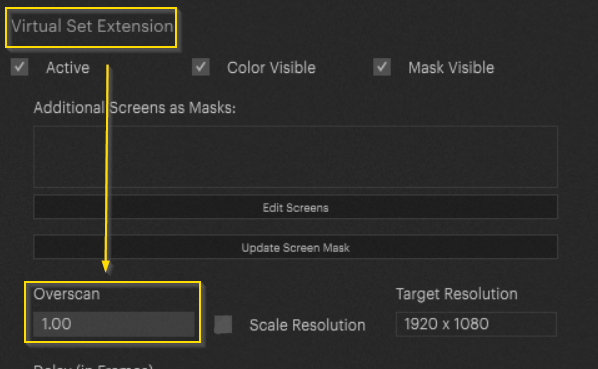
Overscan
By adjusting the warp, we encounter the problem that we can “warp out” of the boundary of the set extension inside the camera. To avoid this, we can set an overscan in the camera settings. This setting is important for pos warp setups. The setting is in percentage. A value of 1.2 creates an overscan of 20%. The oversan should be as less as possible. So, a factor of 1.05 should be fine in most cases. Furthermore, please uncheck the Scale Resolution checkbox.
PIXERA 2.0.65 | 24 July 2024 | CL