 Contact Us


Disclaimer
Virtual Production is a complex topic. It is mandatory to understand the basic setup to be able to advance to the advanced techniques (For example, Set Extension and Multi-Pos warp).
Furthermore, it is mandatory to understand all the basic principles of PIXERA.
Here is a list of all the VP related documentation in chronological order:
Unreal 5.2.1 Tips and Tricks (Performance and Testing)
PIXERA Connect, an Unreal Plugin - General Usage
PIXERA Texture Sharing to Unreal
Studio Camera (Virtual Production)
Set Extension (Virtual Production)
Studio Camera Setup
Import the studio camera in the “Screens Tab”:

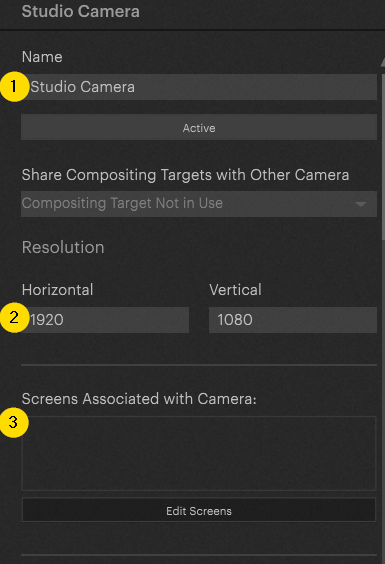
1: Editable camera name
2: Camera resolution
3: Mapping the camera to selected screens
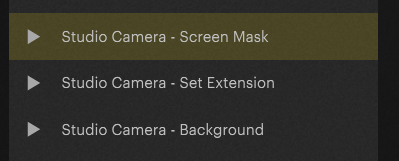
Switch to the compositing tab.
In the Compositing Tab, PIXERA automatically creates Screen Groups for the Studio Camera. These are for the individual output planes of the camera, and they depend on what you have selected in the Studio Camera inspector:
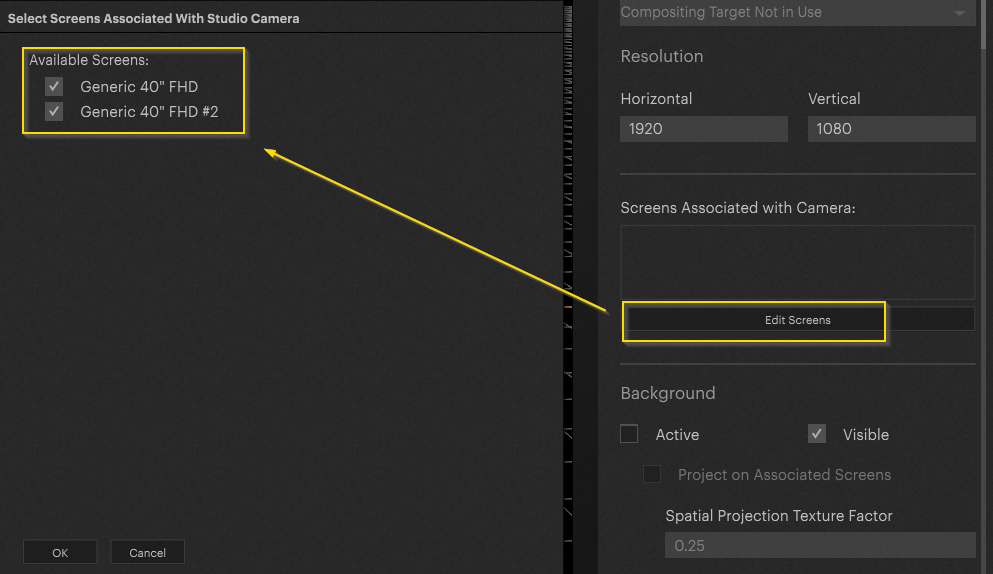
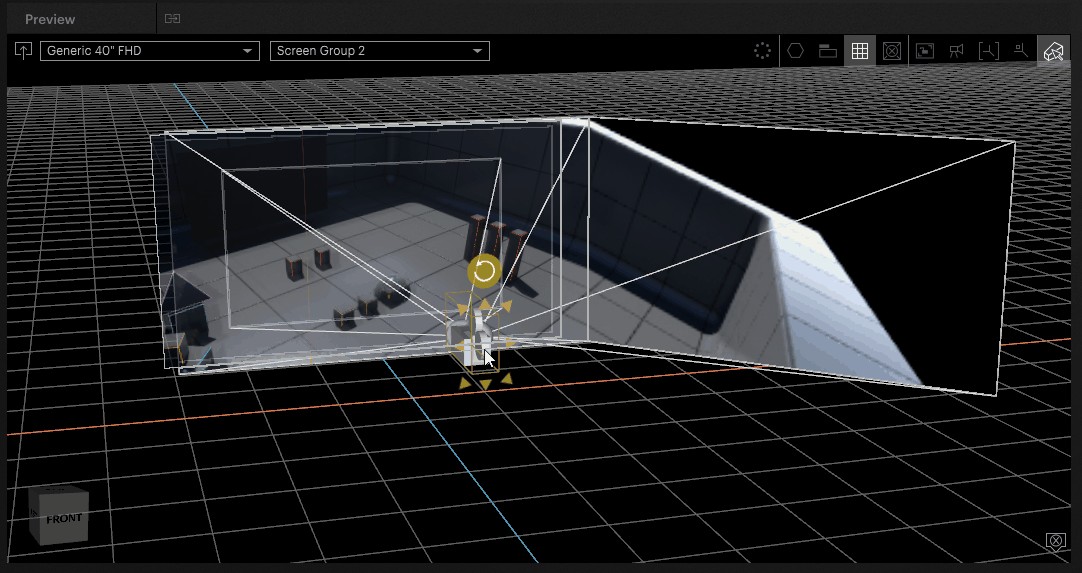
Navigate to the inspector after selecting the Studio Camera in the Compositing tab.
Hit edit and select the available screens / LED volume to assign the camera to the used volume:
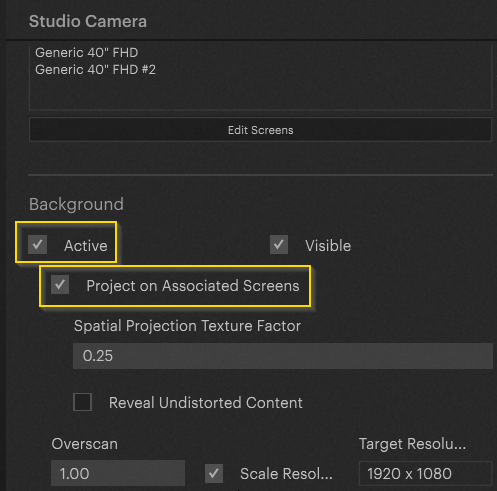
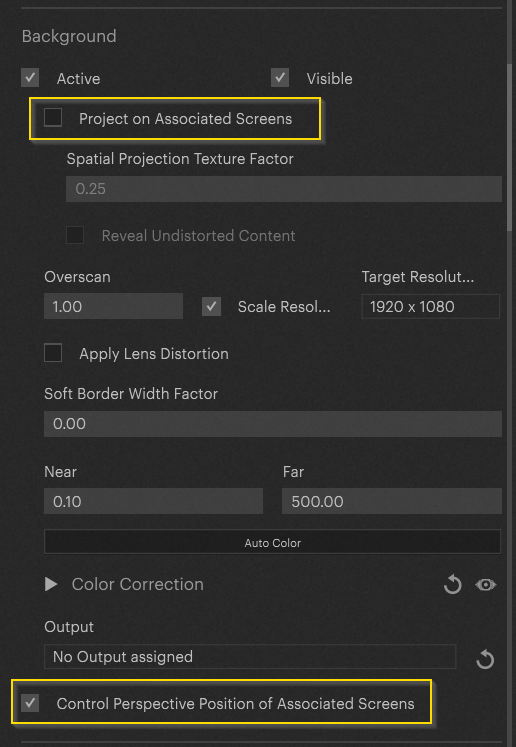
Scroll down and deactivate the option “Control Perspective Position of Associated Screens!”. If not deactivated, the camera and perspective of the screen will be linked together.
Note: depending on the setup it may not be necessary to link the perspective to the screen's perspective, such as in a Cave setup. This is optional for that reason.
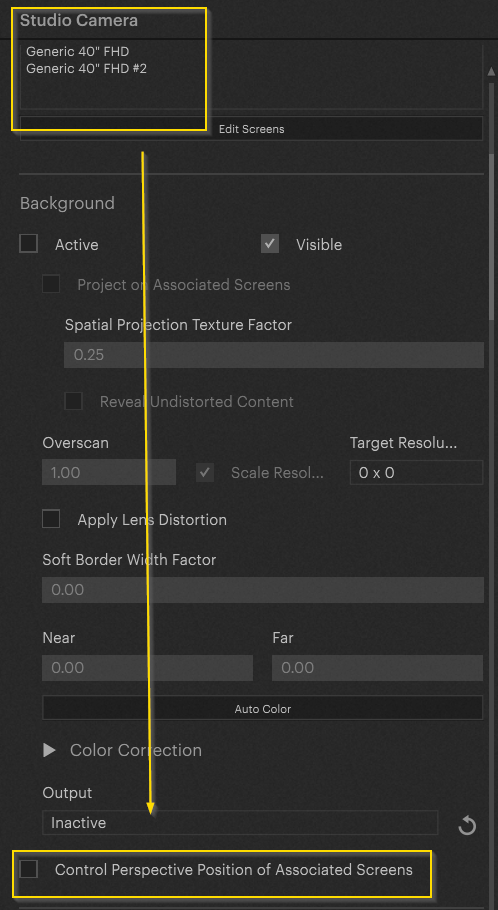
Activate “Background” and “Project on Associated Screens”. This will activate the background in the camera's viewport and back-project it onto the volume.
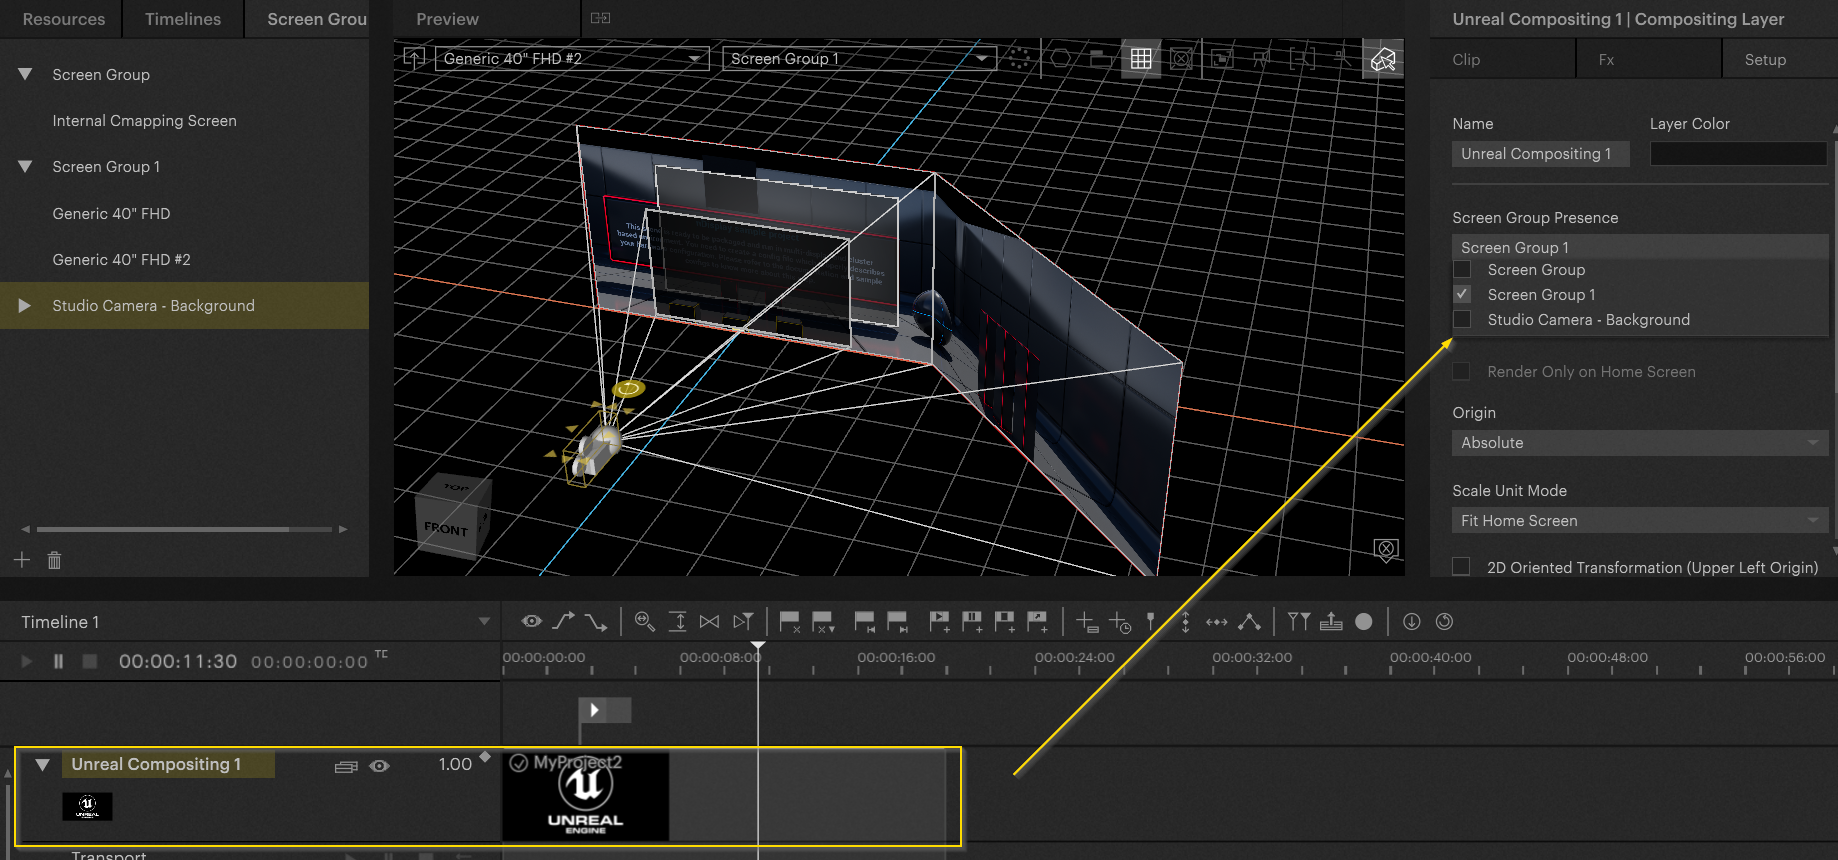
PIXERA created a new Screen Group for the added Studio Camera. Add the new Screen Group to the “Screen Group Presence” option of the layer. Otherwise, rendering will not happen on the Studio Camera.
In addition, select the resource, kill the Unreal project, recreate the nDisplay config and run it again: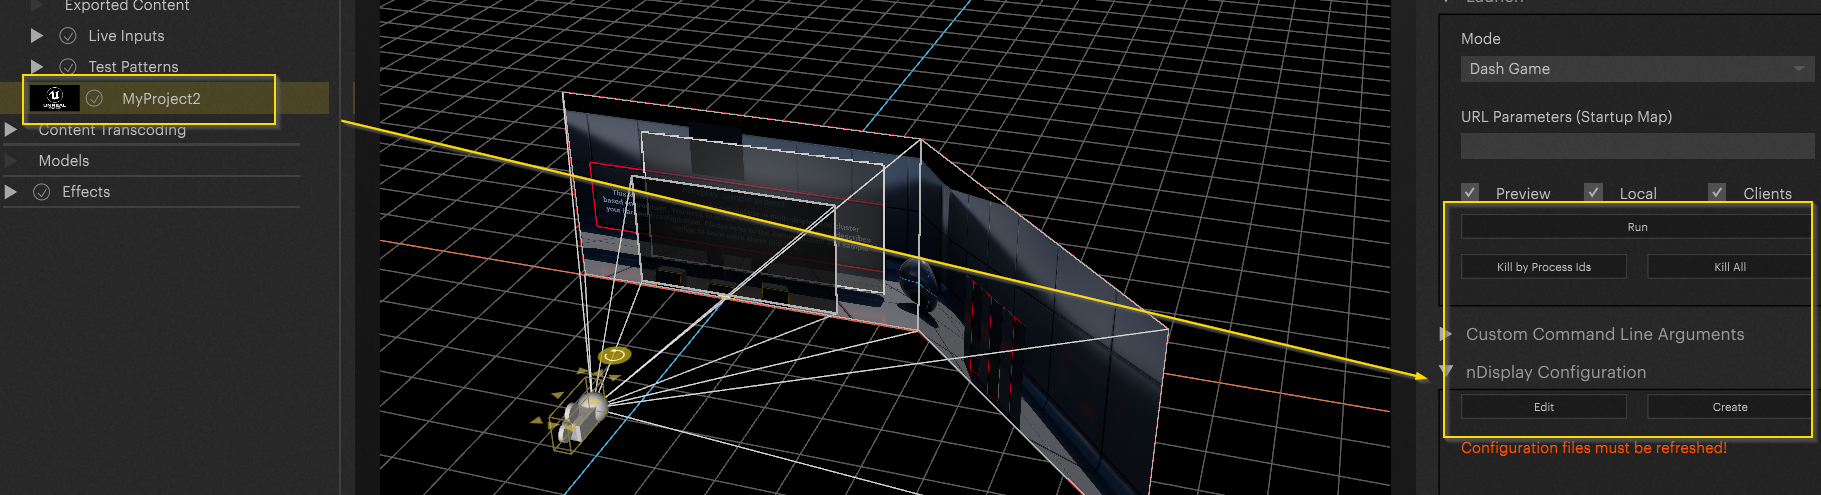
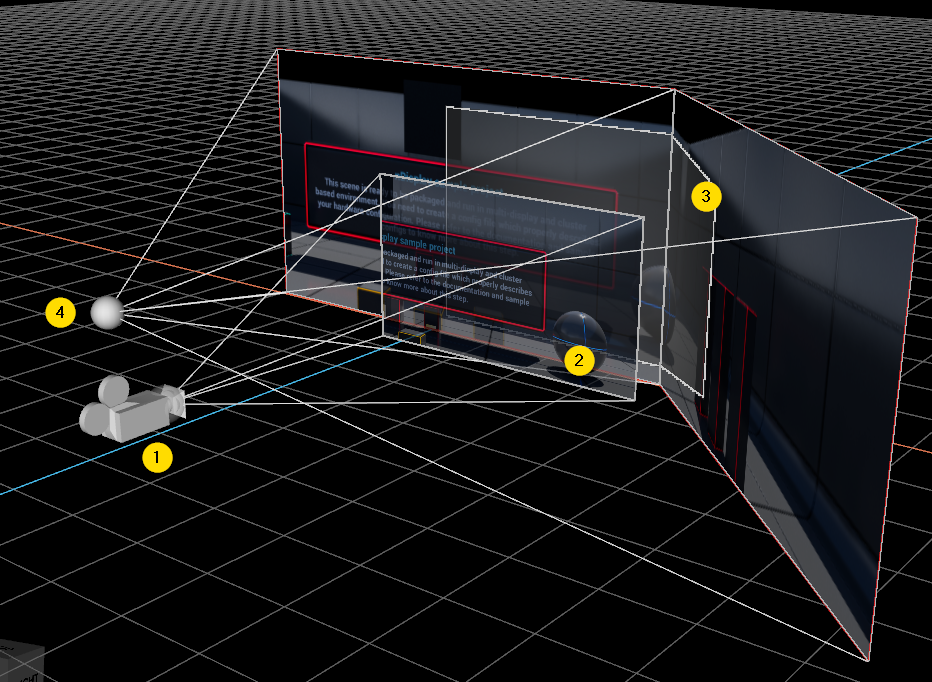
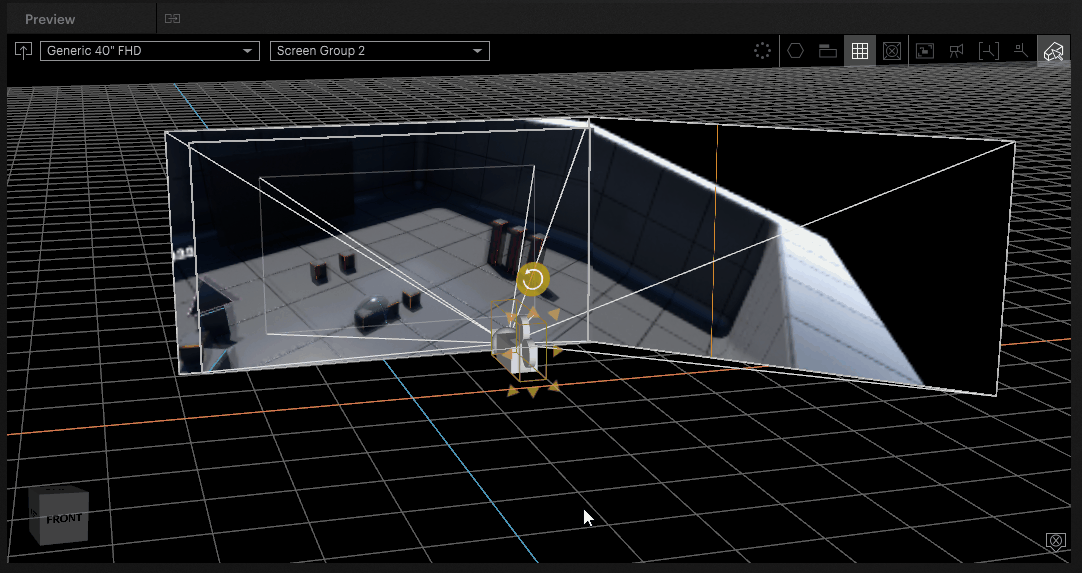
1: Studio camera
2: Camera background
3: Back projection on volume
4: “Eye” (perspective of volume)
Important Camera Settings
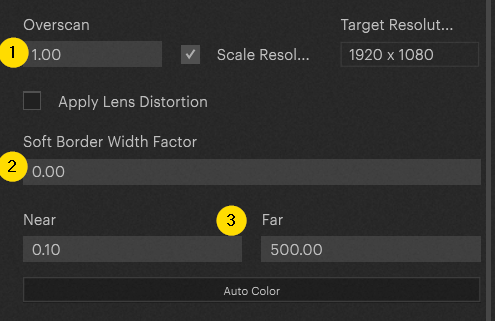
- Frustum data in a Virtual Production setup is always delivered via the tracking information. As the video chain (server, processor, led) adds slight delay, it is important to activate the overscan. Otherwise, the camera might catch parts of the outer frustum during camera movement or movement in general.
- This option bleeds out the viewport (like a mask).
- Far: same option as in the Unreal Settings. By increasing this setting, the render distance is increased (in our example sky will be rendered).
- Near: sets up the near render distance. If set to 10, everything from 0-10 won't be displayed in the frustum.
Cave Setup
It is also possible to set up a so-called “Cave Setup”. In this case the camera is not individually controlled but rather linked to the screen's perspective.
This setup is a lot less performance intensive and allows for an easier setup.
To set this up, deactivate the back projection and activate “Control Perspective Position of Associated Screens”:
PIXERA 2.0.65 | 24 July 2024 | CL