 Contact Us


IMPORTANT
Pixera Connect only works with an active network connection. The loopback adapter does not work!
Disclaimer
Virtual Production is a complex topic. It is mandatory to understand the basic setup to be able to advance to the advanced techniques (for example set extension and multi pos war).
Furthermore, it is mandatory to understand all the basic principles of Pixera.
Here is a list of all the VP related documentation in chronological order:
Pixera Connect (Unreal Engine Plugin)
Studio Camera (Virtual Production)
Set Extension (Virtual Production)
Installing Pixera Connect
To access the Pixera connect unreal plugin please download it here:
Navigate to the unreal project folder (IMPORTANT: not the install path!). Create a “plugins” folder in here:
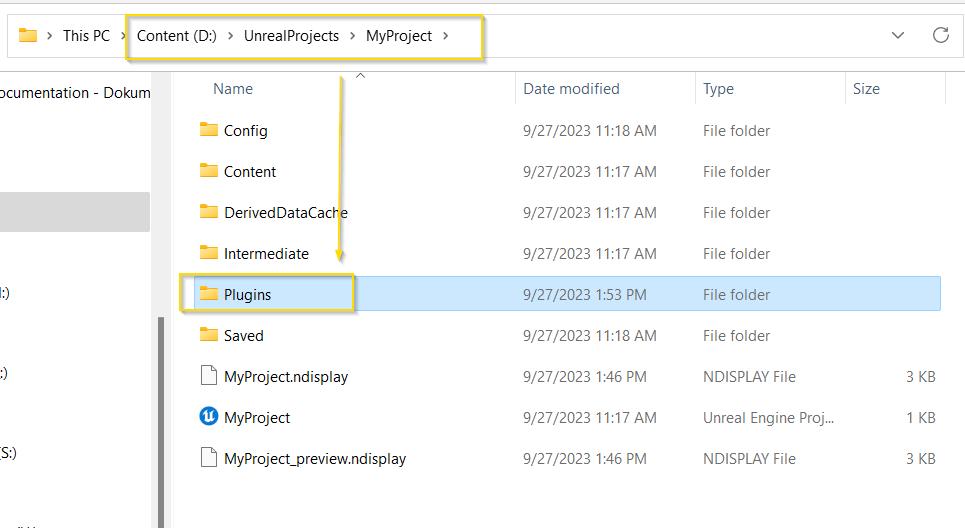
Unzip the download in this folder. It must look like this:

In case you are already running an unreal project (or followed the guide), kill, create, and run the unreal engine. Besides the “Resource” tab you can access the “Unreal” tab:

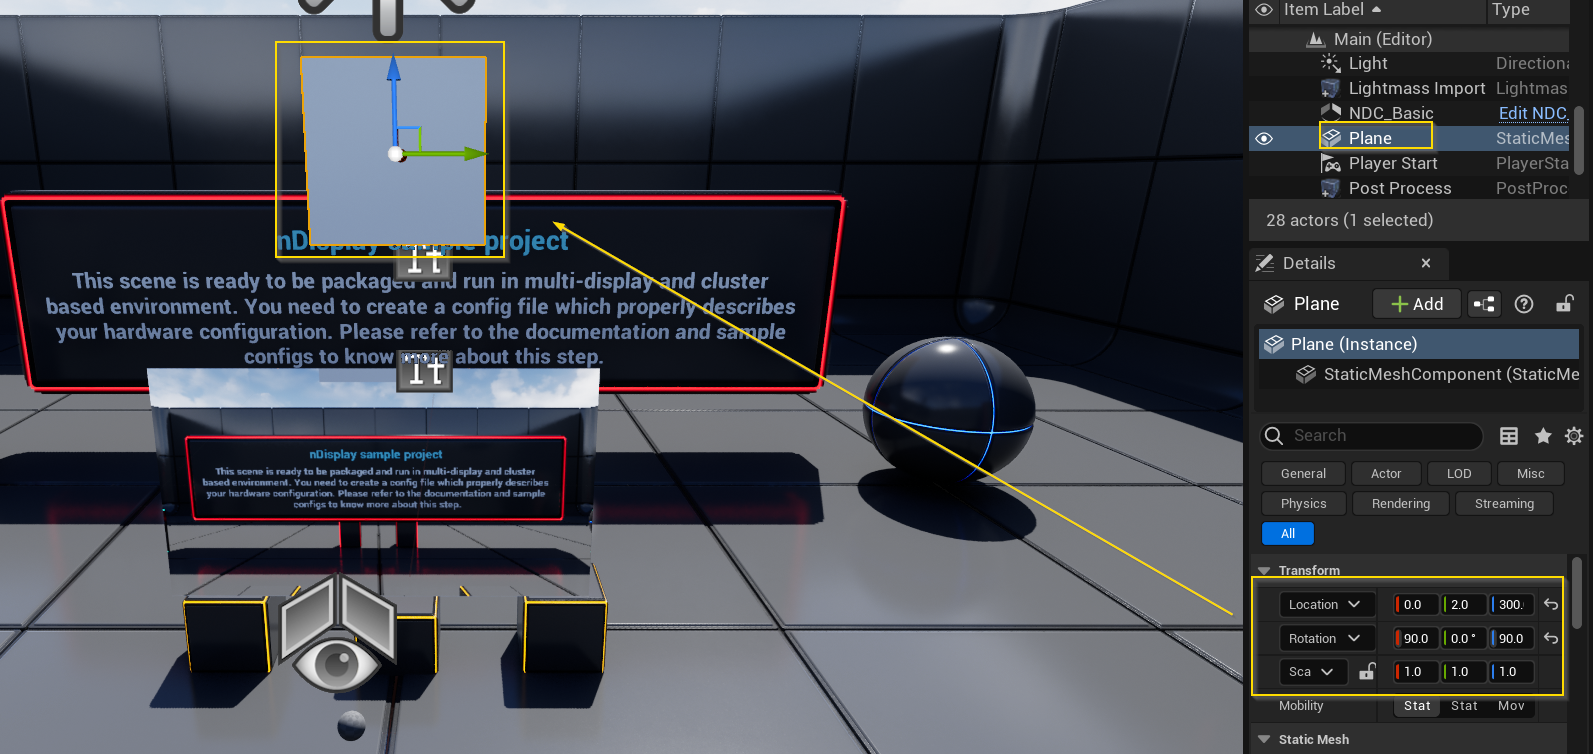
Certain objects are now editable. These must be set to movable inside Unreal otherwise they can't be controlled and will not show up.
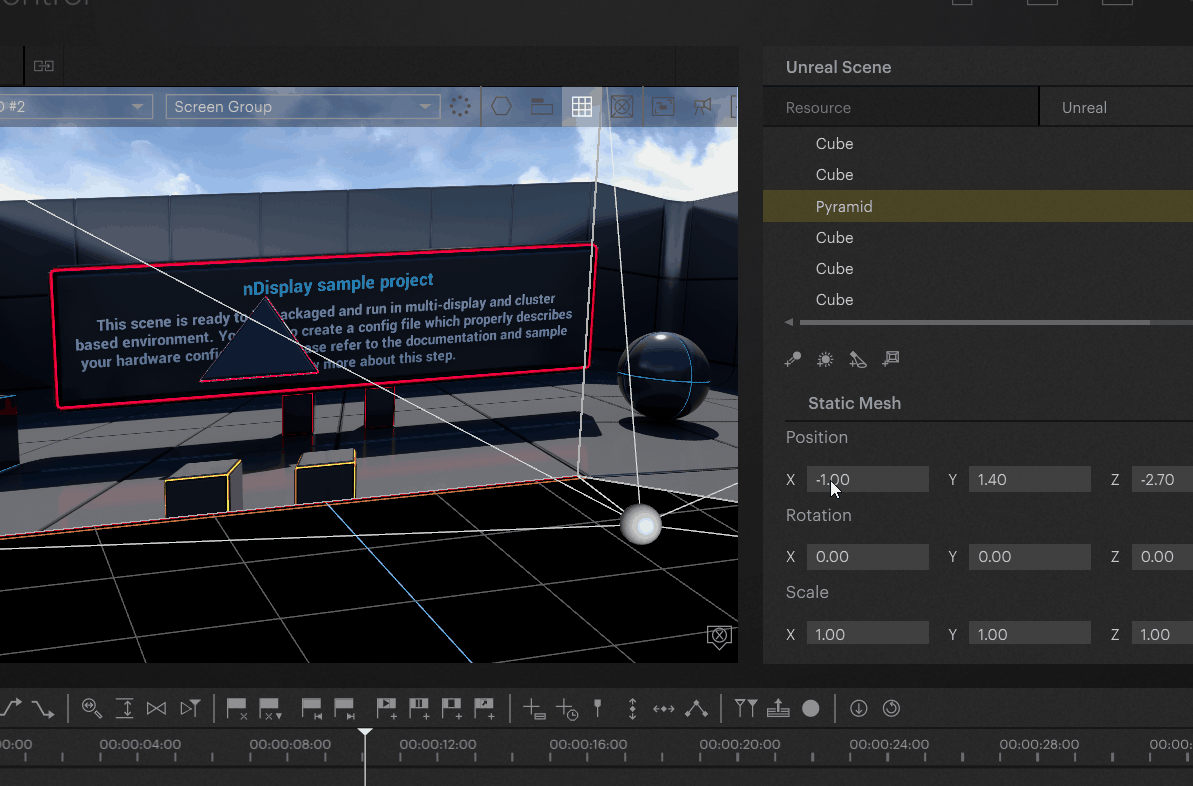
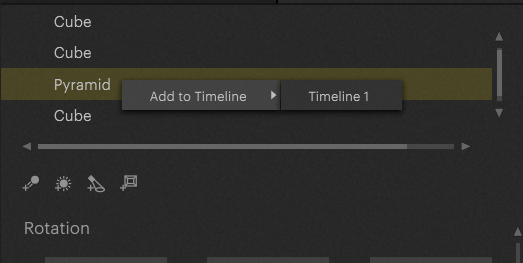
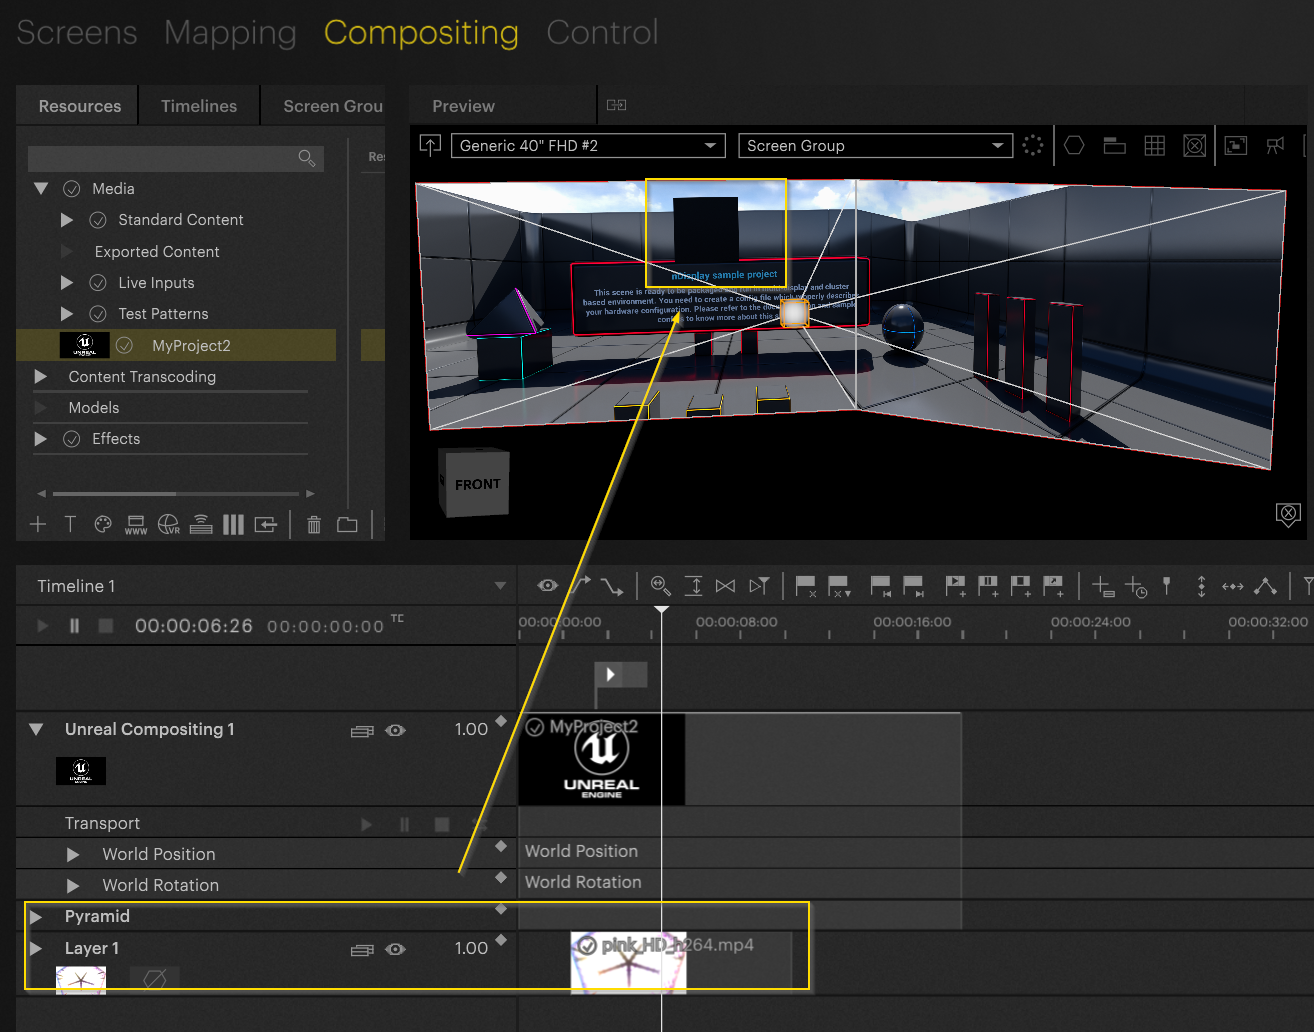
These parameters can be exposed to the timeline by right clicking on the item (multiselecting available):
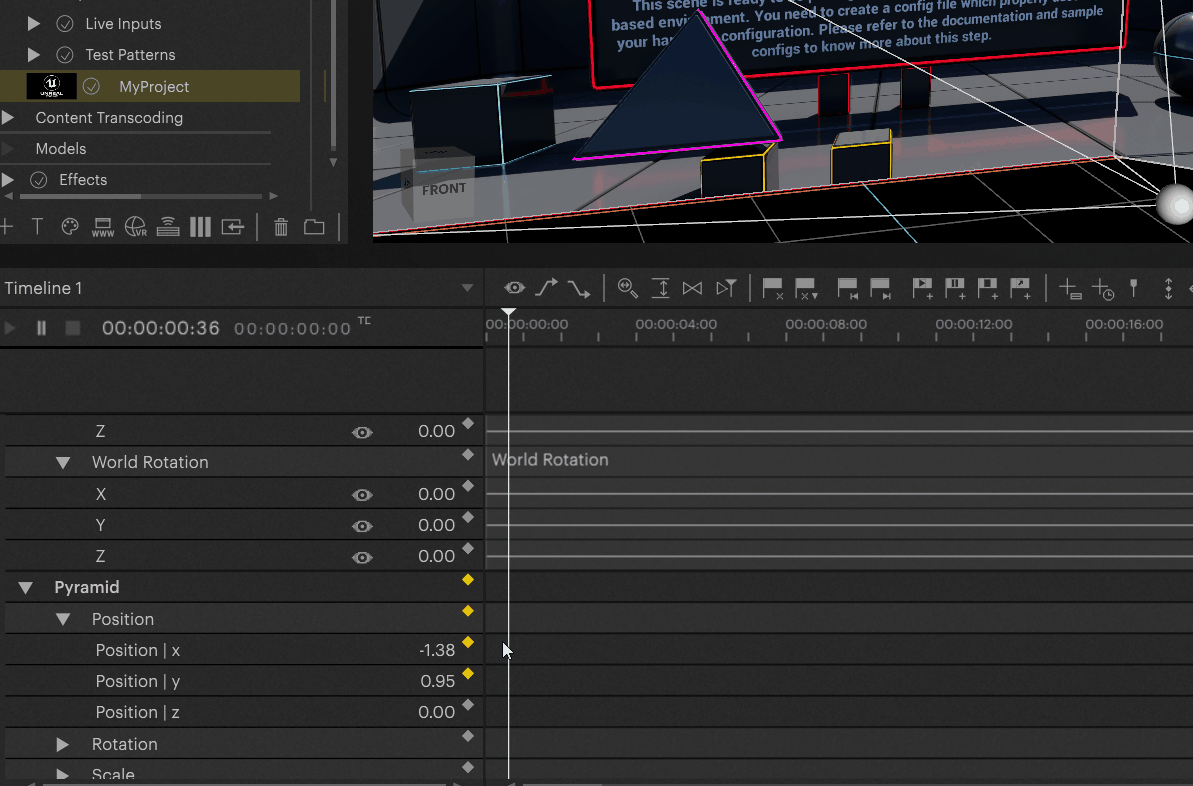
Save the keyframes once to create a timeline object. Afterwards the keyframes are editable and animations can be created:
Texture Sharing Pixera to Unreal
Open the Unreal engine via Epic Games launcher or Desktop link and start your project (nDisplay test project in our case).
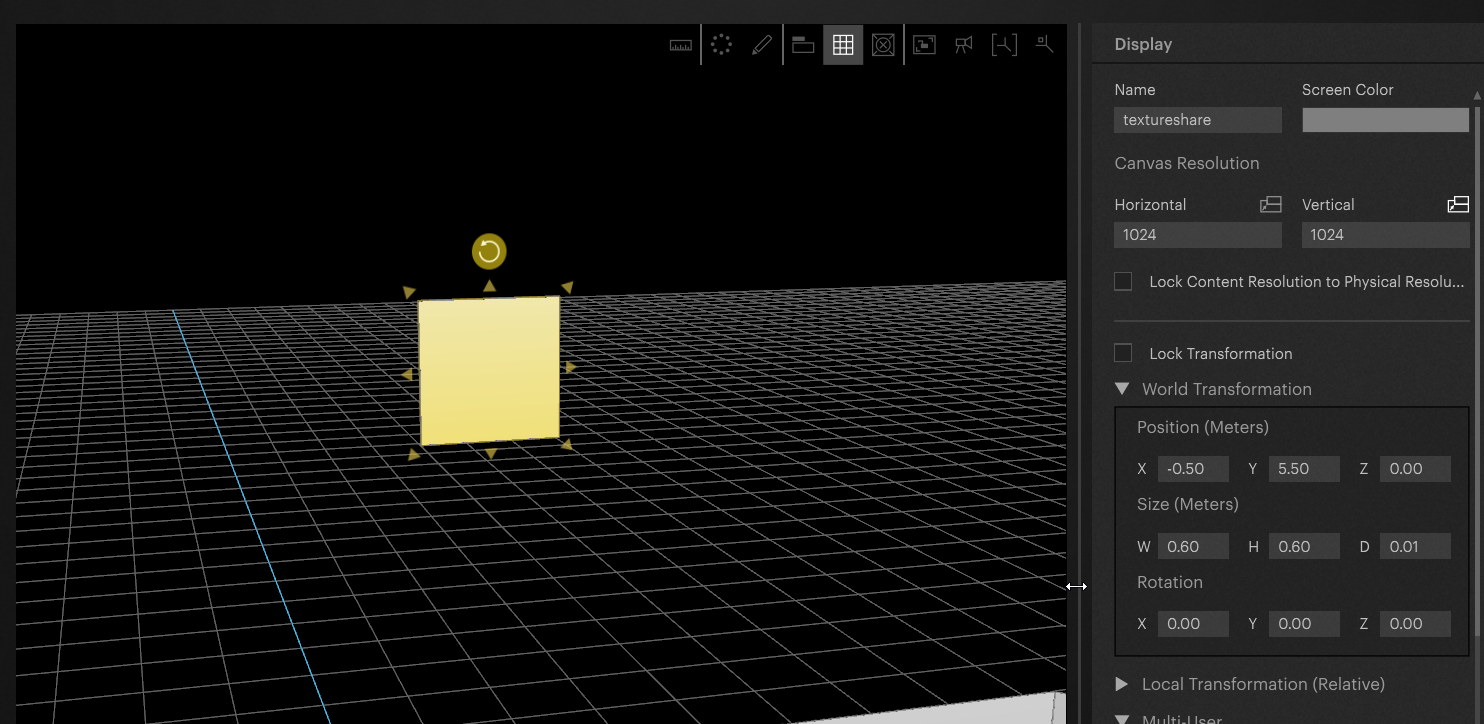
Add a plane (or any other shape):
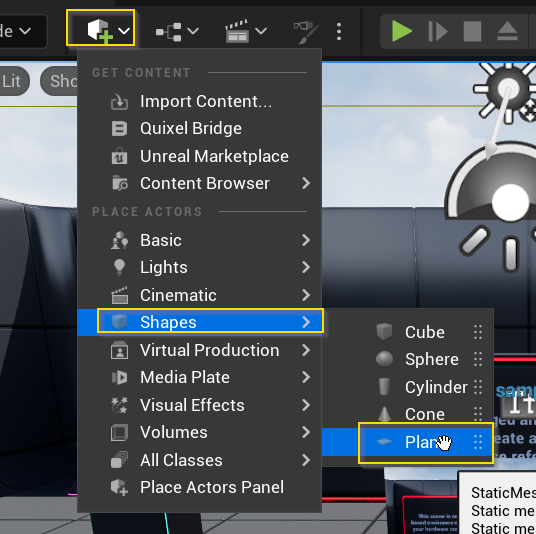
Select the plane and set the desired settings:
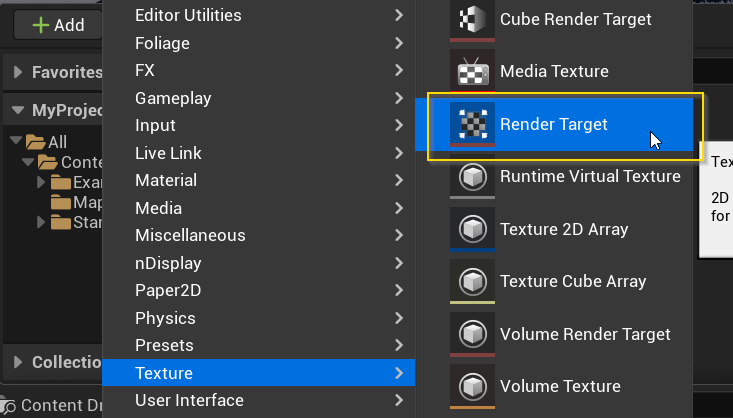
Add a render target texture:
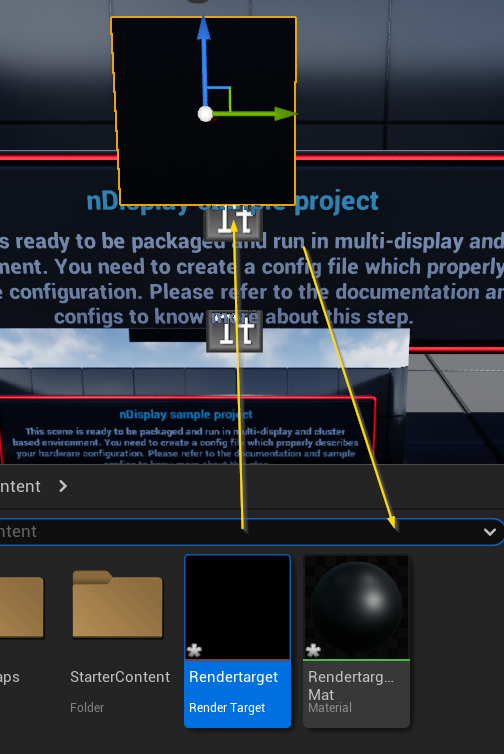
Drag and drop onto plane. Unreal will automatically create a material:
Double-click the texture (Render target in our case) to open the texture editor:

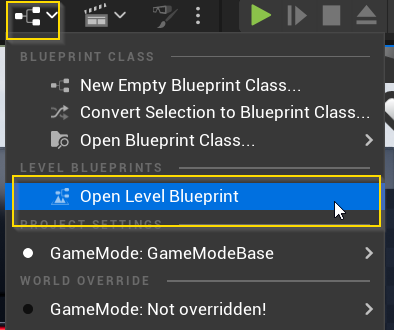
Open level blueprint to set the correct texture source (Pixera):
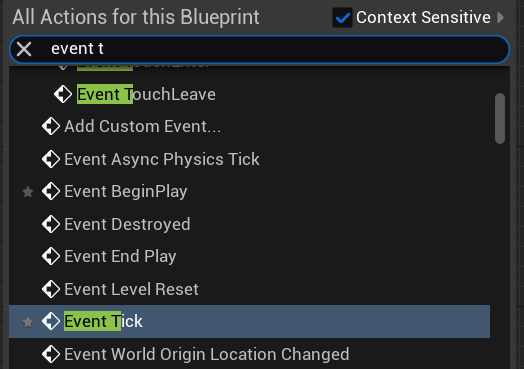
Right click to add an event tick:
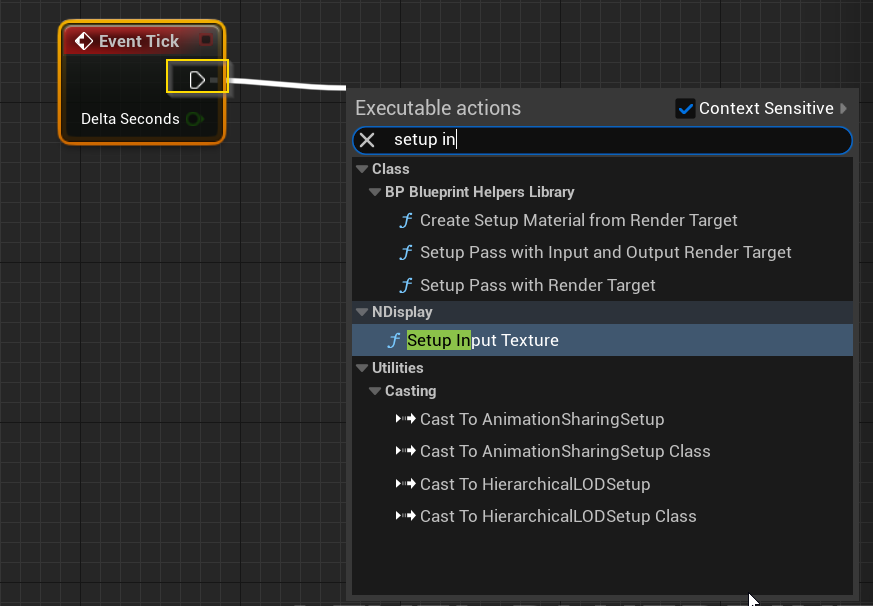
Setup Input Texture ("pull node to workspace to access options):
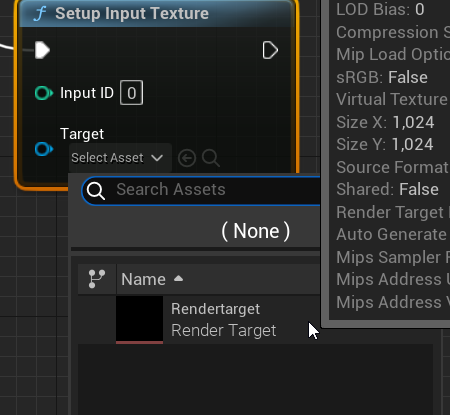
The Input ID refers to the index in Pixera (described later down) and the Target must be set to the “Rendertarget” you have created:
Save and close your Blueprint.
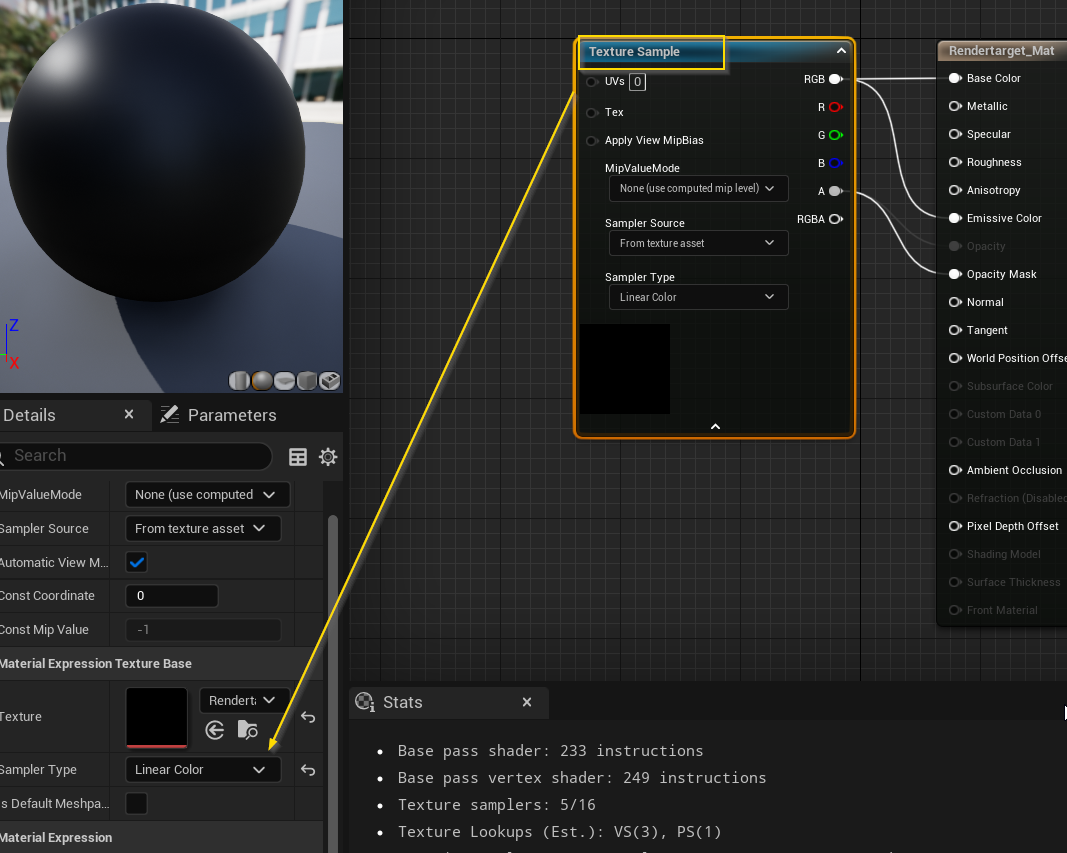
Open the material created earlier.
Select Linear Color in “Sampler Type”:
SAVE PROJECT (FILE -→ SAVE ALL)
Important
Texture sharing does not work in preview!
Texture Output from Pixera to Unreal
We created a new screen to output content to Unreal (dummy screen). The imported screen must have the same output resolution as well as aspect ratio. After we have set a 1024x1024 plane in unreal we set them in Pixera as well:
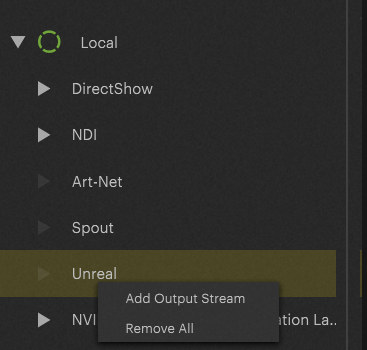
Add output stream for Unreal on your Render client in the mapping tab:
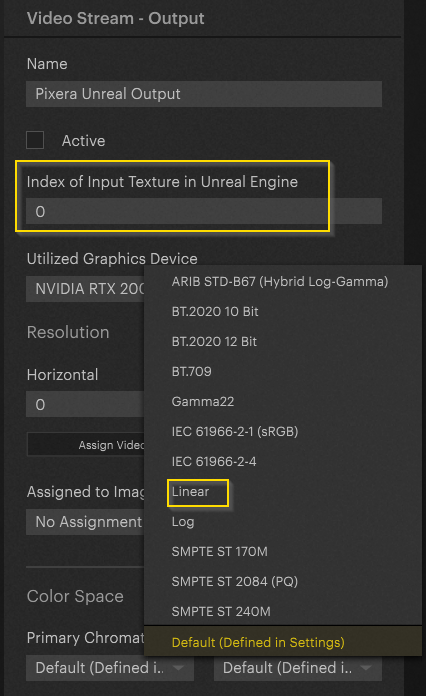
Here we must set up the correct index (the index that was assigned previous in the blueprint node → called input ID in unreal). Furthermore the “Color Space Transfer Characteristic" must be set to linear:
Content is now being rendered on the created plane inside the unreal scene (black in our scenario as the rendering does not happen in preview):
The content will now be rendered with its reflexions inside the unreal scene (screenshot taken from output rendering):

Pixera 1.9.143 | 21. September 2023