This guide explains how to set the graphics card to 10Bit. The Pixera renderengine should detect the settings of the graphics card and automatically adapt its settings.
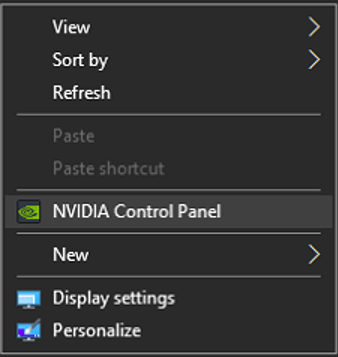
- Open the context menu on the desktop (right click on the desktop).
- Click on “NVIDIA Control Panel”.
- In the NVIDIA Control Panel click on “Change resolution”.
This submenu should be visible if the “Display” tab is unfolded.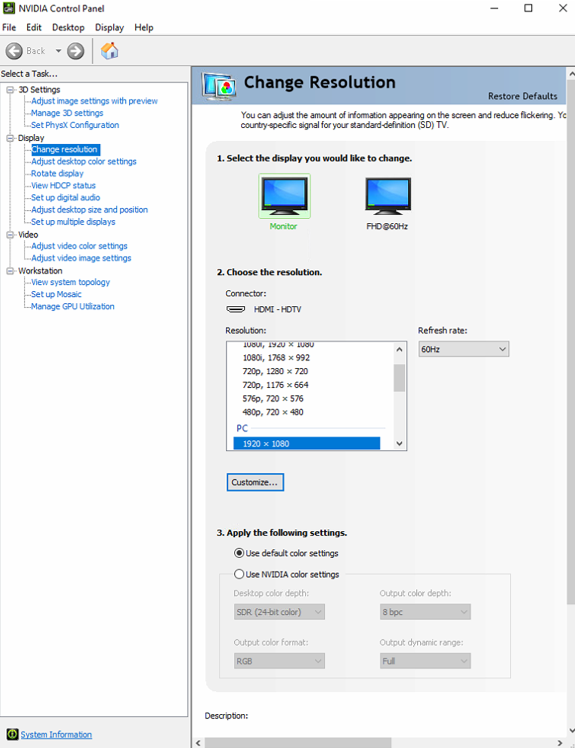
- After entering this menu, you can see your connected displays.
Click on the display where you want to change the “Output color depth”.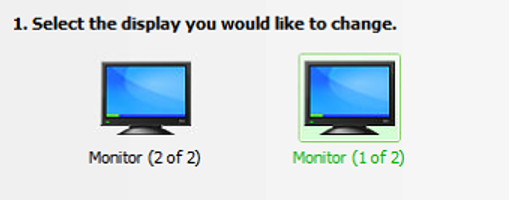
- Near the bottom in this window, you can see “Use default color settings” and “Use NVIDIA color settings.
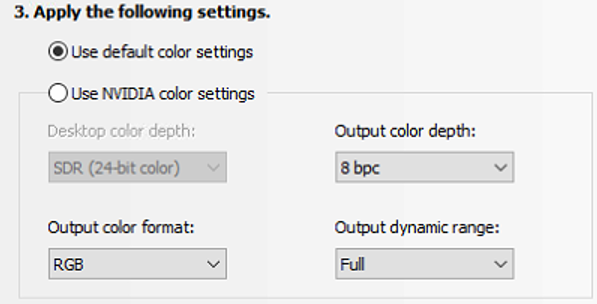
- In “Output color depth” you can now switch to “10 bpc” which means “10 bit per channel”.
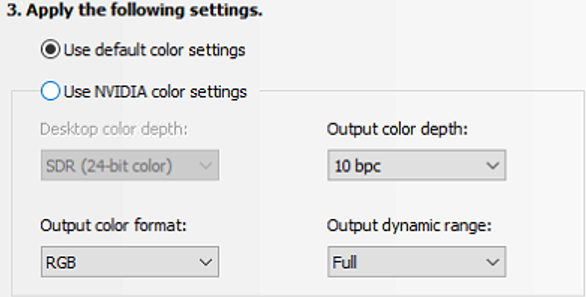
- Simply click on “Apply” to save your changes.
To check if the Pixera render engine adapts the settings correctly you can utilize the "On-Screen Statistics". This statistic can also be activated and deactivated by simply using the shortcut "Ctrl+9".
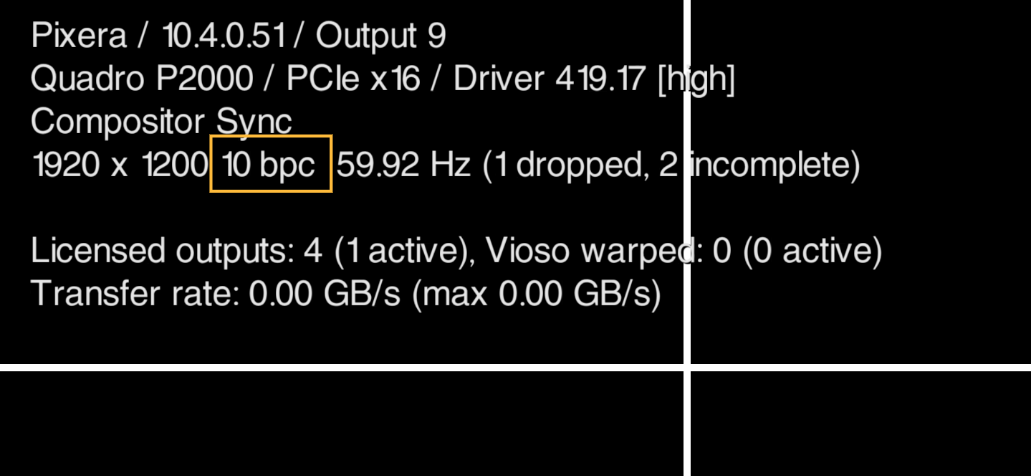
To read more about the On-Screen Statistics please have a look on the related article - On-Screen Statistic
Forcing the renderengine to display 10bit:
In some rare cases the renderengine doesn't recognize the 10bit correctly, so you have to force it.
You can do it with adding the following line to C:\ProgramData\AV Stumpfl\RX\user_settings.lua
context_settings.color_bits = 10
You can open the .lua file with a text editor and add it after the first entry and save it.
Then your render display information should display 10bpc like my screenshot above.
 Contact Us


