Hard Disk stability check
In the following points, you can carry out short tests as well as long-term tests if you have suspect problems with the respective hard disk.
IOmeter
- First download Iometer, chose a destination folder(direct link for Windows)
- Unzip the downloaded file and run the IOmeter.exe

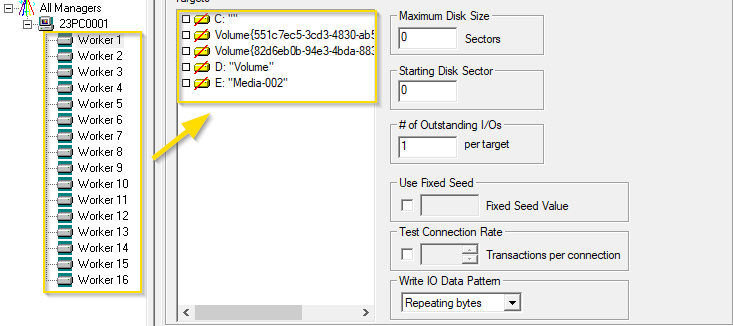
- Press on the Manager and select the number of workers, maximum the number of available cores of the CPU.
On the right side of the workers select the target (respective hard disk)Note
You have to do this step for each Worker individually!

- The maximum disk size should be set to approximately 40 000 000 (~20GB) for each worker. The size should be chosen based on the free space of the hard disk and the expected speed.
Warning
If this isn't set or to high, the entire hard disk can fill up to the maximum.

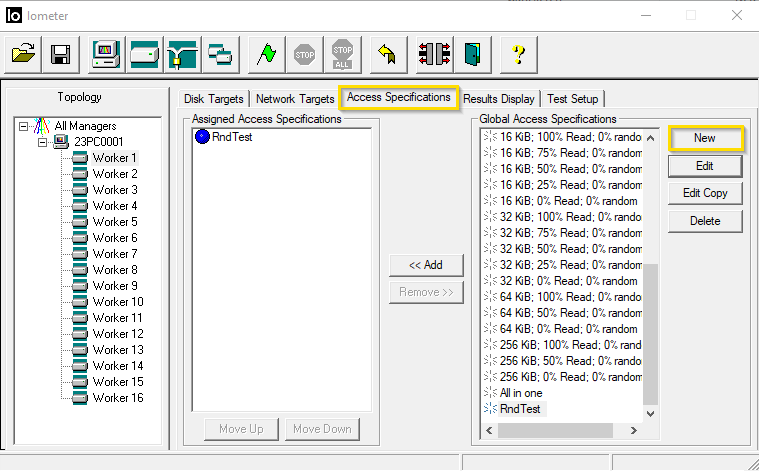
- Press on the tab “Access Specifications” and chose a New “Global Access Specification”

- At the top left set the name of the test as desired.
Below this, set the transfer request size to a value (3 megabytes)
Set Percent read/write distribution to 100% read. Now press Ok.

- Press the “Results Display” tab and check the box “Record last update results to file”.
set the update frequency (seconds) to the interval of the update (1-3 seconds recommended)

- If you press the green flag it will first start to make a file on the already chosen hard drive. On the bottom of the window it will show "preparation".
Attention! Duration of the preparation depends on the write speed of the hard disk used.

- Then the live statistics are displayed like in the picture.
The test runs until you stop.

Graphical Representation
- Download hwInfo, run the installer and start the program.
- Start with only sensors

- Search the Read Rate of your SSD Sensor and double-click on it


A graphic of the last 8–9 minutes is displayed, it is displayed when the reading speed has dropped.It is recommended to run IOmeter with HwInfo at the same time!
PIXERA 2.0.167 | 30. August 2024 | R.F.
 Contact Us


