 Contact Us


Creating an NDI Output
Creating an NDI output from Pixera is similar to assigning any other output. These settings are found in the Mapping (1) >Live Tab (2)

From here we can twirl down the engine that we want to assign the NDI output on and select “NDI” (3)
In the inspector we can see: “Add NDI Output Stream” (4).
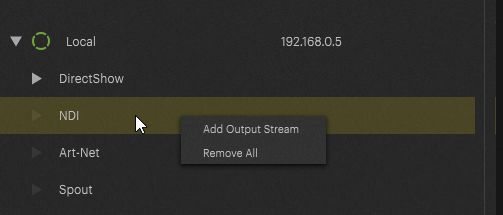
Alternatively, you could right click on “NDI” and click “Add Output Stream”
Once you have generated your stream you assign it just like any other output!
Make sure to press F5 to activate it!
NOTE
NDI Outputs “cost” an output just like a physical output (or Art-Net/Spout/Unreal) would.
NDI Output Options

Note!
PIXERA does not support audio output via NDI.
Clock Video
This checkbox allows to use the NDI sync as Pixera Engine Sync, if enabled the Engine will sync to NDI. This is incompatible with (Syncboard) swap group and VSync.
This option is only available for NDI Output Streams.
Warning
If any virtual screen/display in your Pixera Project is connected to a physical GPU output and that output is synchronized (swap group), enabling Clock Video can cause issues and lead to unstable playback.
Examples:
When Clock Video is not enabled, and a 50 Hz NDI stream is used while the output is set to 60 Hz, internal logic attempts to compensate by adjusting frame timing. In this case, every sixth frame is dropped to match 50 fps to 60 fps as cleanly as possible.
In a setup with 30 Hz NDI and 60 Hz output (Clock Video disabled), every second frame in the NDI output is skipped.
However, if Clock Video is enabled with a 30 Hz NDI stream and a 60 Hz output, playback quality can degrade significantly due to interference between the differing sync rates, resulting in unstable output.
On the other hand, if the project uses only NDI outputs, enabling Clock Video can be beneficial, as it allows direct synchronization with the NDI stream. In this case, NDI determines the exact output frequency.
Rule of thumb: Don't use it unless you only have NDI Outputs.
Pixera 2.0.40 | 25. April 2024 | M.B. | J.B.