 Contact Us


New to Screen Groups in PIXERA 2.0 is the ability to add Screen objects to multiple screen groups and assign layers visibility based on a new parameter in Setup: Screen Group Presence.
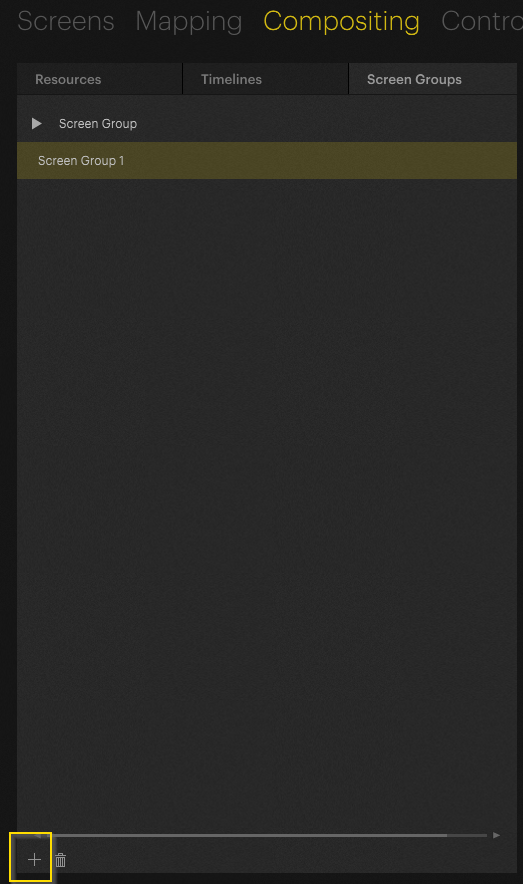
You can add a new screen group by clicking on the plus button in the Screen Groups tab:
You can rename the Screen Group by selecting it and changing the Name in the Inspector.
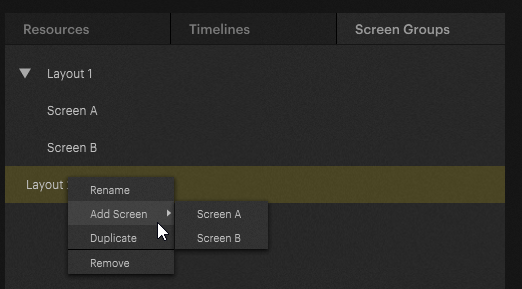
You can then right-click on the Screen Group and choose which Screen objects will be within this Screen Group.
Alternatively, you could duplicate a Screen Group that already has the Screen objects in it that you desire from this same menu.
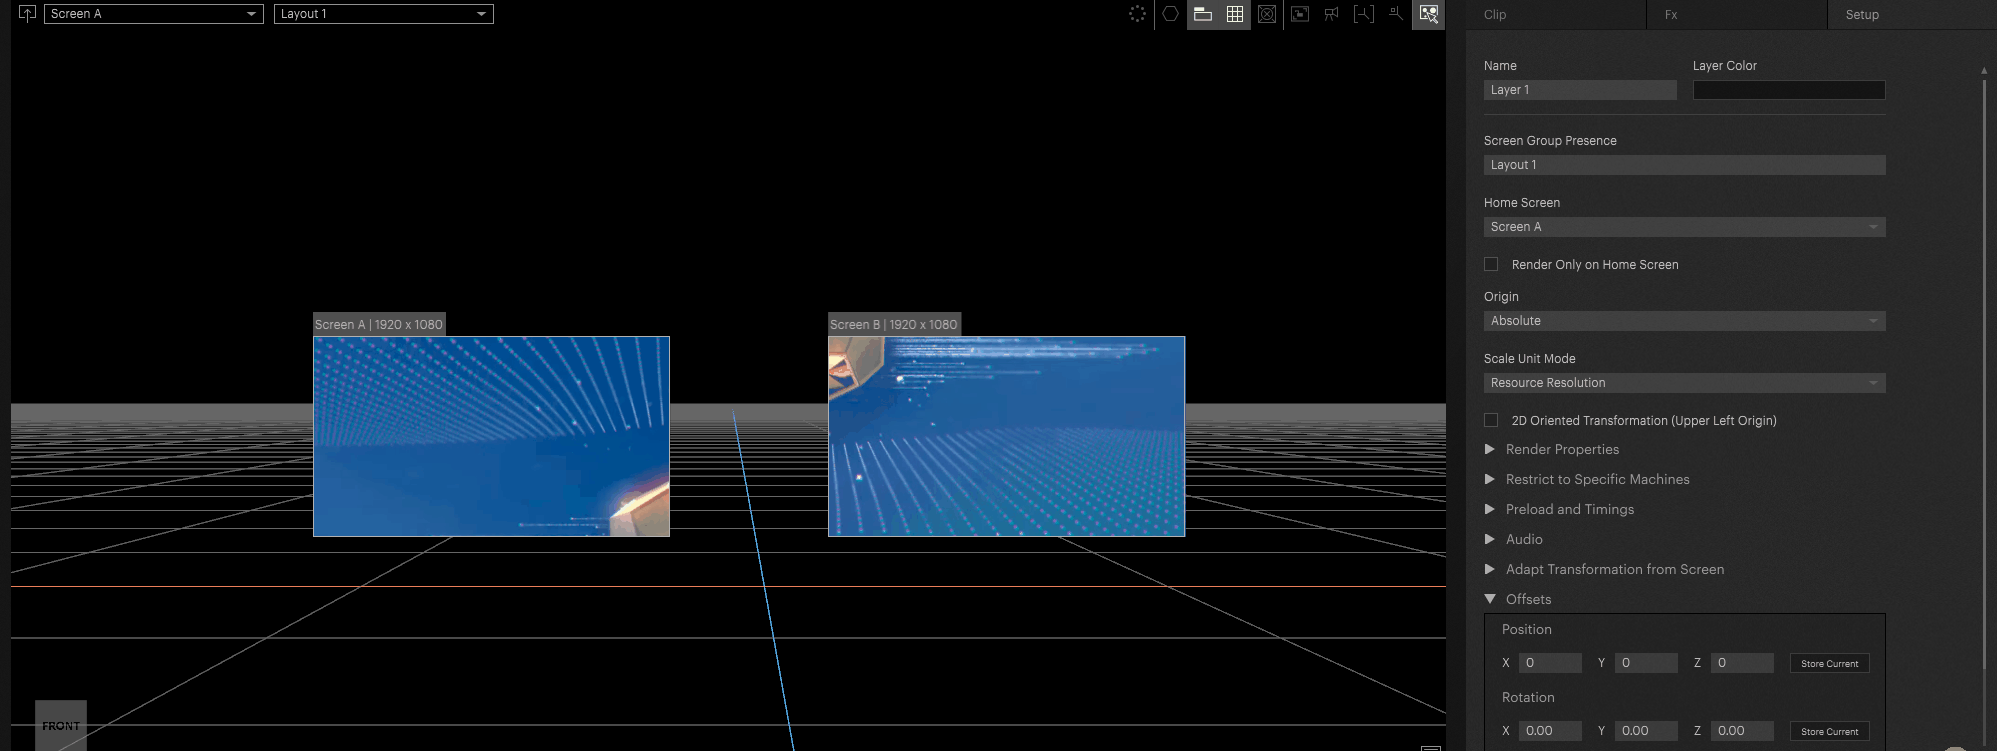
We can select which Screen Groups a layer appears in by selecting a Layer and going to Setup to find a new parameter: Screen Group Presence.

Screen Group Presence has replaced Screen Presence in 2.0
Additionally, there is an added option for each layer: ‘Render Only on Home Screen’ will render the layer only on its Home Screen, no matter what Screen Groups it is in.

Layers can appear in one or multiple Screen Groups by clicking on the check boxes in the drop-down menu:
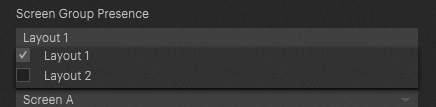
Layers must appear in at least one Screen Group
In the workspace, you will find two dropdown menus that define which screens and screen groups will be edited in the inner compositing when you dive in. The inner compositing space will then contain those layers that are present on the currently selected Screen Group, and not excluded from the selected home screen. That means that if you set a layer to render only on its home screen, it will only show up in inner compositing if that home screen is selected in the first dropdown. If the layer is not present on the Screen Group that is selected in the second dropdown, it will also be hidden. The Screen Group dropdown allows you to choose from all Screen Groups that the home screen selected in the first dropdown is part of.
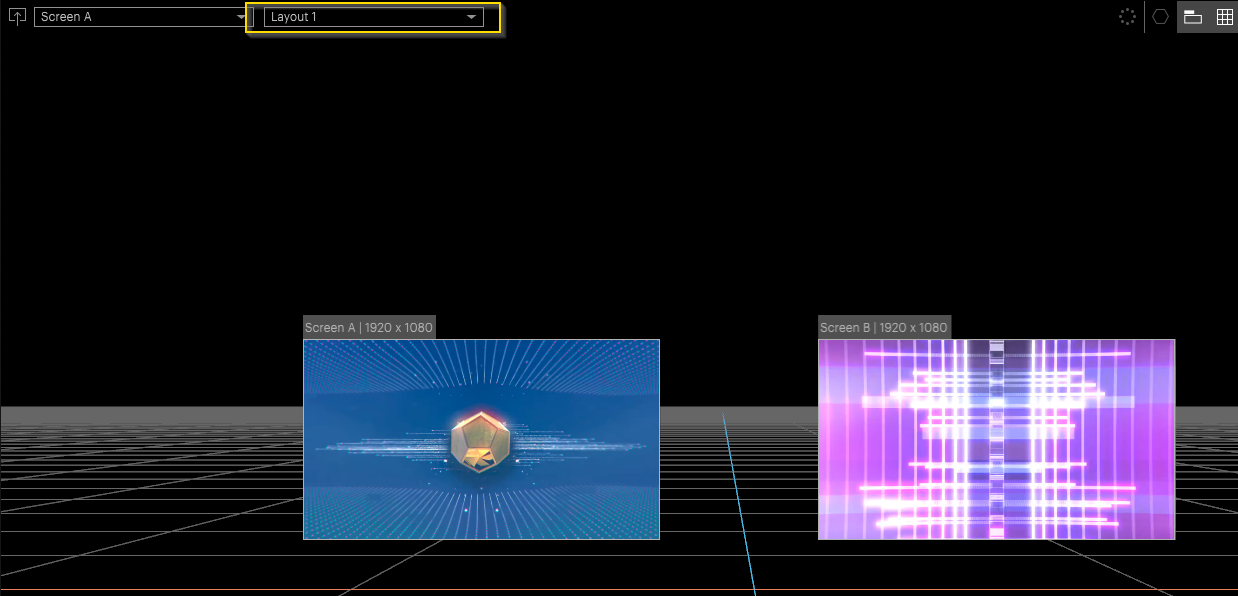
When we dive in, we can rearrange the screen perspectives for each Screen Group individually by changing which Screen Group we're in.
Here, we've set up Screen A and Screen B of Layout 1 to meet in the middle of some content.
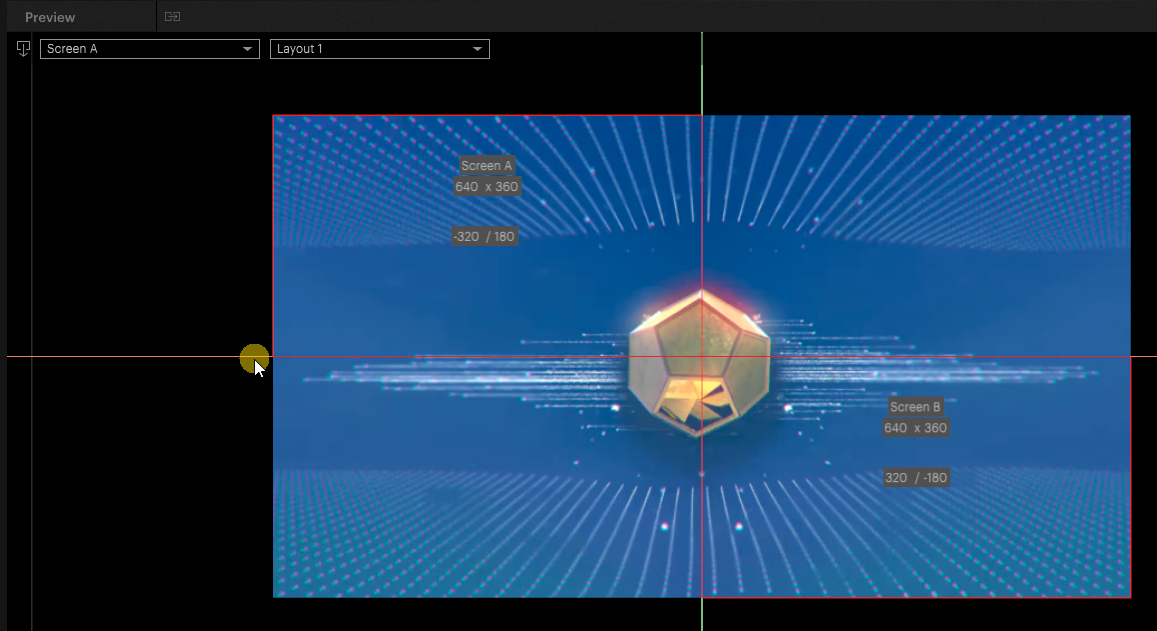
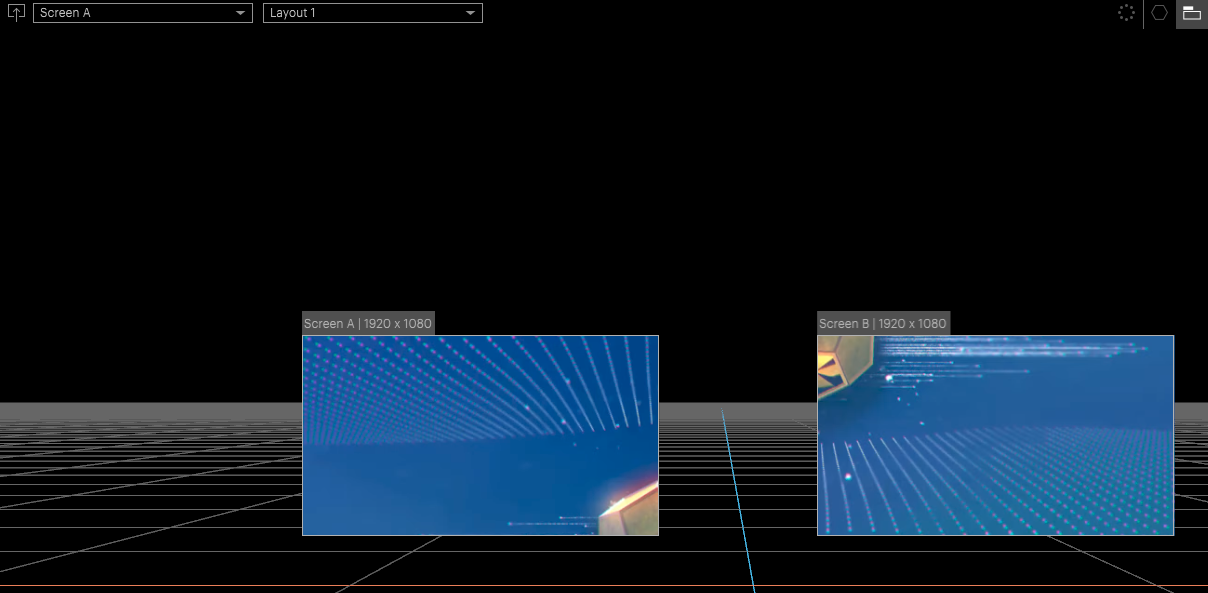
Here's what that looks like when we Dive Out:
We can change this layer's Screen Group Presence property to only appear with Layout 2. We can then rearrange the Perspectives of Layout 2 so that both perspectives overlap.
We can see two different layouts for the same Screen Objects.
Scaling on Multiple Screens in the same Screen Group
In this example, we have different resolutions on our displays. We can now move content between these as long as they are in the same Screen Group.
In the above example, both screens are in the same Screen Group, and the one named BO3 (an LED wall) is used as the reference screen because it was created first. The resolution of the second screen displayed in the inner compositing relates to the resolution and size of the first screen. This is done so that you can move layers over several screens while the size of the content appears to be the same in your stage view. PIXERA generates this resolution for the second screen using the size of the second screen relative to the first screen, rounding to integers such that the aspect ratio might be slightly altered. In this example, it is 493x277, which is no longer exactly 16:9 (it differs by around 0.3 pixels), as fractions of pixels are not displayed.
The adjustment of the second screen's resolution is necessary to have content display seamlessly across your screens (e.g., if it moves among screens), maintaining the physical size of the content. If you want to display content correctly on two screens while respecting each screen's actual pixel density, you need to put layer presence and screens in two separate Screen Groups. This assumes that you want your content to be displayed individually, without moving across screens or connecting seams.
Note
This scaling does not lead to a loss of quality, even if set incorrectly, because it is only used in the render pipeline to determine the section of the content that should be displayed, not the actual resolution of it.
You can deactivate this calculation in the screen group by toggling “Frustum Size Depends on Resolution”. Then, you can observe how your content appears without scaling the screen perspectives to match the differences in screen size.

You can read more about screen scaling and perspectives in the article for Inner and Outer Compositing.
Workflow example
Sometimes it is necessary to display different mappings on the same outputs. By utilizing Screen Groups, you have more flexible solutions at your disposal.
Create the different screen groups for different layers to show different mappings on the outputs.
In the example below, two Screen Groups were created for the setup. The first layer was assigned to the first Screen Group:

Meanwhile, the second layer is assigned to the second Screen Group. As you can see, the inner perspective setup differs:

Now the system can simply fade between two different screen group setups (different mappings, so to speak).

PIXERA 26.2 INTER 101 | 8. June 2026 | M.B.