101: Screen Setup
As a first step a screen will be added to the workspace and adjusted for size, position and resolution.
Activating the grid
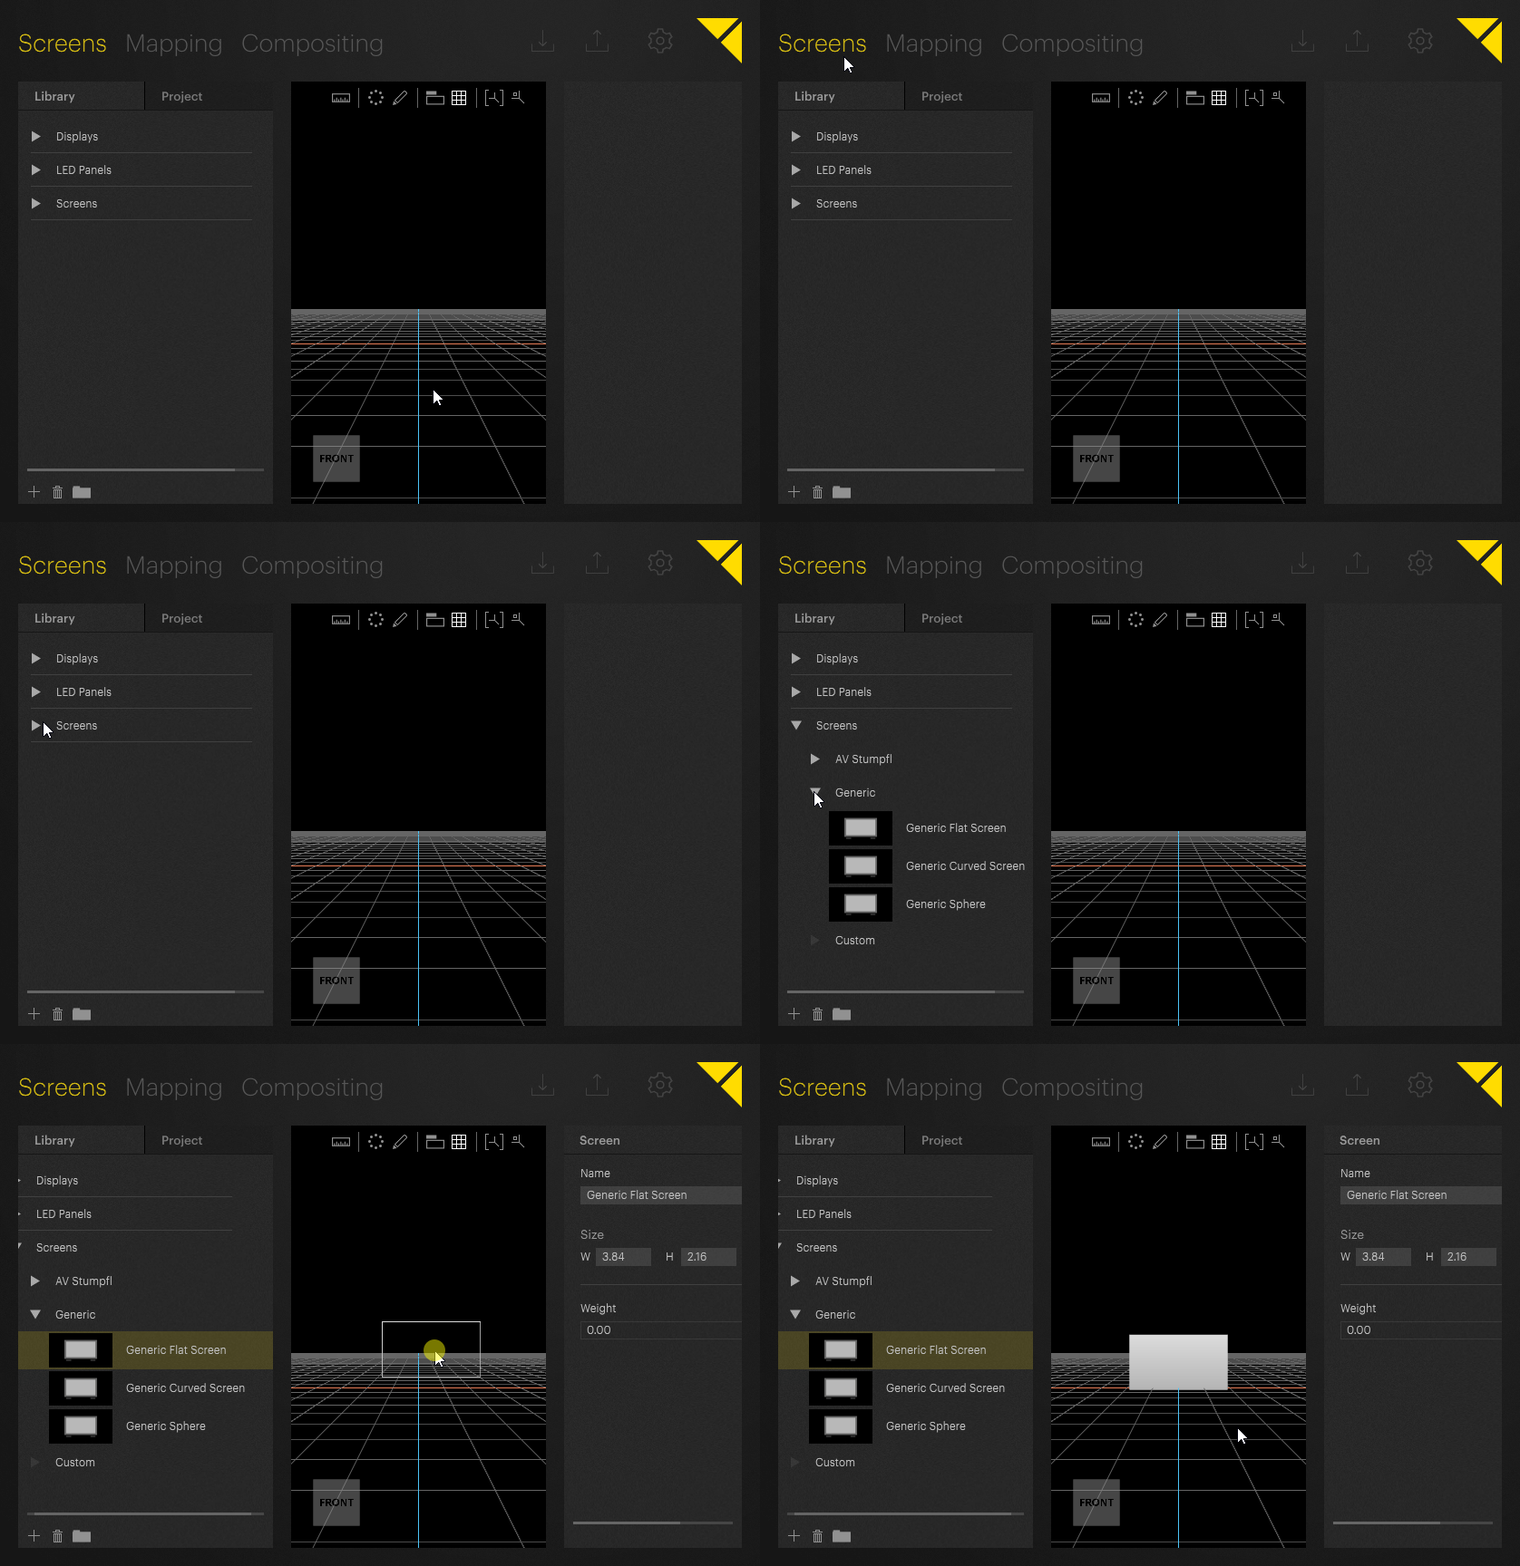
In Screens mode, the Workspace defaults to a blank scene. To get a better orientation of the scene it is a good idea to activate the grid representing the floor. The grid can be activated by either hitting [G] on the keyboard or clicking the grid icon from the available tools in the top right corner of the Workspace.

Placing a projection screen in the Workspace
Pixera comes with an extensive database of available AV-Stumpfl projection screens and LED panels with predefined dimensions. For this example project, a custom sized projection screen will be created.
- Make sure that Screens mode is active.
- Select the Library tab in the Selection Pane on the left side of the screen.
- Open the Screens category by clicking the triangle to the left or by double-clicking Screens itself. Then open the Generic category.
- Drag and Drop a Generic Flat Screen on the Workspace.
The generic screen will be placed in the Workspace.

Changing Screen properties
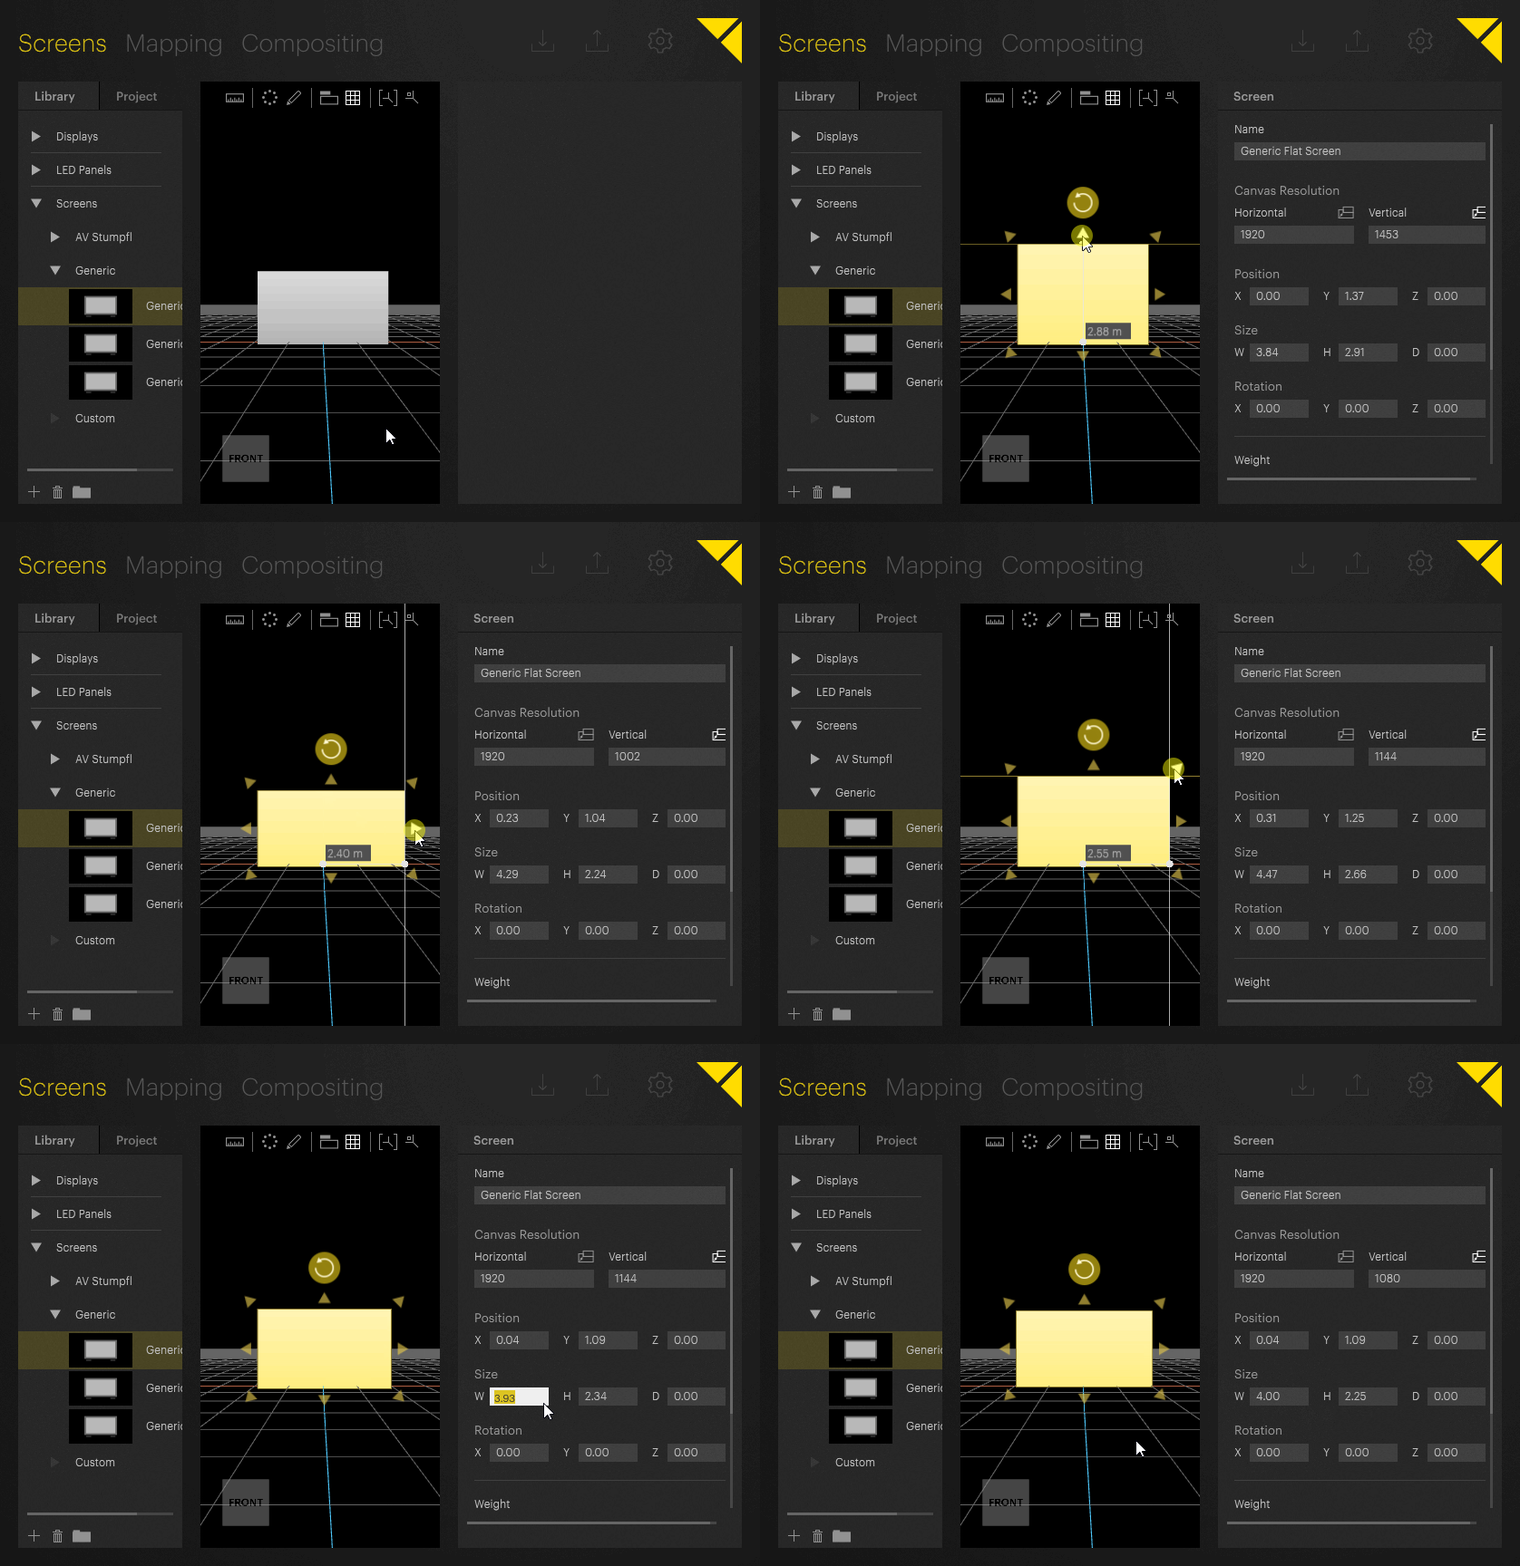
The properties of the screen can be inspected or changed in the Inspector on the right side of Pixera’s user interface.
Screen name
After creating a screen, it is always a good idea to immediately give it a custom, unique name:
- Make sure the screen is selected by clicking on the screen in the Workspace (the screen will be highlighted yellow).
- In the Inspector tab, click the Name text field to enter a custom name like MainProjectionScreen and hit the [Return] key on your keyboard to confirm the change.
Screen dimensions and position
For this sample project, we will assume a screen with dimensions of 4 by 2.25m. Its bottom edge should be placed exactly on the ground plane.
To change the dimensions of the screen:
- Make sure the screen is selected.
- Enter width and height in the Inspector.
The screen size changes accordingly. Note, that it is also possible to change the screen dimensions by click-dragging the triangles appearing around the selected screen in the Workspace.

To change the screen position:
- Make sure the screen is selected.
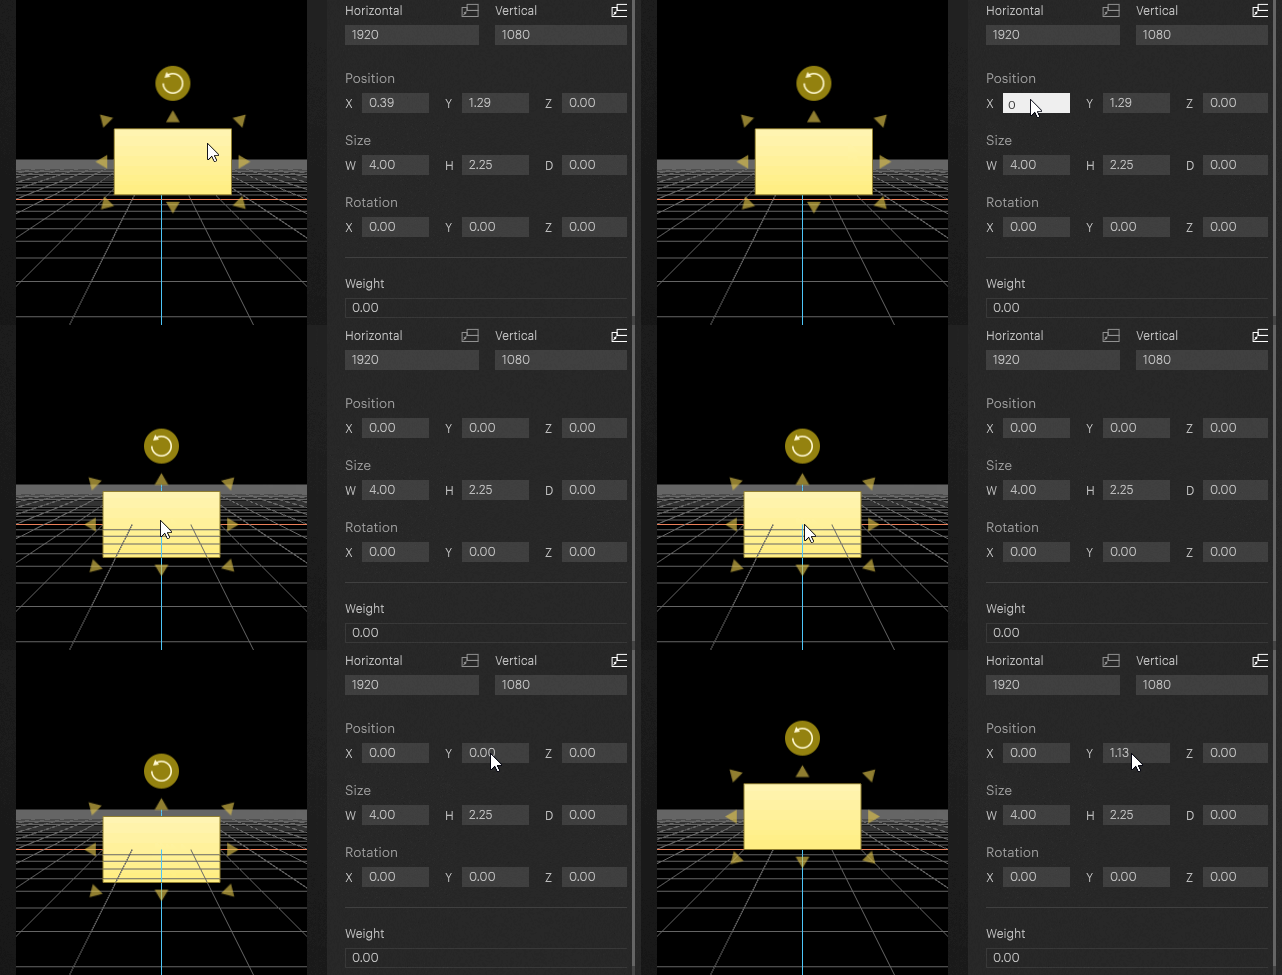
- Search the Position category and enter ‘0’ for the X position. This centers the screen on the X-axis.
- To place the screen’s bottom edge on the ground plane one has to be aware that the Positionin the Inspector indicates the screen center (i.e. at half the width and height of the screen). There are two convenient alternatives to align the screen to the bottom edge:
- Calculate the offset of the screen center from the ground for the Y-position. The screen has a height of 2.25m, therefore half the screen height is 1.125m. Setting this as the Y-position aligns the bottom edge with the ground plane.

- Snap-Dragging:
- In the Workspace, click and hold the screen with the left mouse button close to the lower edge of the screen. While dragging the screen object, notice a horizontal and a vertical line appearing aligned with the bottom edge and another edge. Depending on the main dragging direction, one of the lines will turn dark-yellow while the other will be gray.
- While still dragging, hit the [Shift] key once. Depending on the main dragging direction the corresponding axis will now turn white and dragging will be restricted to this axis. (Hitting [Shift] more than once will toggle this axis-movement restriction to the other axis.)
- Drag the bottom edge towards the orange line that represents the X-axis. Notice that it will snap to the zero position once it drops below a certain distance.
- Release the mouse button.

For details on snap-dragging, see the section on moving objects.
The screen is now centered and bottom-edge aligned with the ground plane.
- Calculate the offset of the screen center from the ground for the Y-position. The screen has a height of 2.25m, therefore half the screen height is 1.125m. Setting this as the Y-position aligns the bottom edge with the ground plane.
Canvas Resolution
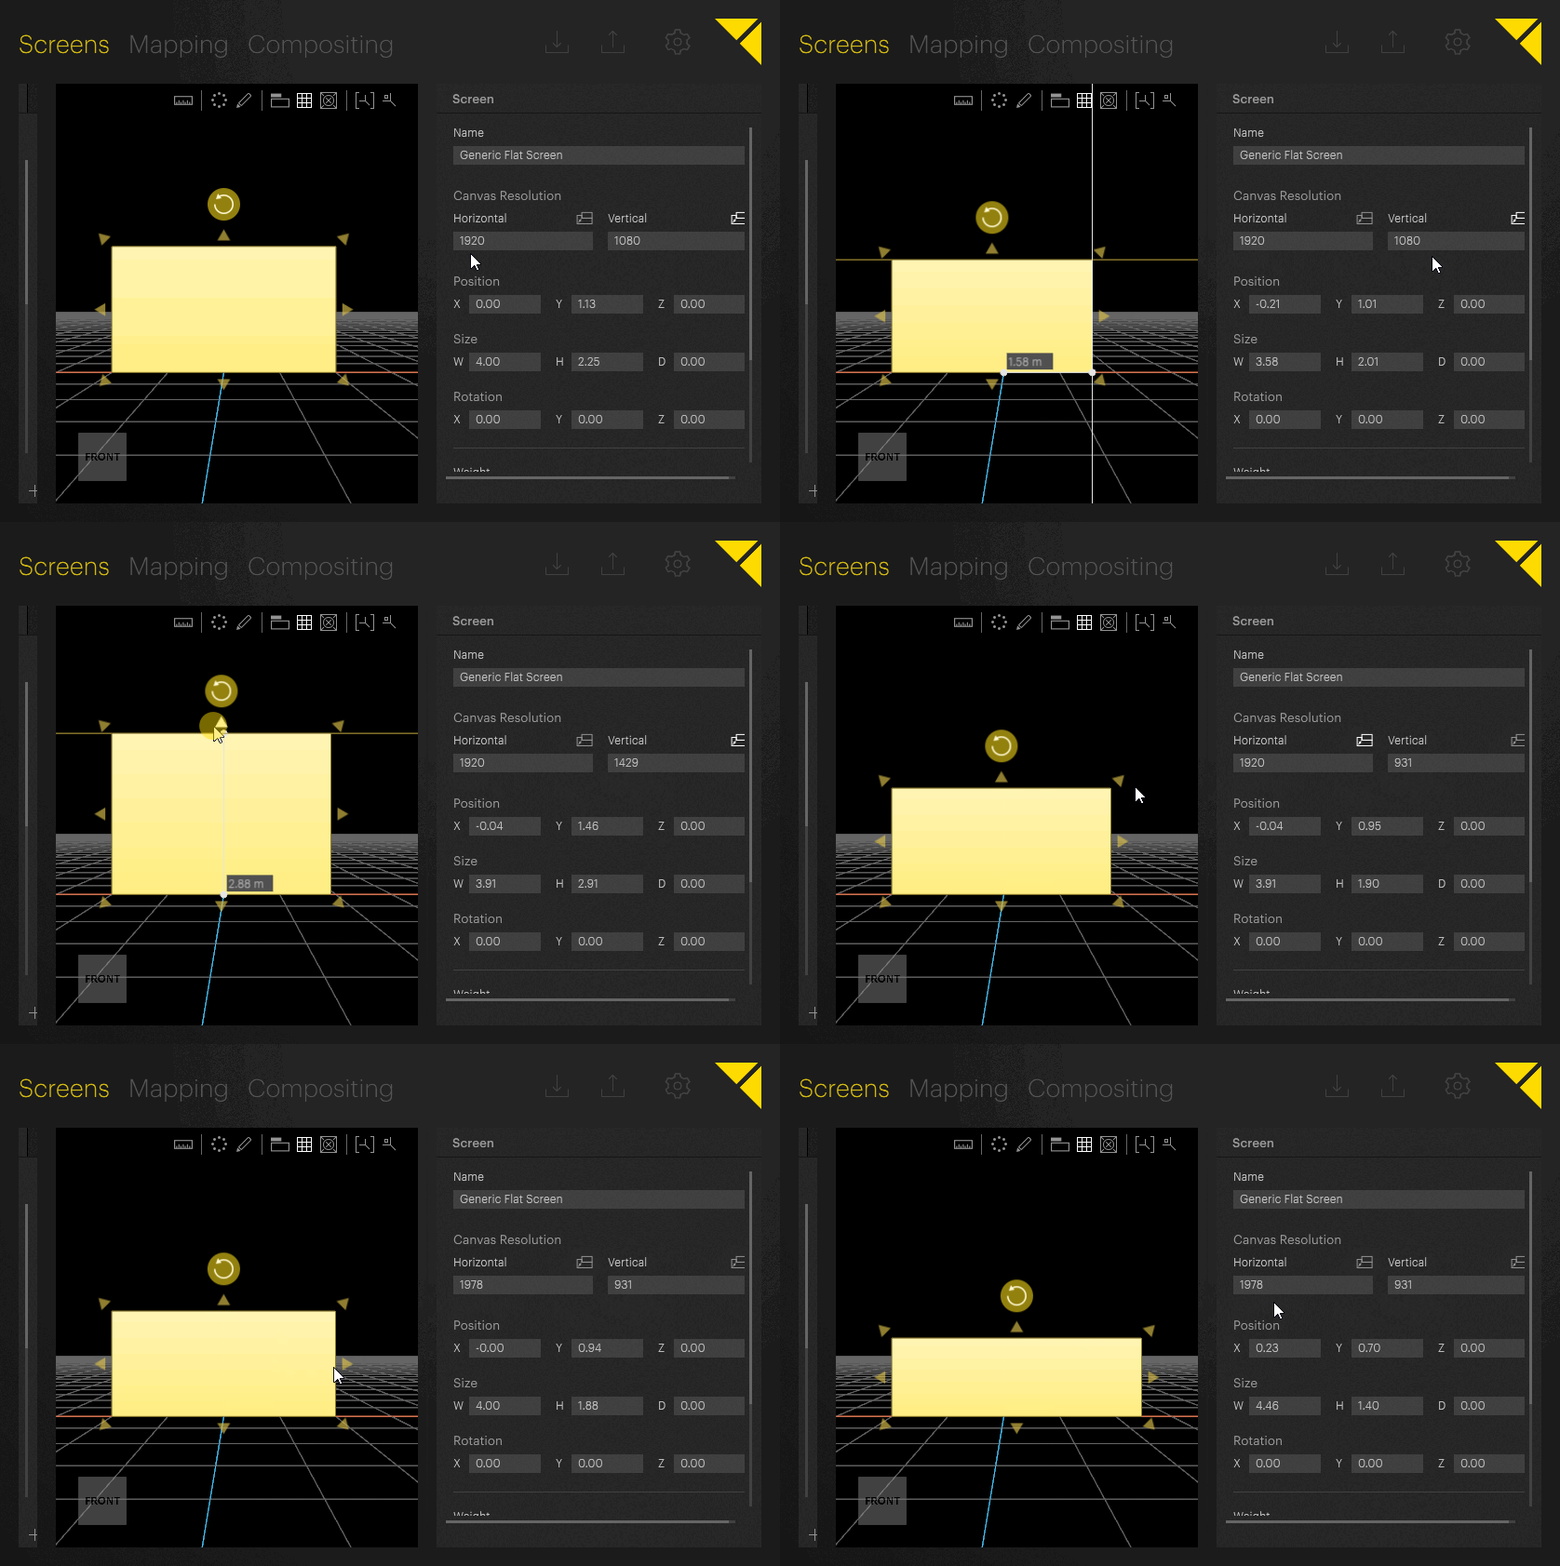
The created screen not only defines the position and size in space, but also the resolution of the Canvas the composition will be rendered on. For a simple project like this it is sufficient to set the Canvas Resolution to the resolution the projector can provide. Here a Full-HD resolution of 1920 by 1080 pixels is assumed. If you need to render your content at a higher resolution, change it accordingly.
However, it is possible to override this setting and assume non-square pixels. Deselecting both of the Keep Pixels as Squares icons (next to the Horizontal and Vertical descriptions in the Inspector) will allow you to set a pixel resolution independent of the screen's aspect ratio.

In the next step the projectors will be set up.
 Contact Us


