Pixera supports a wide range of live video input sources - directly via a supported video input card, DirectShow sources or using network technologies like NewTek NDI.
Supported Live Input Cards
- Deltacast - implemented via SDK
- Datapath - implemented via SDK
- Blackmagic Decklink - implemented via SDK
- all input cards which support DirectShow
NOTE - Please ask our team at AV Stumpfl which cards exactly are tested!
- No video outputs are supported on Blackmagic Decklink cards!
The available "Live Inputs" can be found in the ressources tab of the compositing area:

Local and Remote Sources
Pixera supports setups with single or multiple machines, of which each can have video inputs. In the case when only a single machine is used, only Local video inputs will be listed. To manage a networked setup, Pixera separates inputs into Local and Remote sources.
Pixera manages all inputs automatically. The list of available devices is updated as soon as a new source is available.
Local
All video inputs directly connected to the machine Pixera is running on are reffered as local inputs. Depending on your hardware configuration these can be video input cards, Windows DirectShow sources (i.e. all video inputs that Windows recognizes) and NDI sources.
DirectShow
DirectShow is one of Windows underlying video managing systems. Consumer devices like WebCams usually come with a DirectShow driver, so they can be used from Windows applications.
NDI
NDI is a technology by NewTek to stream compressed video with high quality and low latency over GBit Ethernet. Available NDI sources on the same network as the Pixera machine will automatically appear in the NDI section as soon as they are available.
How to use Live Inputs in Pixera
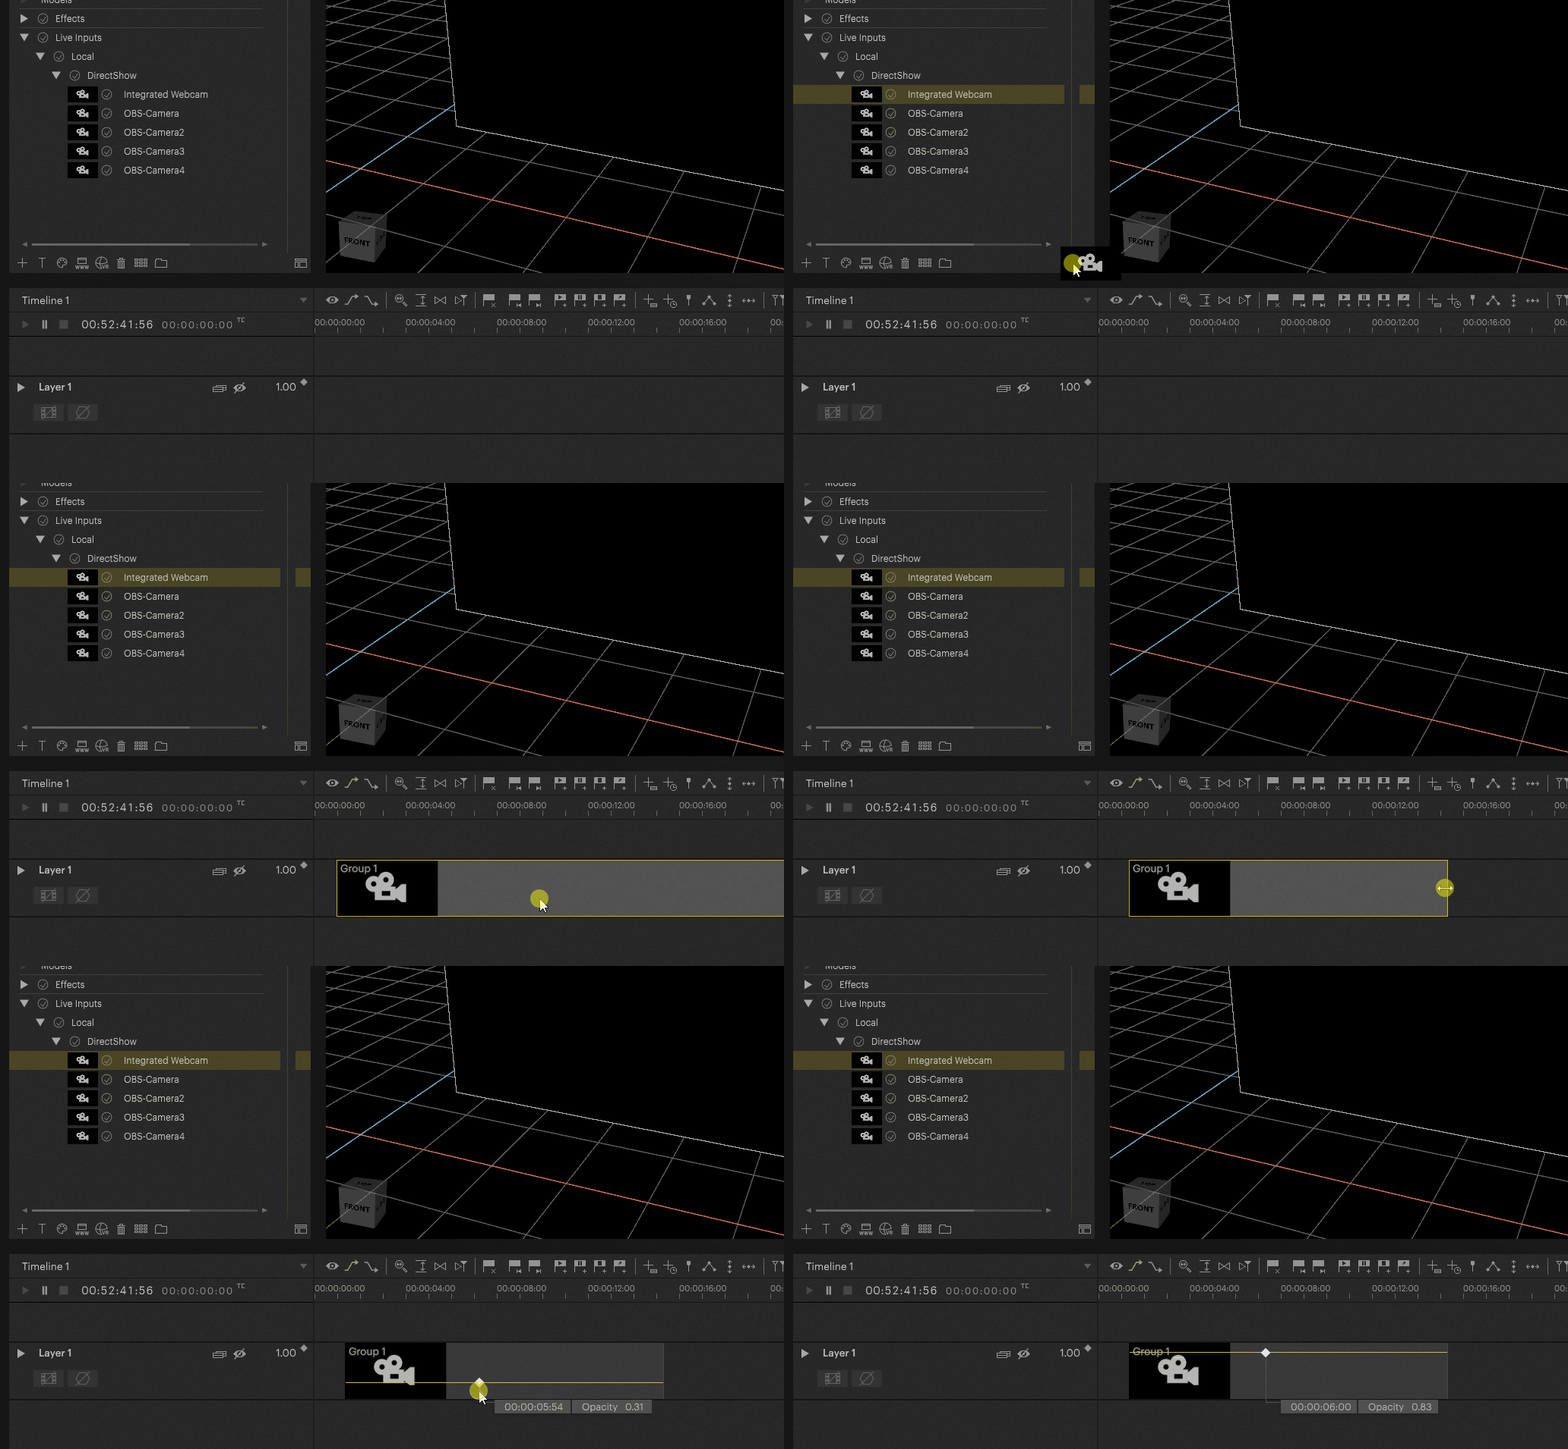
Basically, Live Inputs in Pixera can be used like normal clips. This means that they can be dragged and dropped onto a layer and the options for modifying live inputs (applying effects, keyframing, fade in/out) work in the same way as for video clips.

By selecting the Live Input in the resources on the left side it's possible to change its settings in the Inspector.
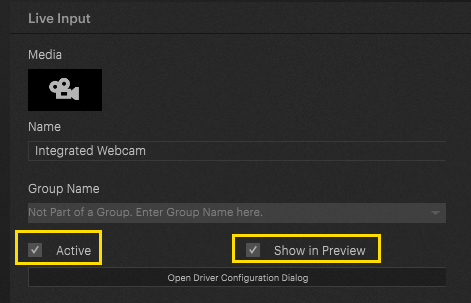
Activating the Live Input and display in Preview
In here it is possible to activate the Live Input (by default the input is activated) and even to show the Live Input in Preview

The Live Input preview is actually an internal NDI Stream.
Driver Settings for Live Inputs
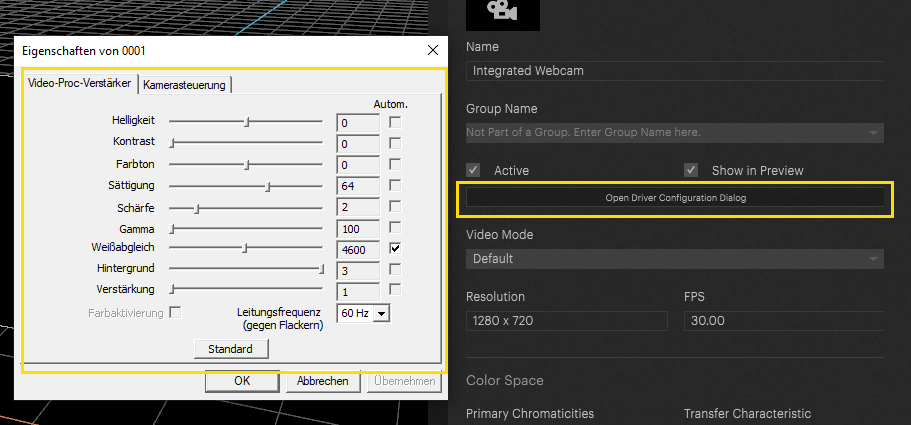
Additionally it is possible to change the camera settings directly out of Pixera by selecting "Open Driver Configuration Dialog" in the Inspector

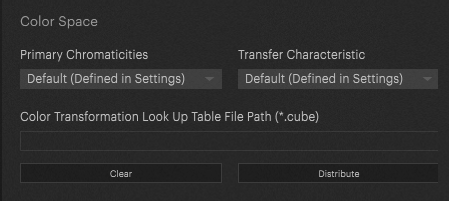
Color Space for Live Inputs
Beside the basic Live Input settings it's possible to change the color characteristics and to load a specific "Color Transformation Look Up Table"

Using Live Inputs in a Multi Client Setup
In larger setups it happens that the camera feed should be displayed on a large LED.
However, if this LED is fed by outputs from several servers, the camera feed must be present on each of these servers in order to be able to display it on the output.
To activate this camera feed on the layer, you would now have to put every live input of every server on the timeline.
To simplify this workflow, Pixera offers the possibility to group the live inputs.
If a live input of this group is now placed on the layer, all inputs that belong to this group are automatically activated.
Thus, it is possible to activate the live input feed on two, three or even more servers with only one object on the timeline.

This group has to be assigned to each Live Input of the local and the remote Servers.
 Contact Us


