 Contact Us



Quick overview
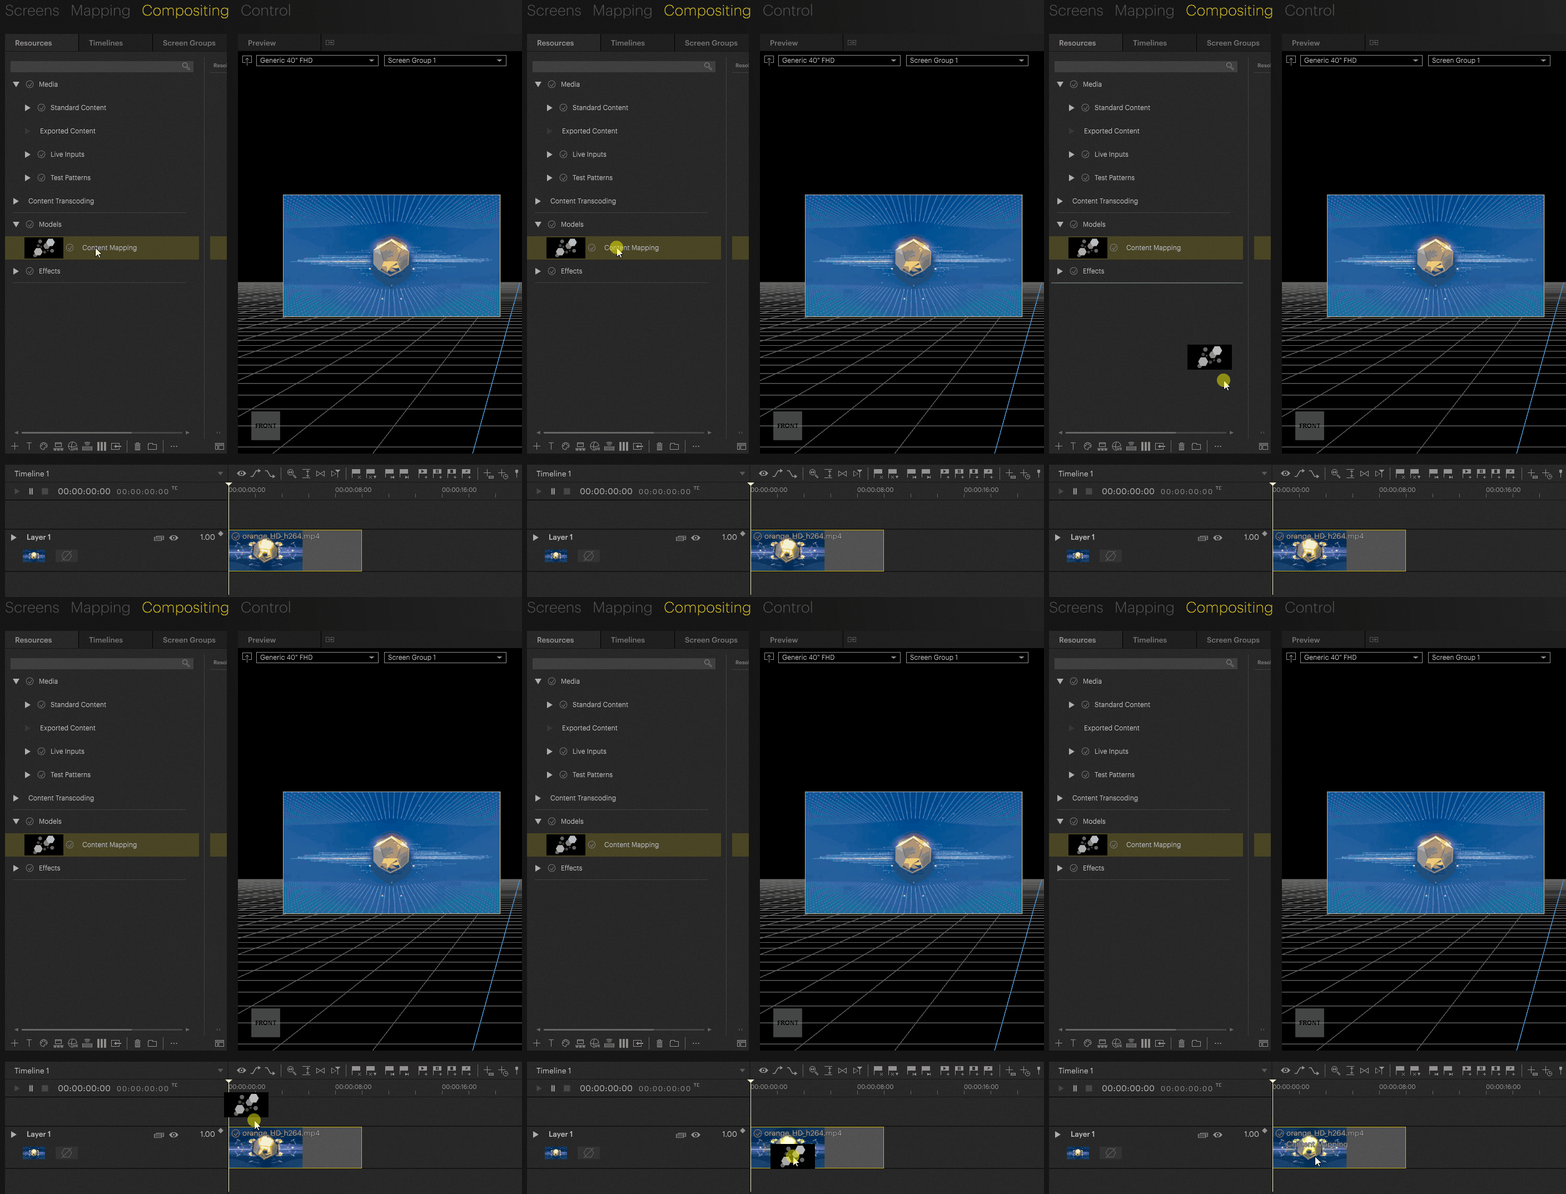
The animated image below shows the basics of using content mapping.
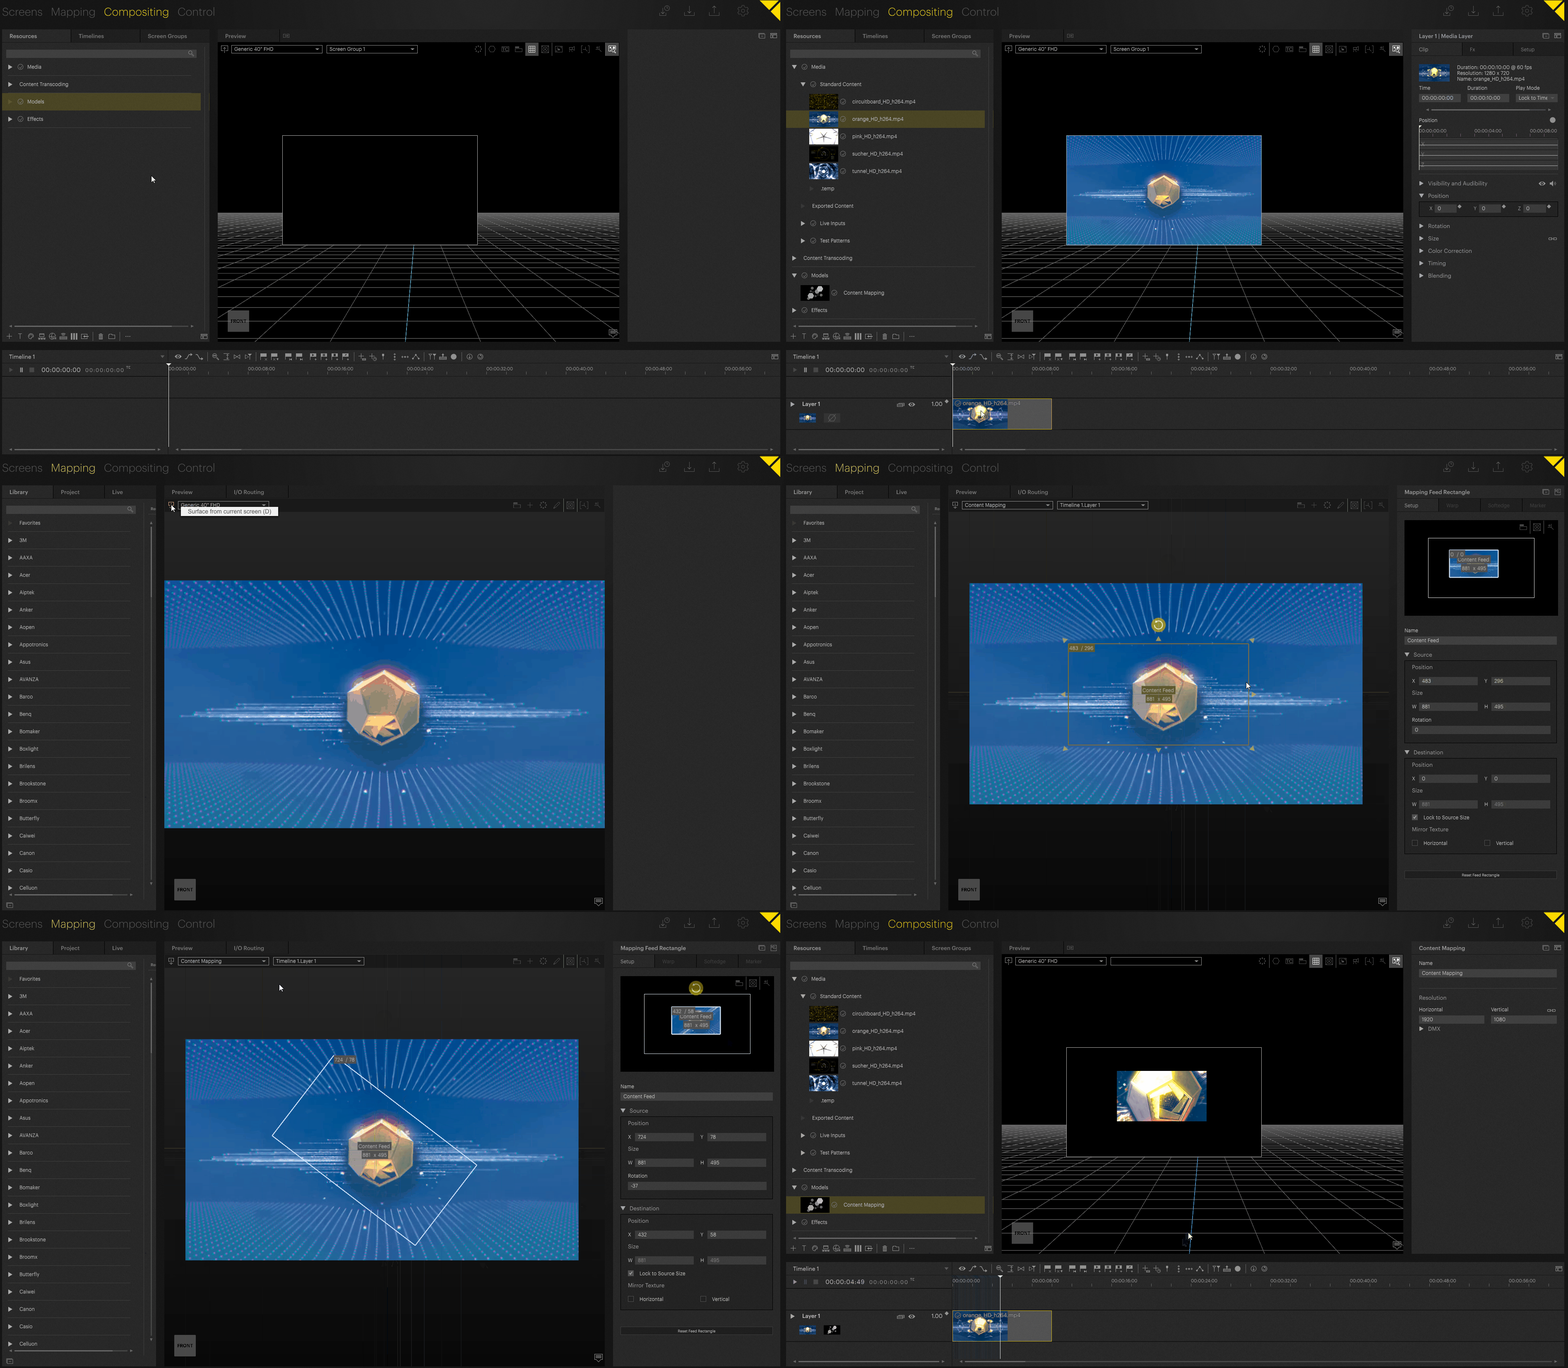
The mapping can also be applied to the container itself.
Create a content mapping
Content mappings are treated like resources that are applied to the layer, so the same mapping can be used on multiple layers.
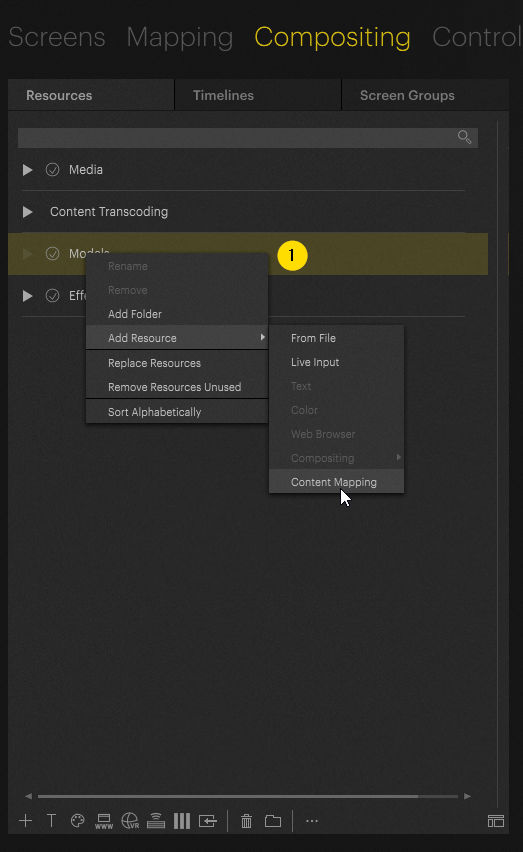
Right-click on the “Models” folder in your Resources Tab in the Compositing area, navigate to “Add Resource” → “Content Mapping”
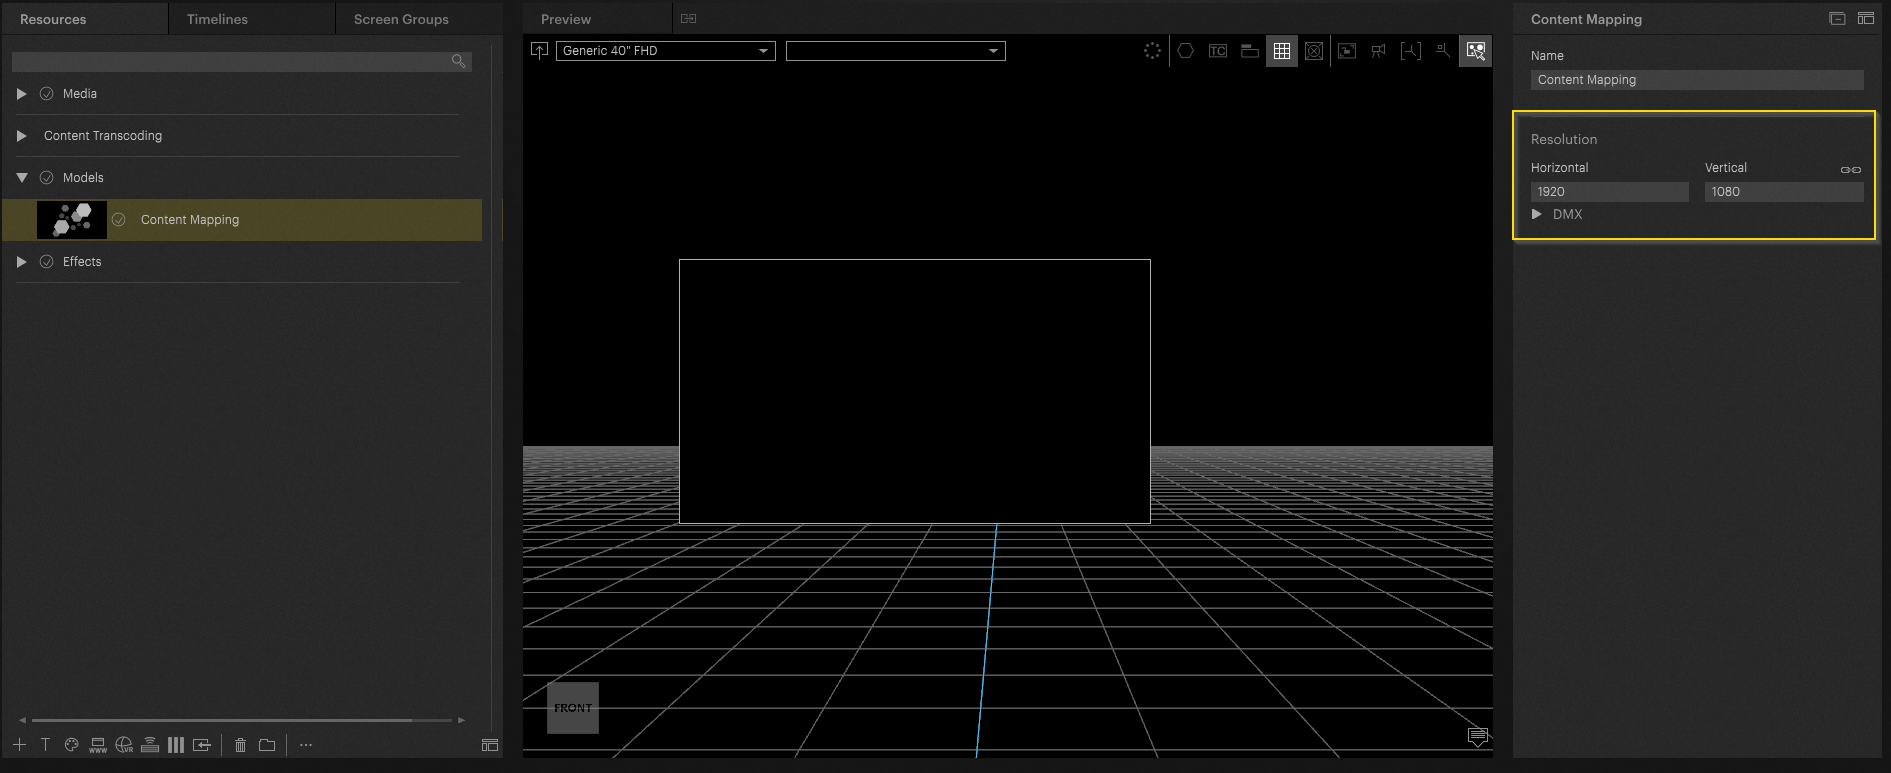
The resolution of the content can now be set in the inspector; this is used as a reference for aspect ratios. This can also be used for pre-production. If the content has not yet been delivered, the content mapping already applies the correct content size to the timeline.
The content mapping can be applied to the layer using drag and drop.
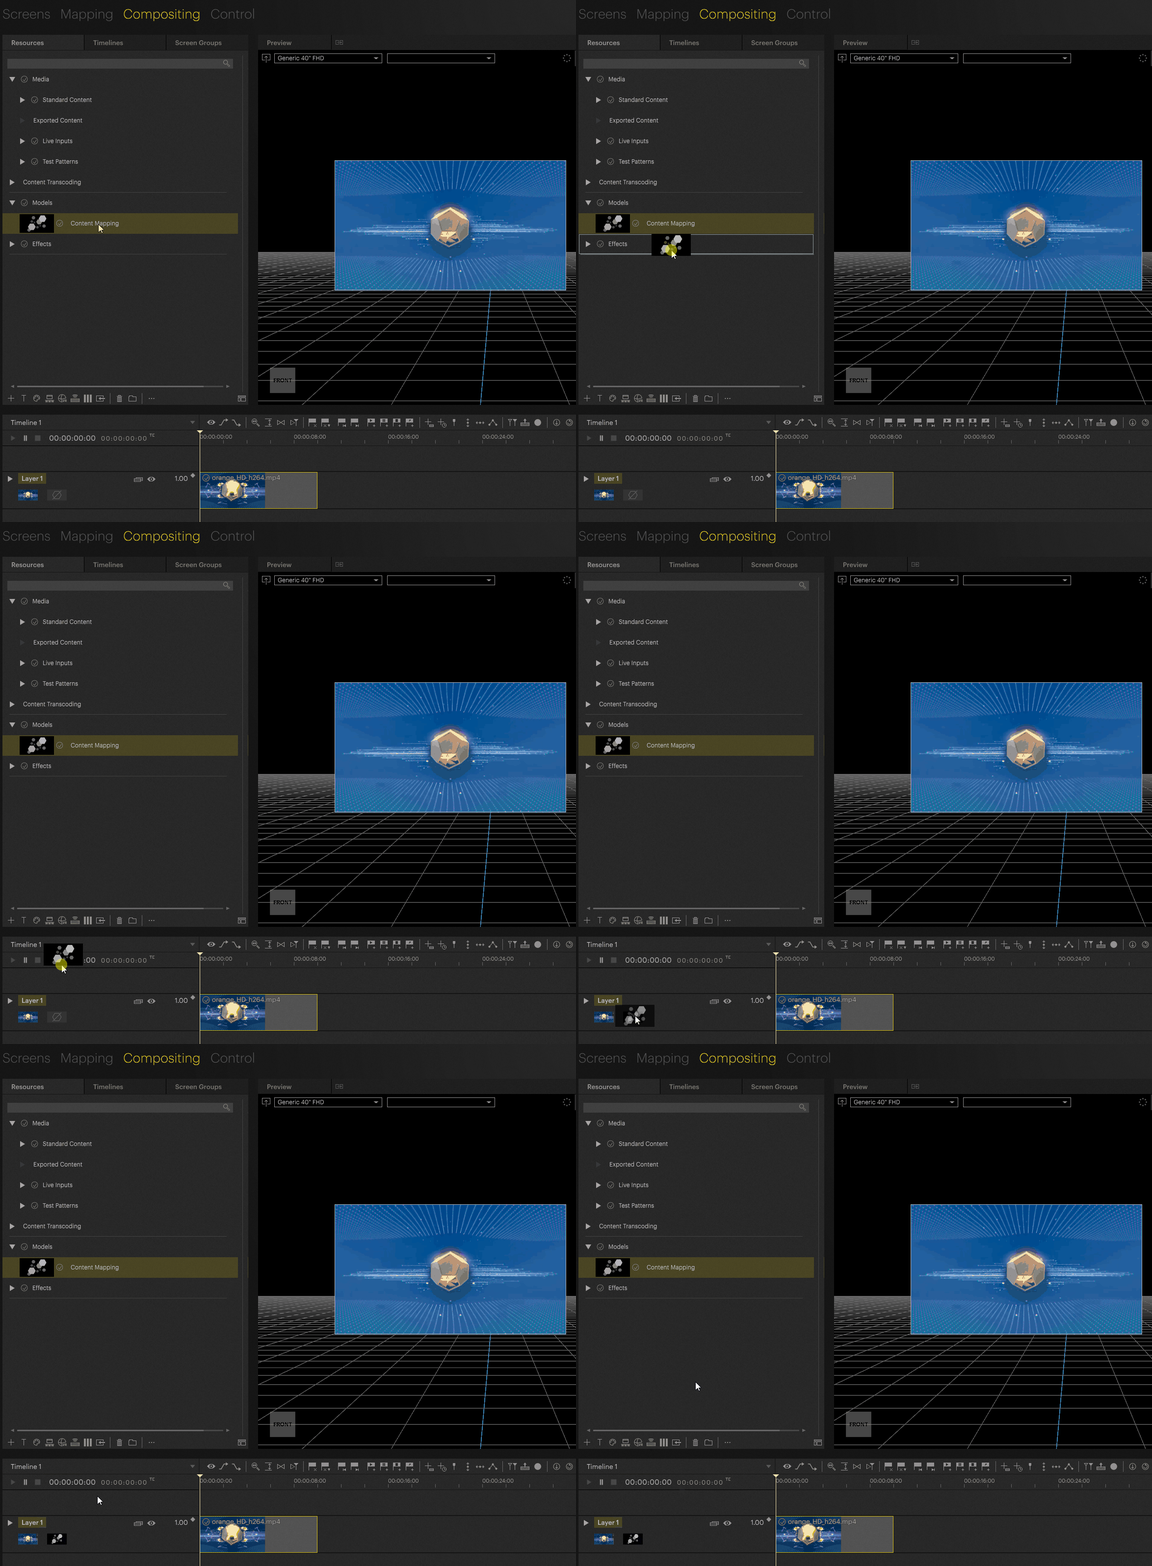
It can also be assigned to the content container itself.
Note - ‘Absolute’ Layer Origin applied

Content mapping only works in absolute coordinates. When you apply content mapping to a clip on a layer that has its origin set to something other than ‘Absolute’ in the Layer Presence settings, the origin will be changed to ‘Absolute’. This means that if you had clips on that layer configured to specific offsets, their final positions might now differ. We suggest never combining clips with content mapping and clips without content mapping on the same layer.
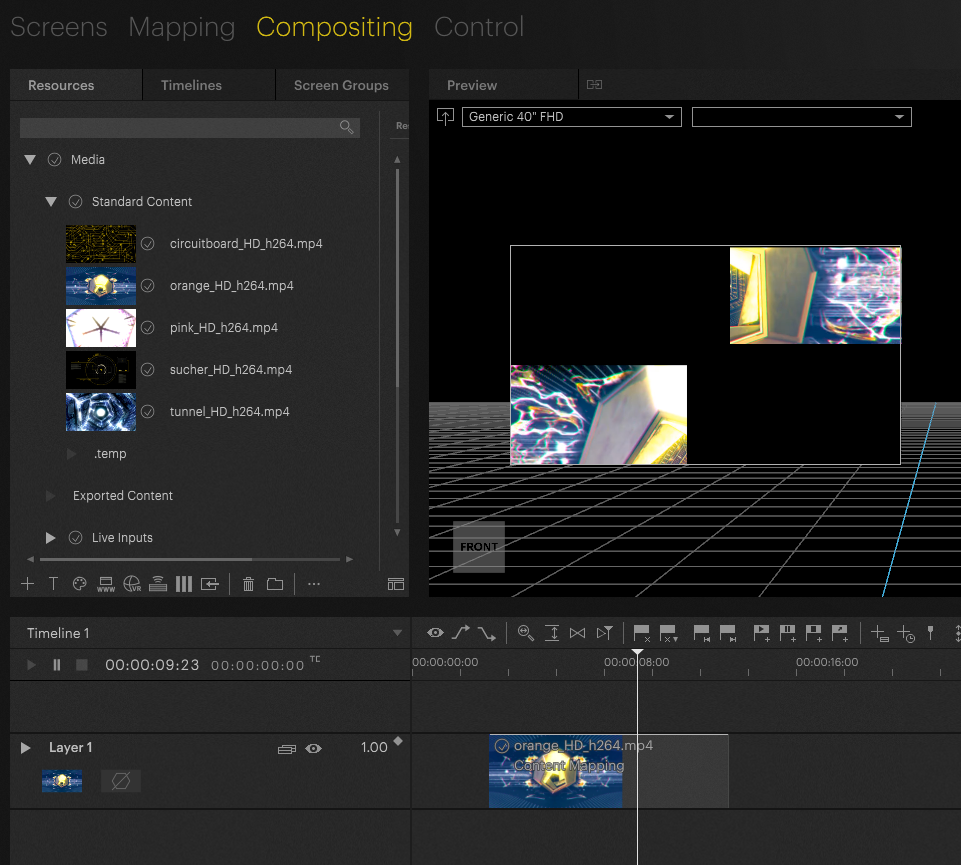
If, after applying the content map, you can't see the content in the preview or it is very small, like in the image above, it might have moved to another screen if your screen group is referencing another screen (by default, this is the screen you created first). To resolve the issue, you can set the "Reference Screen" in the Screen Group's Inspector to the screen where the content for the content mapping is assigned. Make sure to also check your other layer presence settings.
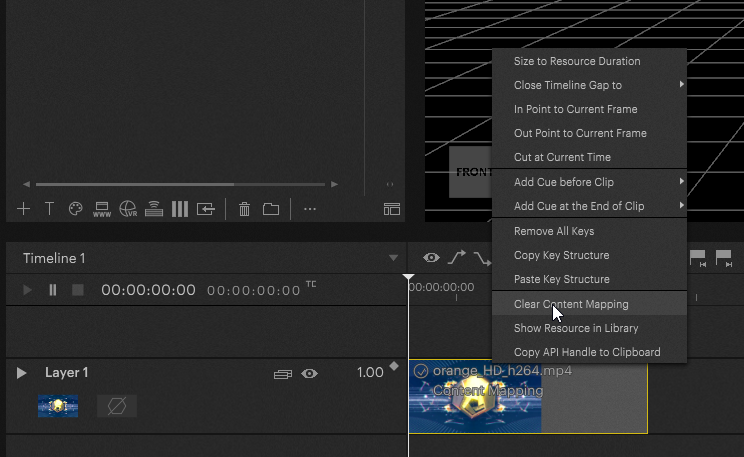
Mappings can be deleted by right-clicking in the Content Container and selecting “Clear Content Mapping”
Configure your mapping
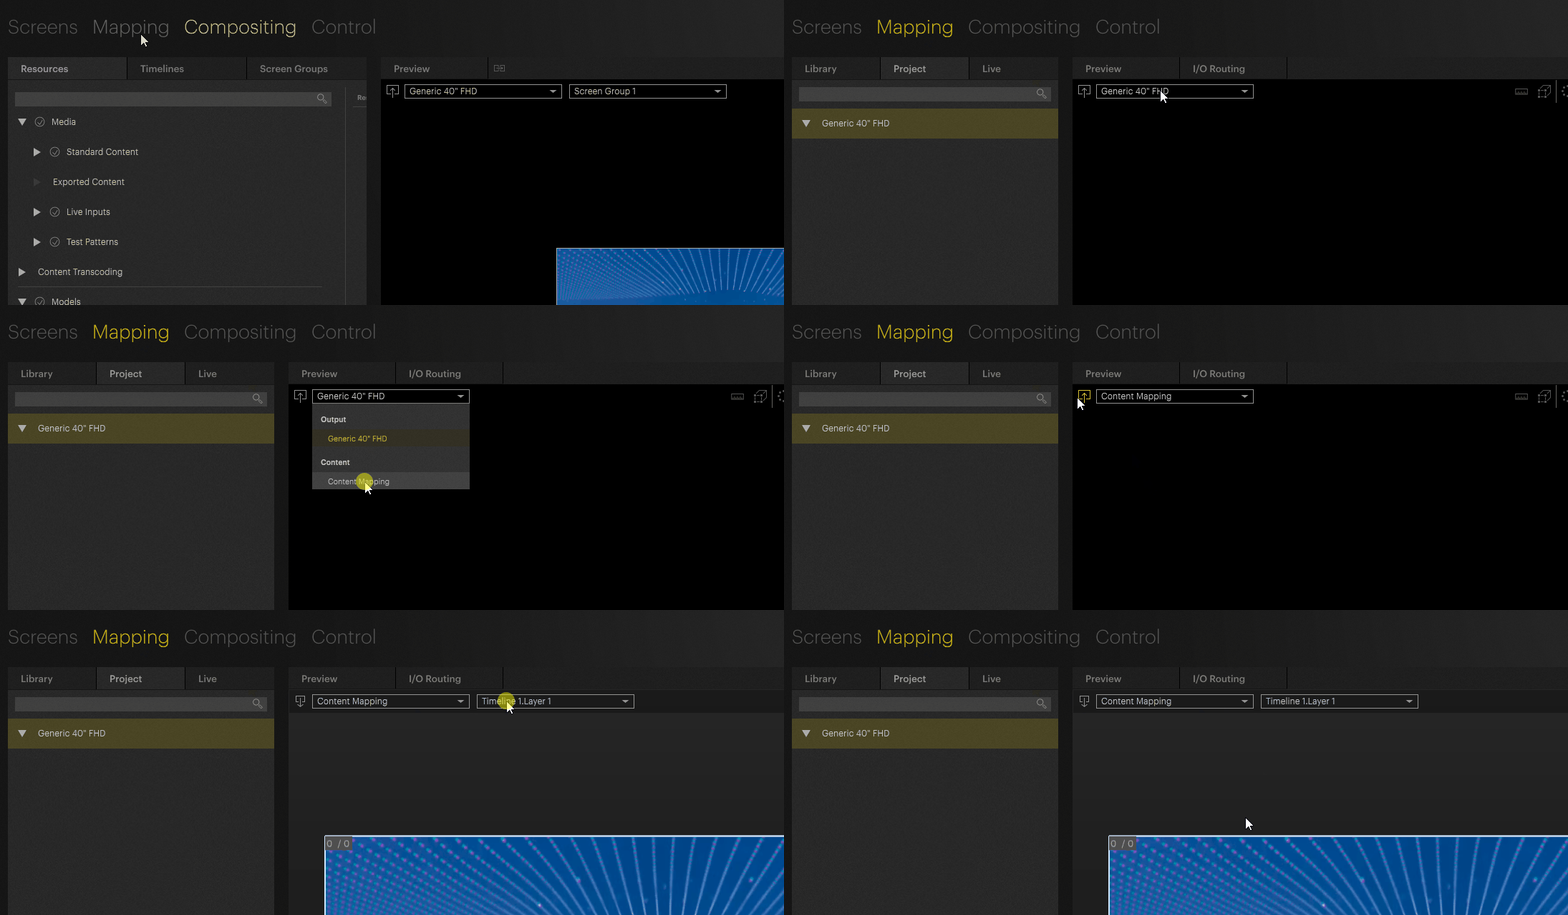
Content mapping works similarly to LED mapping. We navigate to the mapping tab and go to the inner compositing of our mapping.
25.2 Feature update:
You can automatically jump to edit your content mapping by right-clicking on the mapping in the resource browser, or in the layer header, and selecting “edit”


The content feed area can now be determined here and assigned in the layer mapping
Mappings can be added with the "+" icon
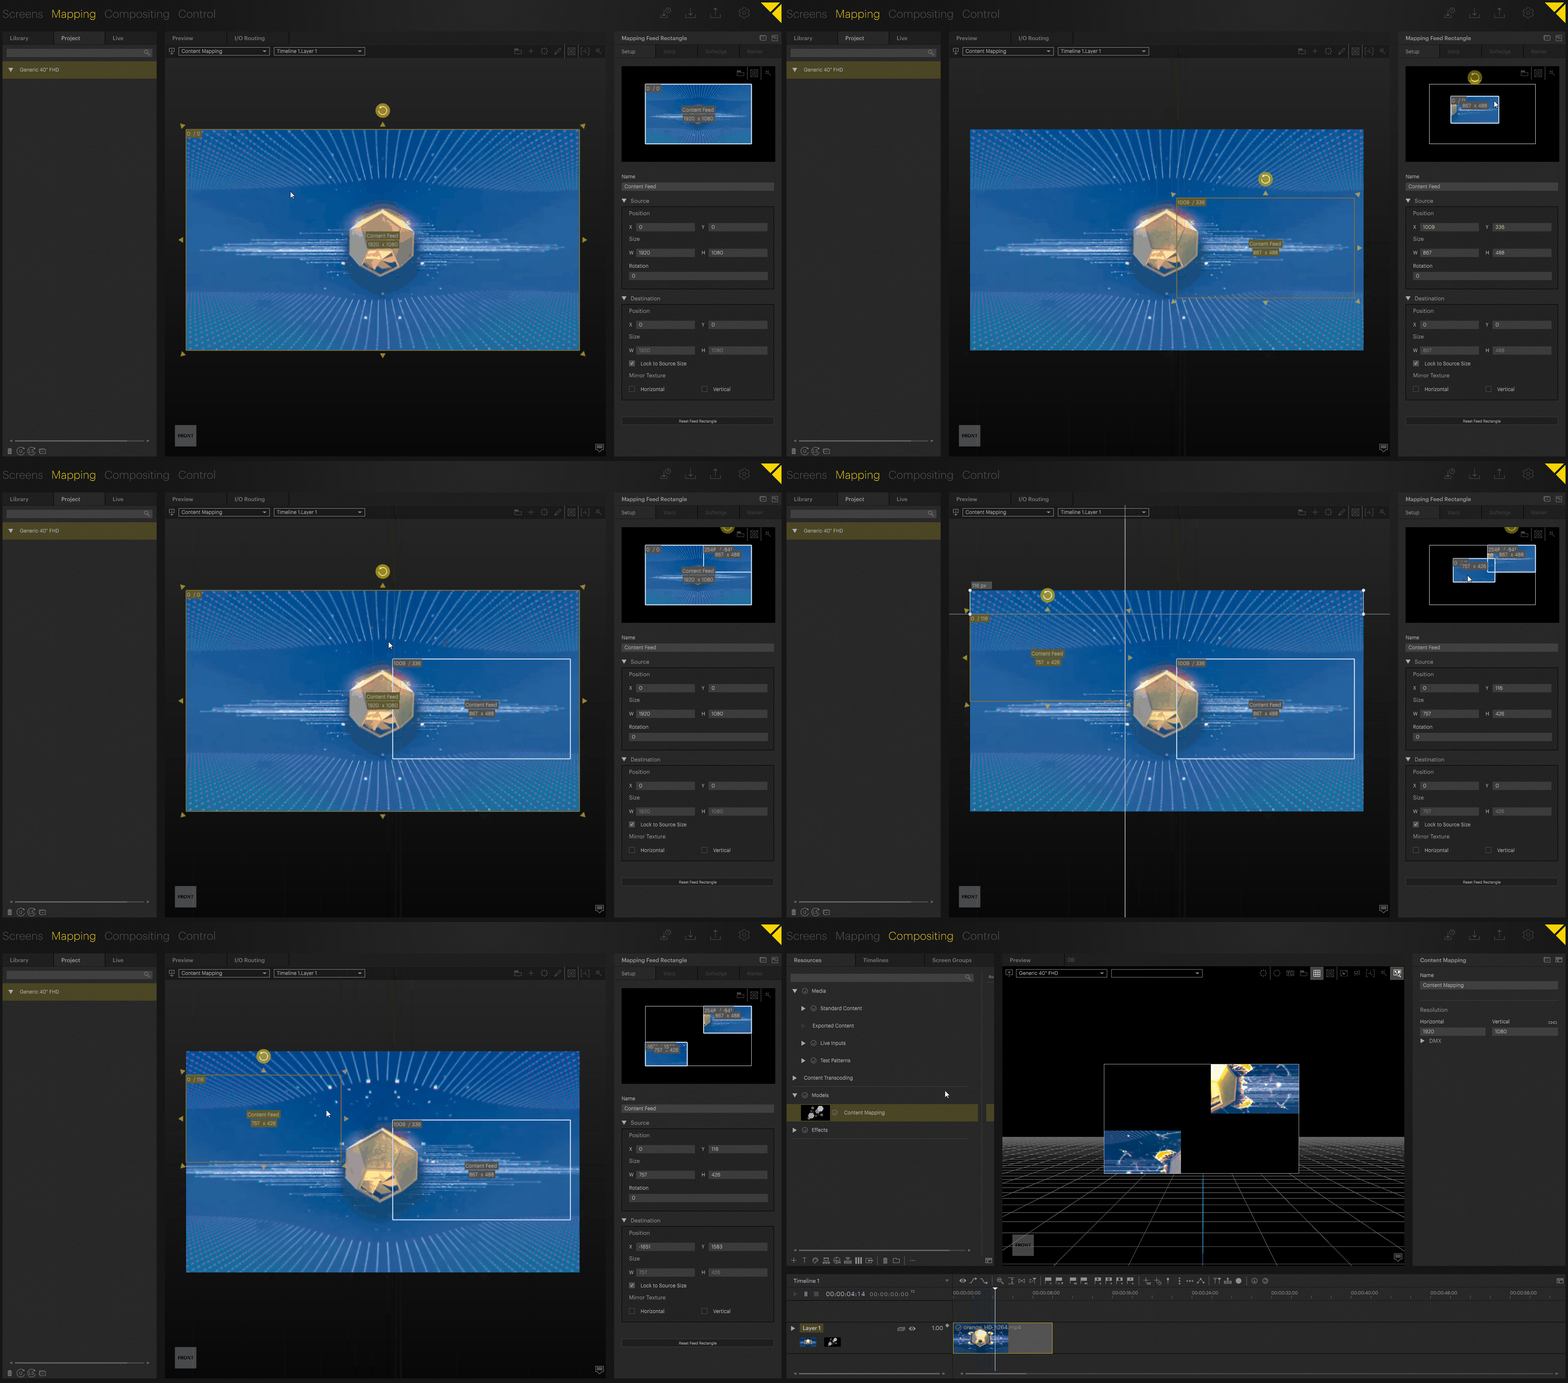
If this mapping is now assigned to a clip, it is applied.
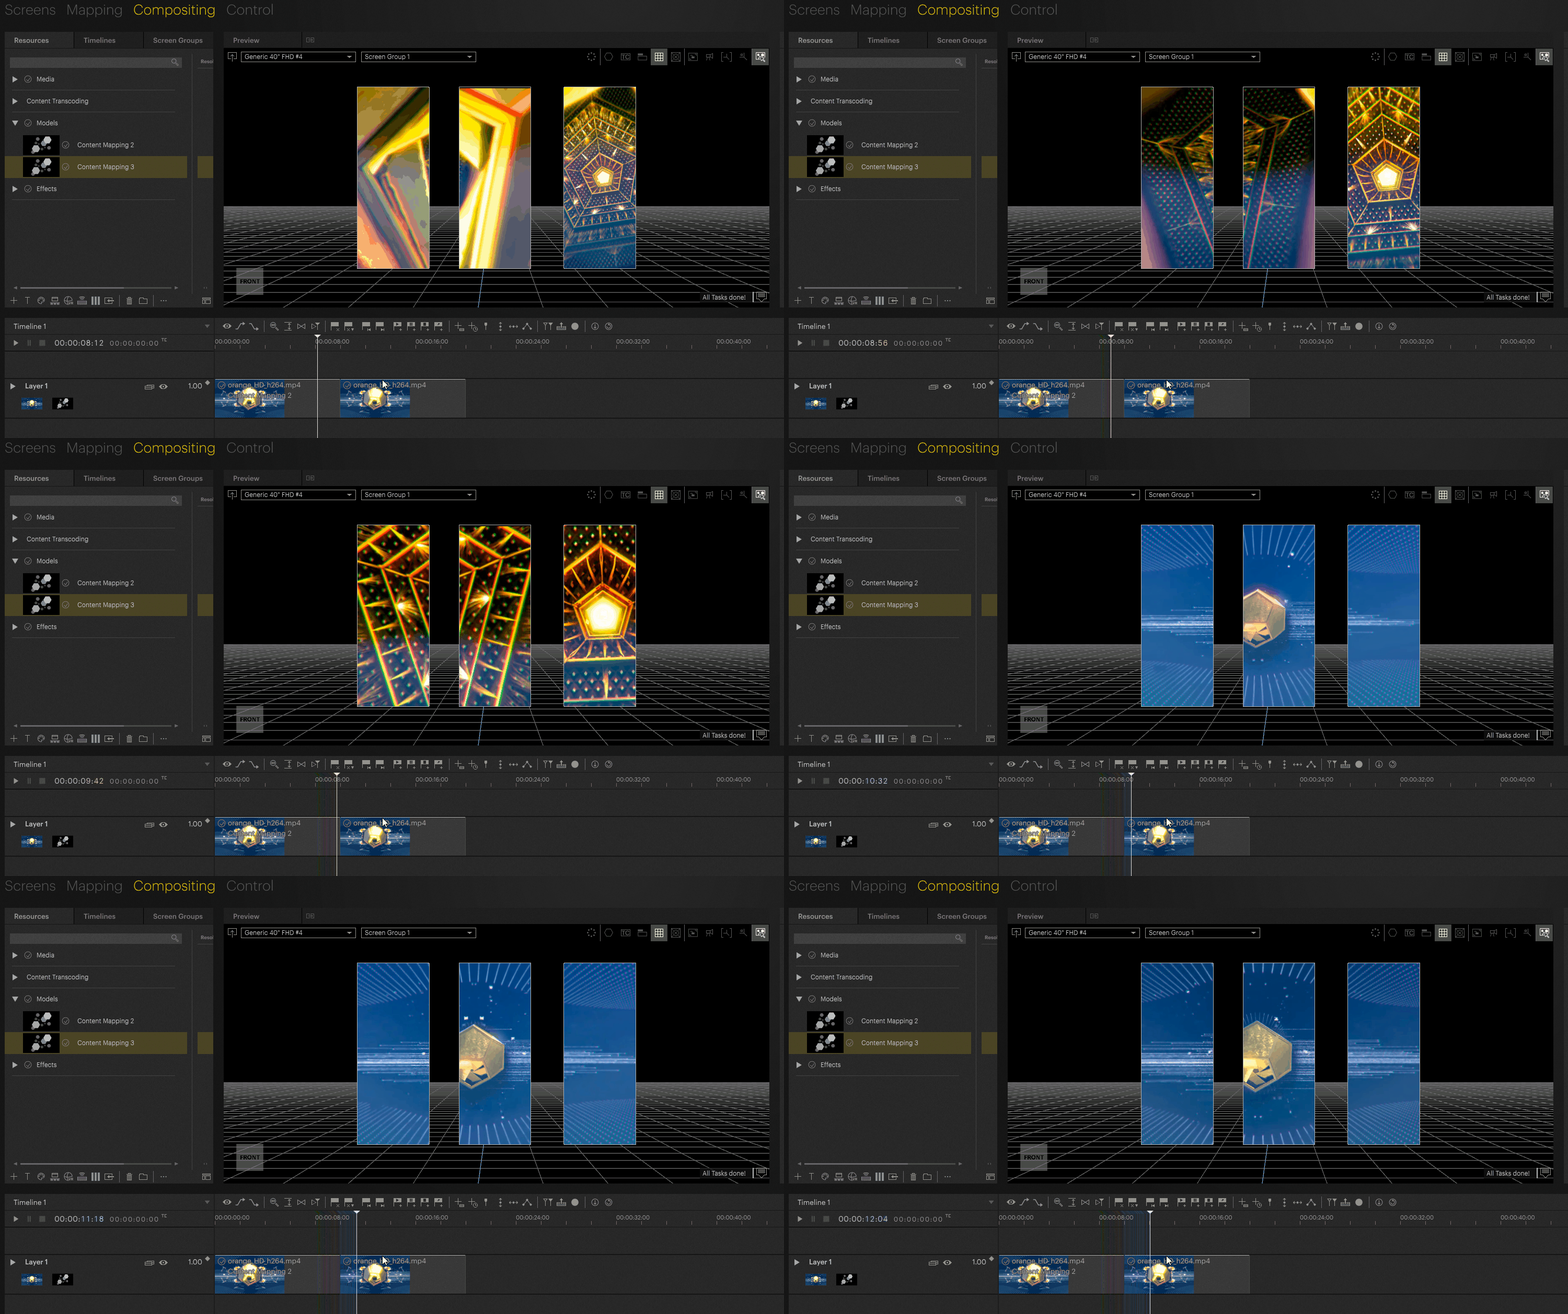
This method can also apply mappings across multiple screens.
Tip
If multiple clips with mappings are used on a timeline, a mapping should be applied to the layer without modification so that a default size exists for the container as a reference if none is applied to the container.

As a result, the content scaling will behave correctly on the layer in relation to the mapping.
PIXERA 1.9.225 | 19. December 2023 | F. E.